Any links to online stores should be assumed to be affiliates. The company or PR agency provides all or most review samples. They have no control over my content, and I provide my honest opinion.
Amazon Wish Lists are a feature provided by Amazon that allows users to create personalized collections of products they want to buy in the future or would like to receive as gifts. These lists can be used for various purposes, such as birthday or holiday wish lists, wedding or baby registries, or even just for personal shopping organization.
I use Amazon Wish lists as a bookmarking tool for items I want to buy or that interest me. I am a bit of a compulsive spender, so if I put it on a wish list, I can try and wait a while before buying it.
However, they are a popular way to share gift lists, and they have also become popular online with “influencers” and other online personalities sharing their wishlists. I can’t fathom buying a complete random something off a wish list, but each to their own!
Some Types of Amazon Wish List Include:
- Personal Shopping Organization: You can use Amazon Wish Lists to save items that you’re interested in but aren’t ready to purchase yet. This way, you can easily find them later without having to search for them again.
- Gift Lists: If you’re planning for a birthday, holiday, or other gift-giving occasion, you can create a Wish List of items you’d like to receive. You can then share this list with friends and family, making it easy for them to choose a gift that they know you’ll love.
- Event Registries: For events like weddings or baby showers, Amazon Wish Lists can be used to create a registry of items that you need. Guests can then purchase items directly from the list, ensuring that you get exactly what you need.
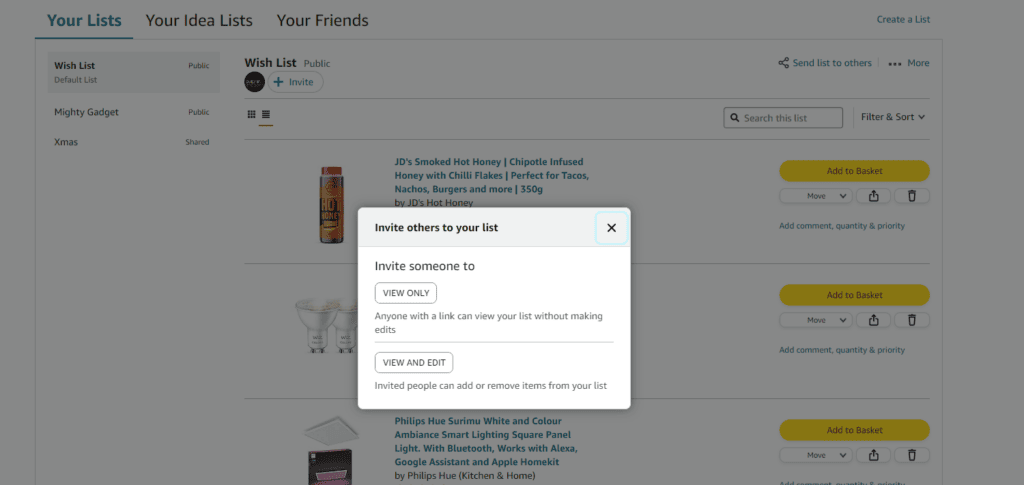
- Collaborative Lists: Amazon also allows you to create collaborative Wish Lists. This means that you can invite others to add, remove, or purchase items from the list. This is great for planning shared events or projects.
- Privacy Settings: You can choose to make your Wish List public, private, or shared only with specific people. This gives you control over who can see your list.
- Purchasing from a Wish List: When someone buys an item from a Wish List, it’s removed from the list to avoid duplicate purchases. However, the list owner won’t see who bought the item or that it’s been purchased until they receive it, keeping gifts a surprise.
A Step by Step Guide for Amazon Wish Lists
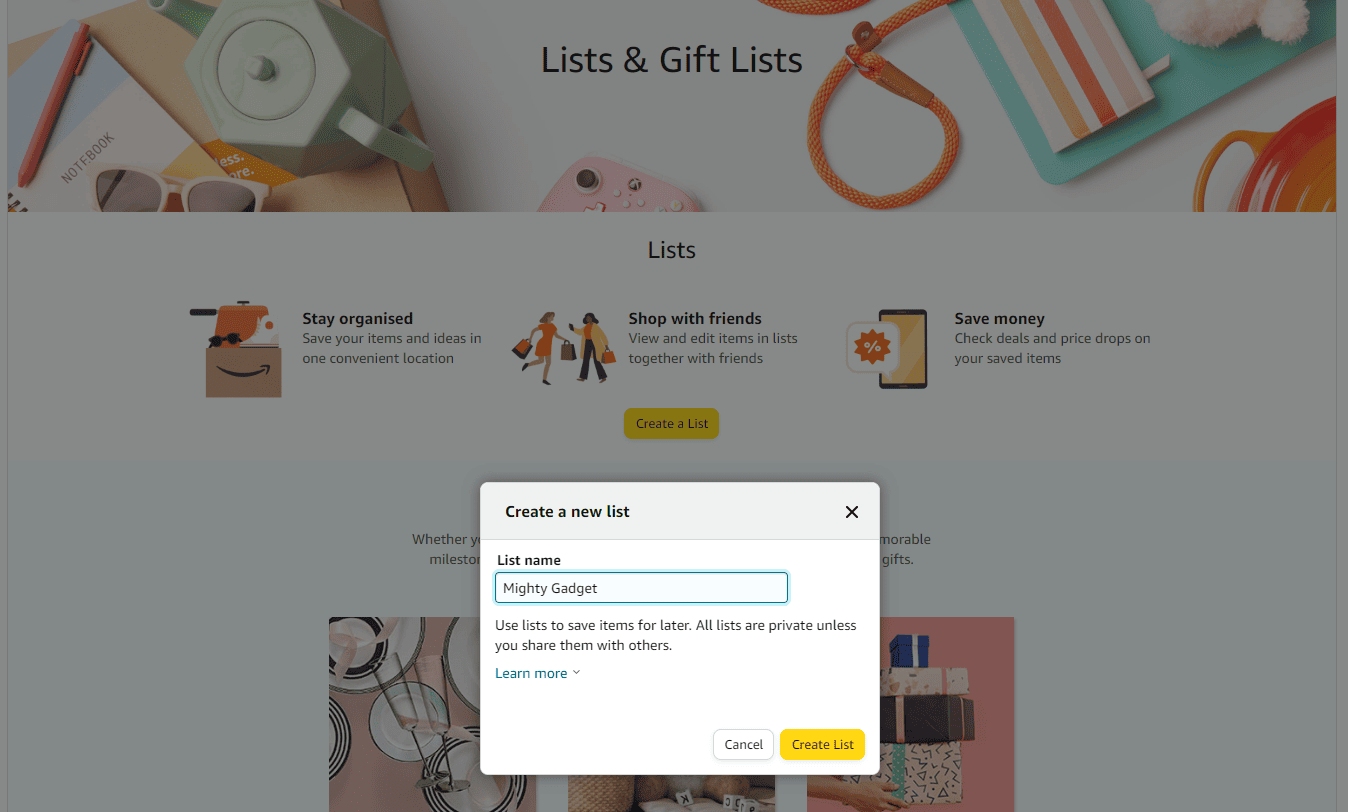
- Creating an Amazon Wish List: To start, you need to have an Amazon account. Once you’re logged in, navigate to the “Accounts & Lists” section in the top right corner of the homepage. From the drop-down menu, select “Create a List”. You can choose to make your list public, private, or shared only with specific people.
- Adding Items to Your Wish List: When you’re browsing Amazon and find a product you like, click on the product to view its details. On the product detail page, you’ll find a button labeled “Add to List”. Click on this button to add the product to your Wish List.
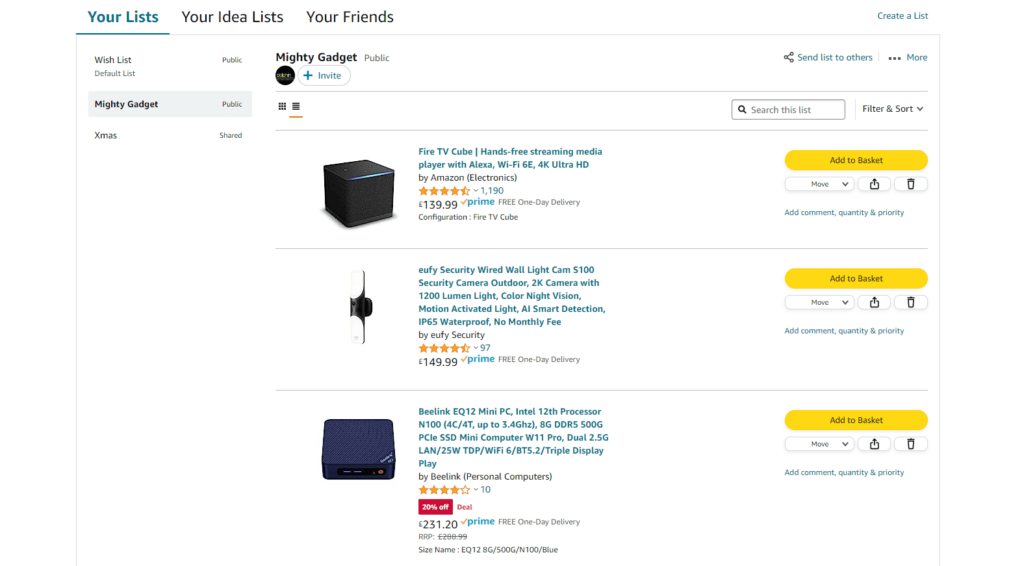
- Viewing and Managing Your Wish List: You can view your Wish List at any time by going to “Accounts & Lists” and selecting “Your Lists”. Here, you can remove items, change their priority, add comments, or even purchase items directly from the list.
- Sharing Your Wish List: If you want to share your Wish List with others, go to “Your Lists”, select the list you want to share, and click on the “Send list to others” button. You can either share the link directly or have Amazon send an email on your behalf.
- Buying from a Wish List: If you’re shopping for someone else, you can search for their Wish List by going to “Find a List or Registry” under “Accounts & Lists”. Once you’ve found the list, you can add items to your cart and purchase them just like any other Amazon product. The list owner won’t be notified of what items have been purchased until they receive the item, preserving the surprise.
How do I Find Someone’s Amazon Wish List?
Finding someone’s Amazon Wish List can be done in a few simple steps. Here’s how:
- Log in to Amazon: You need to be logged into your Amazon account to access this feature.
- Navigate to ‘Find a List or Registry’: On the Amazon homepage, hover over “Accounts & Lists” in the top right corner. From the drop-down menu, select “Find a List or Registry”.
- Search for the Person’s Wish List: In the search bar, enter the person’s name or email address associated with their Amazon account. Click “Search” to proceed.
- Browse the Results: If the person you’re searching for has a public or shared Wish List, it should appear in the search results. Click on their name to view the list.
Sharing your Amazon Wish List is a straightforward process. Any list you want to share will need to be set to public or shared.
Here’s a step-by-step guide on how to do it:
- Log in to Amazon: First, ensure you’re logged into your Amazon account.
- Access Your Wish List: Hover over “Accounts & Lists” on the Amazon homepage, then select “Your Lists” from the drop-down menu.
- Select the List You Want to Share: If you have multiple lists, click on the one you want to share.
- Click on ‘Send List to Others’: On the right side of the screen, you’ll see a button labeled “Send list to others”. Click on this button.
- Choose How to Share: After clicking “Send list to others”, you’ll have a few options. You can either copy the link and manually send it to others, or you can enter their email addresses and have Amazon send an email on your behalf. If you choose the email option, you can add a personal message.
- Confirm and Send: Once you’ve chosen how to share and entered the necessary information, click “Send Email” or “Copy Link”, depending on your chosen method.
What is an Alexa shopping list?
An Alexa Shopping List is an alternative type of list designed specifically for Amazon’s virtual assistant, Alexa, which allows you to create, modify, and manage your shopping list using voice commands. This feature is available on all devices that have Alexa built-in, such as Amazon Echo smart speakers, certain Fire tablets, and smartphones with the Alexa app installed.
Here’s how it works:
- Creating a Shopping List: You can create a shopping list by simply saying, “Alexa, create a shopping list.” Alexa will confirm the creation of a new list.
- Adding Items to the List: To add items to your shopping list, you can say, “Alexa, add [item] to my shopping list.” Alexa will confirm that the item has been added.
- Reviewing Your List: If you want to hear what’s on your shopping list, you can ask, “Alexa, what’s on my shopping list?” Alexa will then read out all the items currently on your list.
- Removing Items from the List: If you want to remove an item from your shopping list, you can say, “Alexa, remove [item] from my shopping list.” Alexa will confirm that the item has been removed.
- Accessing Your List on Other Devices: Your Alexa Shopping List is synced across all your devices that have the Alexa app installed. This means you can access and manage your list from your smartphone or tablet while you’re out shopping.
- Integration with Amazon: If you’re an Amazon customer, you can also use your Alexa Shopping List to shop directly from Amazon. Simply say, “Alexa, order [item] from my shopping list,” and Alexa will search for the item on Amazon.
What is an Amazon Idea List?
An Amazon Idea List is a feature that allows you to create collections of items available on Amazon around a specific theme or concept. Unlike a Wish List, which is typically used for personal shopping or gift requests, an Idea List is often used to provide inspiration or recommendations to others. For example, you might create an Idea List of your favourite books, top fitness equipment, or essential kitchen gadgets.
It is worth noting that when I tried to create one of these for myself, Amazon showed a 403 error.
Here’s how to create an Amazon Idea List:
- Log in to Amazon: You need to be logged into your Amazon account to create an Idea List.
- Navigate to ‘Your Lists’: On the Amazon homepage, hover over “Accounts & Lists” in the top right corner. From the drop-down menu, select “Your Lists”.
- Create a New List: On the “Your Lists” page, click on “Create a List”. In the pop-up window, select “Idea List”.
- Customize Your List: Give your Idea List a name and description. You can also choose whether to make your list public (anyone can see it), shared (only people with the link can see it), or private (only you can see it).
- Add Items to Your List: Browse Amazon for items to add to your list. When you find an item you want to include, click on the product to view its details. On the product detail page, click “Add to List” and select your Idea List.
- Share Your List: If your Idea List is public or shared, you can share it with others by clicking “Send list to others” on the list page. You can either copy the link and send it manually, or enter email addresses and have Amazon send an email on your behalf.
I am James, a UK-based tech enthusiast and the Editor and Owner of Mighty Gadget, which I’ve proudly run since 2007. Passionate about all things technology, my expertise spans from computers and networking to mobile, wearables, and smart home devices.
As a fitness fanatic who loves running and cycling, I also have a keen interest in fitness-related technology, and I take every opportunity to cover this niche on my blog. My diverse interests allow me to bring a unique perspective to tech blogging, merging lifestyle, fitness, and the latest tech trends.
In my academic pursuits, I earned a BSc in Information Systems Design from UCLAN, before advancing my learning with a Master’s Degree in Computing. This advanced study also included Cisco CCNA accreditation, further demonstrating my commitment to understanding and staying ahead of the technology curve.
I’m proud to share that Vuelio has consistently ranked Mighty Gadget as one of the top technology blogs in the UK. With my dedication to technology and drive to share my insights, I aim to continue providing my readers with engaging and informative content.