Any links to online stores should be assumed to be affiliates. The company or PR agency provides all or most review samples. They have no control over my content, and I provide my honest opinion.
Apple AirPods are insanely popular, and I know a lot of people who won’t use anything other than AirPods.
I can’t personally use the normal AirPods because the open-fit design doesn’t work with my big ears, but it seems that this design is the reason why some people are so loyal to AirPods.
However, with a growing number of AirPod options and thousands of competing options, a lot of people can be confused about what features some AirPods might have and compatibility questions. For existing users, they inevitably have troubleshooting questions.
This guide aims to help answer a few of the most common questions.
Apple AirPods FAQs
This list of FAQs is some of the most common questions I have seen on the Internet or personally been asked by various people.
Which AirPods have noise cancellation?
Currently, there are just two models with ANC:
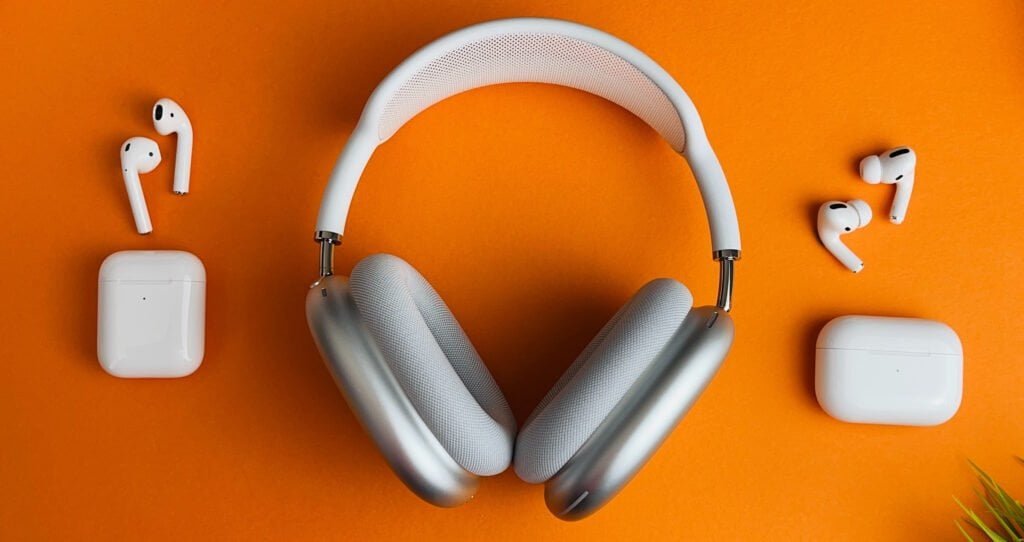
- AirPods Pro: These are the premium wireless earbuds from Apple that feature active noise cancellation. They use advanced technologies to block out external sound and provide an immersive audio experience. The AirPods Pro also include a transparency mode, which allows you to let in ambient sound when needed. They come with a wireless charging case and offer various features like adaptive EQ, customizable fit, and touch controls.
- AirPods Max: Unlike the smaller AirPods, the AirPods Max are over-ear headphones that also incorporate active noise cancellation. These headphones are designed to provide high-fidelity audio with rich bass and detailed sound. They feature a breathable knit mesh canopy, an adjustable headband, and ear cushions made from memory foam for enhanced comfort. The AirPods Max also includes a transparency mode and offers various controls for audio playback and Siri.
What AirPods work with Android?
AirPods can be used with Android devices, although some features may be limited compared to when used with Apple devices. All AirPods models can connect to Android devices via Bluetooth and be used as regular wireless headphones. However, certain features that are deeply integrated with the Apple ecosystem, such as Siri voice activation or automatic switching between Apple devices, may not be available when using AirPods with Android.
How to connect AirPods to iPhone?
AirPods can be easily connected to an iPhone using a simple pairing process. Here’s how you can connect AirPods to an iPhone:
- Ensure that your AirPods are charged and the case is nearby.
- Open the AirPods case lid.
- On your iPhone, go to the Home screen and swipe down from the top right corner (or swipe up from the bottom on older iPhone models) to access the Control Center.
- In the Control Center, tap on the “Bluetooth” icon to turn on Bluetooth if it’s not already enabled. The Bluetooth icon should be highlighted or show as “On.”
- With the AirPods case lid open, hold the case close to your iPhone.
- Look for the AirPods name to appear in the list of available devices under the “Other Devices” section. It should display the name of your AirPods, such as “John’s AirPods.”
- Tap on the AirPods name to initiate the pairing process.
- A pop-up window will appear on your iPhone, confirming the pairing request. Tap on “Connect” to proceed.
- Once the pairing process is complete, you will see an animation on your iPhone screen indicating that your AirPods are connected.
- Your AirPods should now be successfully connected to your iPhone. You can close the Control Center and start using them.
Once the initial pairing is complete, your iPhone will automatically connect to your AirPods whenever they are in range and Bluetooth is enabled on your device. Additionally, your AirPods will automatically connect to any other Apple devices signed in to your iCloud account that are also compatible with AirPods.
Which AirPods are waterproof?
None of the AirPods models, including AirPods, AirPods Pro, and AirPods Max, are officially rated as waterproof by Apple.
There are only two models with an official IP rating. The AirPods (3rd Gen) and AirPods Pro (1st and 2nd generation) models are IPX4-rated, which means they are not proofed for dust/solid particles but are sweat and water-resistant.
With these, you shouldn’t use them for water sports, such as swimming, or for showering. After workouts, heavy sweating or water splashes, and before putting AirPods Pro or AirPods (3rd generation) into the charging case, wipe down your AirPods Pro or AirPods (3rd generation) with a soft, dry, lint-free cloth.
All the other models are not water-resistant. However, from personal experience, I have used many none IP rated earbuds find for fitness without any problems. My partner had the AirPods 2nd gen and they worked fine and she runs regularly with them.
Can AirPods be tracked?
Yes, AirPods can be tracked using the Find My app on Apple devices. The Find My app is designed to help locate lost or misplaced Apple devices, including AirPods. Here’s how you can track your AirPods:
- Ensure that your AirPods are connected to your iPhone, iPad, or iPod touch and that you have the Find My app installed.
- Open the Find My app on your Apple device.
- In the Find My app, tap on the “Devices” tab at the bottom of the screen.
- You should see a list of all the Apple devices associated with your Apple ID. Look for your AirPods in the list and tap on them.
- The app will display the last known location of your AirPods on a map, if it’s available.
- If your AirPods are within Bluetooth range, you can tap on the “Play Sound” option to make your AirPods emit a sound that can help you locate them.
Please note that in order to track your AirPods, they need to be connected to your Apple device and within Bluetooth range. If your AirPods are out of Bluetooth range or the battery is depleted, the Find My app will display their last known location when they were connected to your device.
Which AirPods can be tracked?
All AirPods models—AirPods, AirPods Pro, and AirPods Max—can be tracked using the Find My app on Apple devices.
Which AirPods have Spatial Audio?

Spatial audio is a feature available on the AirPods Pro (1st or 2nd generation), AirPods Max, AirPods (3rd generation). Apple also list the Beats Fit Pro.
For spatial audio on Apple devices, this includes dynamic head tracking x that aims to provide an immersive and realistic audio experience. It combines advanced audio processing algorithms with motion sensors to create a three-dimensional soundstage that responds to the movement of your head.
Here’s how spatial audio with dynamic head tracking works:
- Motion Sensors: AirPods Pro and AirPods Max are equipped with built-in motion sensors, including accelerometers and gyroscopes. These sensors detect the movement and orientation of your head.
- Head Tracking: The motion sensors continuously track the position and movement of your head as you turn, tilt, or rotate it. This information is used to adjust the audio playback in real-time.
- Virtual Soundstage: Spatial audio algorithms analyze the motion data and use it to simulate a virtual soundstage around you. The audio is dynamically positioned to make it appear as if the sound is coming from different directions, even as you move your head.
- Immersive Experience: With dynamic head tracking, as you turn your head or change the orientation of your device, the audio adjusts accordingly to maintain a realistic and immersive experience. This creates a sense of depth and spatial awareness, enhancing the overall audio playback.
To make the most of spatial audio, you need content that has been encoded with Spatial Audio metadata, such as movies and TV shows in compatible formats. It provides a more lifelike and engaging audio experience, making it feel as if the sound is coming from all around you.
For both music and movies, Dolby Atmos is one of the formats that supports Spatial Audio.
Which AirPods are best for small ears?
As someone with giant ears, this has never been a concern for me. However, my partner complains about the fit of her earbuds all the time. She can only wear the normal AirPods without the silicon tip.
I also noticed Shannon Morse (Snubs) on Twitter ask a similar question the other week. The feedback she got wasn’t that great. But it highlights that the problem varies between people due to their anatomy. In her case, she has a small concha, so she didn’t want a physically large earbud sitting there because it just fell out.
In theory, the AirPods Pro should be the best because:
- Customizable Fit: The AirPods Pro come with three sizes of silicone ear tips (small, medium, large) that can be easily swapped to find the best fit for your ears. The smaller ear tips are particularly suitable for smaller ear canals, providing a more secure and comfortable fit.
- In-ear Design: Unlike the original AirPods, the AirPods Pro feature an in-ear design that helps create a seal in the ear canal, which can improve both comfort and sound quality. The in-ear design is beneficial for users with smaller ears as it offers a more snug and secure fit.
- Secure Fit Tests: The AirPods Pro include a built-in Ear Tip Fit Test feature that uses audio feedback to determine if you have a proper seal with the chosen ear tips. This helps ensure that you have the best possible fit for your ears.
The ANC features can be handy too, if you don’t have a perfect fit, it can help reduce unwanted noise.
Will AirPods connect to PC?
Yes, AirPods can connect to a PC, including Windows-based computers, as long as the PC has built-in Bluetooth functionality or a Bluetooth adapter.
Here’s how you can connect AirPods to a PC:
- Make sure that Bluetooth is enabled on your PC. You can usually do this by going to the settings or control panel of your PC and navigating to the Bluetooth settings.
- Open the AirPods case lid to activate the pairing mode. Keep the lid open during the pairing process.
- On your PC, go to the Bluetooth settings and search for available Bluetooth devices.
- In the list of available devices, look for your AirPods. They should appear as “AirPods” or with a custom name if you have previously set one.
- Select your AirPods from the list and click on the “Pair” or “Connect” button.
- Your PC will attempt to establish a Bluetooth connection with your AirPods. Once the pairing is successful, you should see a confirmation message on your PC.
After the initial pairing, your AirPods should automatically connect to your PC whenever they are in range, and Bluetooth is enabled on both devices.
Can AirPods connect to Switch?

In the past, it was not possible to connect directly to the Nintendo Switch, because it lacked Bluetooth support. However, an update rolled out in September 2021 enabled this functionality and 10 devices can be saved on a Switch, but you can only use one at a time. You can only use two wireless Joy-Cons while using Bluetooth audio, and Bluetooth microphones don’t work at all.
How to connect AirPods to Nintendo Switch?
- Put your AirPods into pairing mode.
- Turn on your Switch and navigate to System Settings > Bluetooth Audio > Pair Device.
- Find your AirPods on the list of available devices and select them to pair with the Switch.
You can also use a third-party Bluetooth dongle or adapter.
How to connect AirPods to Nintendo Switch
Similar to the other devices:
- Put the AirPods into pairing mode.
- On your Android device, go to the Settings menu.
- Navigate to the Bluetooth settings. The location may vary depending on your Android device, but it is typically found in the “Connections” or “Connected Devices” section.
- Turn on Bluetooth if it is not already enabled.
- In the Bluetooth settings, your Android device will scan for nearby Bluetooth devices. Look for your AirPods in the list of available devices. They should appear as “AirPods” or with a custom name if you have previously set one.
- Tap on your AirPods in the list to initiate the pairing process.
- Your Android device will attempt to connect to your AirPods. After a moment, you should see a notification or confirmation prompt on your Android device indicating that the pairing is successful.
- Once connected, your AirPods should now be ready to use with your Android device. You can close the Settings menu.
How to put AirPods into pairing mode?
To put AirPods into pairing mode, follow these steps:
- Ensure that your AirPods are charged, and the AirPods case is open.
- Check if your AirPods are already connected to any device (e.g., iPhone, iPad) and make sure they are disconnected from that device.
- If your AirPods are in your ears, remove them and place them in the open AirPods case.
- Press and hold the setup button on the back of the AirPods case. The setup button is a small circular button located on the back of the case.
- Continue holding the setup button until the status light on the front of the case starts flashing white. The light should flash white to indicate that the AirPods are now in pairing mode.
Once the AirPods are in pairing mode, you can proceed to pair them with your desired device, such as an iPhone, Android phone, or other compatible device.
Airpods Troubleshooting
Most of these questions come from people asking me personally, especially my partner. The questions and answers work for most earbuds in general, as they all experience the similar problems.
How to fix AirPods static noise in one ear?
If you’re experiencing static noise in one ear of your AirPods, you can try the following troubleshooting steps to potentially resolve the issue:
- Clean the AirPods: Dust, debris, or earwax buildup can affect the audio quality. Gently clean the affected AirPod using a soft, lint-free cloth or a clean, dry cotton swab. Be careful not to push any debris further into the speaker.
- Check the fit: Ensure that the affected AirPod is properly inserted into your ear and fits securely. Adjust the position or try a different size of ear tip if necessary.
- Reset the AirPods: Resetting the AirPods can sometimes help resolve connectivity or audio issues. Place both AirPods in the charging case, keep the lid open, and press and hold the setup button on the back of the case until the status light starts flashing amber. Then, reconnect the AirPods to your device.
- Update firmware and software: Ensure that your AirPods, as well as the device they are connected to, have the latest firmware and software updates installed. Updates can include bug fixes and improvements that might address the static noise issue.
- Try different audio sources: Test your AirPods with different audio sources, such as music from a different app or a different device altogether. This can help determine if the issue is specific to a particular audio source or device.
- Contact Apple Support: If the static noise persists after trying the above steps, it’s recommended to contact Apple Support or visit an authorized service provider. They can provide further assistance and guide you through additional troubleshooting steps or determine if a hardware issue needs to be addressed.
Why are my AirPods Pro crackling?
Crackling or static noises in AirPods Pro can occur due to various reasons. Here are a few potential causes and troubleshooting steps you can try to address the issue:
- Earwax or debris buildup: Earwax or debris in the speaker mesh can interfere with the audio quality, causing crackling sounds. Gently clean the speaker mesh of your AirPods Pro using a soft, lint-free cloth or a clean, dry cotton swab. Be cautious not to push any debris further into the speaker.
- Poor fit or seal: Ensure that your AirPods Pro are inserted properly and fit securely in your ears. A loose fit or improper seal can lead to audio issues. Experiment with different ear tip sizes to find the best fit for your ears.
- Software or firmware issues: Ensure that your AirPods Pro, along with the device they are connected to, have the latest software updates installed. Updates often include bug fixes and performance improvements that can address audio-related issues. Connect your AirPods Pro to a device with internet access and check for any available updates.
- Reset your AirPods Pro: Resetting your AirPods Pro can sometimes resolve connectivity or audio problems. Place both AirPods Pro in the charging case, keep the lid open, and press and hold the setup button on the back of the case until the status light starts flashing amber. Then, reconnect the AirPods Pro to your device and check if the crackling issue persists.
- Test with different audio sources: Try using your AirPods Pro with different audio sources, such as music from a different app or a different device altogether. This can help determine if the crackling issue is specific to a particular audio source or device.
Why are AirPods not connecting?
There could be several reasons why AirPods are not connecting to a device. Here are some common troubleshooting steps to try:
- Check Bluetooth and AirPods battery: Ensure that Bluetooth is turned on both on your device and the AirPods. Also, make sure your AirPods have sufficient battery charge.
- Put AirPods in pairing mode: If the AirPods have never been paired with the device before, or if you are trying to connect them to a new device, put the AirPods in pairing mode. Open the AirPods case, and press and hold the setup button on the back of the case until the status light starts flashing white. Then, follow the device’s instructions to connect.
- Forget and reconnect AirPods: On your device, go to the Bluetooth settings and “forget” or “unpair” the AirPods. Then, try reconnecting them by opening the AirPods case near the device and following the pairing prompts.
- Reset network settings: If you’re having persistent connection issues, try resetting the network settings on your device. This will remove saved Wi-Fi networks, Bluetooth devices, and other network-related settings. You can find this option in the device’s settings menu.
- Update software: Ensure that your device’s software is up to date. Software updates can sometimes fix compatibility issues and improve device connectivity.
- Check for interference: Ensure that there are no strong sources of interference nearby, such as other Bluetooth devices or Wi-Fi routers. Move away from such sources and try reconnecting.
- Restart devices: Try restarting both your AirPods and the device you’re trying to connect them to. Power off the device, turn it back on, and then open the AirPods case near the device to initiate the connection.
Why are AirPods not charging?
If your AirPods are not charging, there could be a few reasons for this issue. Here are some troubleshooting steps you can try:
- Check the charging cable and power source: Ensure that you are using the original Lightning cable or Qi wireless charging pad that came with your AirPods. Also, verify that the cable is not damaged, and the power source is working properly.
- Clean the charging contacts: Dust or debris on the charging contacts of your AirPods or the charging case can interfere with the charging process. Use a soft, lint-free cloth to gently clean the charging contacts on both the AirPods and the case.
- Reset the AirPods: Resetting the AirPods can sometimes resolve charging issues. Place both AirPods in the charging case, close the lid, and leave them for about 15 seconds. Then, open the lid and try charging them again.
- Try a different power source: If you’re using a USB port on a computer or laptop to charge your AirPods, try using a different USB port or a wall adapter to see if the issue is with the power source.
- Verify alignment and connection: Ensure that the AirPods are properly aligned with the charging case and that they make a firm connection. Close the lid of the case and make sure it snaps shut securely.
- Check for debris in the charging port: If you’re using wired charging, inspect the Lightning port on the bottom of the charging case. If there is any debris, gently remove it using a clean, dry toothbrush or a wooden toothpick. Be careful not to damage the port.
Why are my AirPods so quiet?
If your AirPods are sounding unusually quiet, there are a few potential reasons and troubleshooting steps you can try:
- Clean the speakers and mesh: Dust, debris, or earwax buildup can partially block the speakers or mesh, leading to reduced volume. Gently clean the speaker mesh and the AirPods using a soft, lint-free cloth or a clean, dry cotton swab. Be careful not to push any debris further into the speakers.
- Adjust volume settings: Double-check the volume settings on both your device and the AirPods themselves. Ensure that the volume is turned up to an appropriate level on both ends. On your device, you can try increasing the volume using the physical volume buttons or the volume slider in the software settings.
- Check audio balance settings: It’s possible that the audio balance settings on your device may be misconfigured, causing one side to sound quieter than the other. Go to the audio or sound settings on your device and verify that the balance is set correctly.
- Reset the AirPods: Resetting the AirPods can sometimes resolve audio-related issues. Place both AirPods in the charging case, keep the lid open, and press and hold the setup button on the back of the case until the status light starts flashing amber. Then, reconnect the AirPods to your device and check if the volume issue persists.
- Update firmware and software: Ensure that your AirPods and the device they are connected to have the latest firmware and software updates installed. Updates can include bug fixes and performance improvements that may address volume-related problems.
- Test with different audio sources: Try using your AirPods with different audio sources, such as music from a different app or a different device altogether. This can help determine if the volume issue is specific to a particular audio source or device.
Why does my Airpods battery run out so quickly?
If your AirPods are running out of battery quickly, there could be several factors contributing to this issue. Here are some possible reasons and troubleshooting steps to help improve their battery life:
- Battery health: Over time, the battery capacity of AirPods may naturally degrade. If you have been using your AirPods for a long time, it’s possible that the battery is no longer holding a full charge. In this case, you may need to consider getting the battery replaced by contacting Apple Support or visiting an authorized service provider.
- Background apps and processes: Ensure that you are not running unnecessary apps or processes in the background on your connected device. Some apps or features can consume significant battery power even when not actively in use. Close any unused apps and disable unnecessary background processes to conserve battery life.
- Bluetooth settings and range: Keep in mind that maintaining a stable Bluetooth connection between your AirPods and your device consumes power. If your AirPods are struggling to maintain a strong connection due to distance or obstacles, they may consume more battery power as a result. Try keeping your device and AirPods in close proximity or minimizing obstructions to optimize the Bluetooth connection.
- Audio quality and volume: Playing audio at higher volumes or using certain audio settings, such as noise cancellation or EQ enhancements, can drain the battery faster. Consider adjusting the volume to a moderate level and disabling unnecessary audio features when not needed to conserve battery life.
- Firmware and software updates: Ensure that your AirPods have the latest firmware installed. Firmware updates often include optimizations and bug fixes that can improve battery efficiency. Additionally, keep your connected device’s software up to date, as operating system updates may include battery-related improvements.
- Charging habits: Make sure you are charging your AirPods properly. Use the original charging cable and follow the recommended charging instructions provided by Apple. Overcharging or inconsistent charging habits can impact battery performance over time.
Originally posted on mightygadget.com – Follow on Twitter – Instagram – Facebook – Mighty Gadget Latest Reviews
I am James, a UK-based tech enthusiast and the Editor and Owner of Mighty Gadget, which I’ve proudly run since 2007. Passionate about all things technology, my expertise spans from computers and networking to mobile, wearables, and smart home devices.
As a fitness fanatic who loves running and cycling, I also have a keen interest in fitness-related technology, and I take every opportunity to cover this niche on my blog. My diverse interests allow me to bring a unique perspective to tech blogging, merging lifestyle, fitness, and the latest tech trends.
In my academic pursuits, I earned a BSc in Information Systems Design from UCLAN, before advancing my learning with a Master’s Degree in Computing. This advanced study also included Cisco CCNA accreditation, further demonstrating my commitment to understanding and staying ahead of the technology curve.
I’m proud to share that Vuelio has consistently ranked Mighty Gadget as one of the top technology blogs in the UK. With my dedication to technology and drive to share my insights, I aim to continue providing my readers with engaging and informative content.