Sonoff NSPanel Pro Smart Home Control Panel Review
The Sonoff NSPanel Pro is an innovative smart home control panel that integrates all your smart home devices and scenes for control.
It acts as a Zigbee hub with support for Sonoff Zigbee devices giving you control of smart lights, switches, heaters, coolers, curtains, and much more, all from the panel itself.
The inclusion of the display also means the panel can be used to display camera feeds, both from Sonof cameras and RTSP cameras, and it can be used to display web pages which can be useful for any self-hosted smart home apps you may be running.

- [Comprehensive Control Panel] The All-in-One Panel allows you to control an unlimited number of devices, supporting all SONOFF products, including smart lights, cameras, security sensors, and switches. It will continue to support future SONOFF devices as they are released
- [Not Only Smart Panel, But Zigbee Hub] Easily add multiple Zigbee devices directly from the screen. The Zigbee 3.0 protocol enhances stability and expands coverage, while connected devices can be voice-controlled via Alexa, Google Home, and more
- [Smart Scenes with One Click] Activate various smart home scenes instantly with a single press, integrating seamlessly with other smart devices
- [Customizable Security Settings] Create up to 3 security modes with different arming devices. Once armed, any triggered sensor will set off an alarm and send an alert notification to your phone
- [Live Monitoring on Display] NSPanel Pro acts as a live monitoring screen, supporting up to 4 camera types. Monitor your living spaces like the living room, garage, or bedroom in real time
Specification & Features

- Chipset: Quad-core Coretex=A35 & Mali G31
- RAM/Storage: 2GB DDR3 / 8GB eMMC
- Screen size: 3.95″ (Capacitive touch panel)
- Screen resolution: 480×480
- Touch control: Support multi-touch
- Input: 100-240V AC 50/60Hz
- Wireless connections: IEEE 802.11 b/g/n 2.4GHz
- Audio: 1W speaker and microphone for two way talk
- Zigbee: Zigbee 3.0
- Integrates with:
- Alexa
- Google Home
- Homebridge
Sonoff NSPanel Pro Negative Reviews
When searching for the Sonoff NSPanel Pro, it is hard not to notice some of the negative reviews.
I have not personally used any of the Sonoff products in the past, so I don’t have anything to compare against.
One of the big issues people have with the NSPanel Pro is that Sonoff advertised many features that were not available at lunch. In subsequent months, they have rolled out many of these features; however, it has been reported that they have removed references to some originally advertised features.
Another big complaint with the Sonoff NSPanel Pro was that they had initially disabled access to ADB, which severely limited how much customisation you could do to it. The older NSPanel was a popular product because it was moddable, so it was a bit counterproductive to lock users out of ADB.
Thankfully, it seems like Sonoff have come to its senses and enabled the ADB functionality with the 1.5.6 firmware.
While the Sonoff NSPanel Pro may not be quite the product that was promised, it looks like they addressed many of the big concerns.
Installation / Requires a Neutral Wire
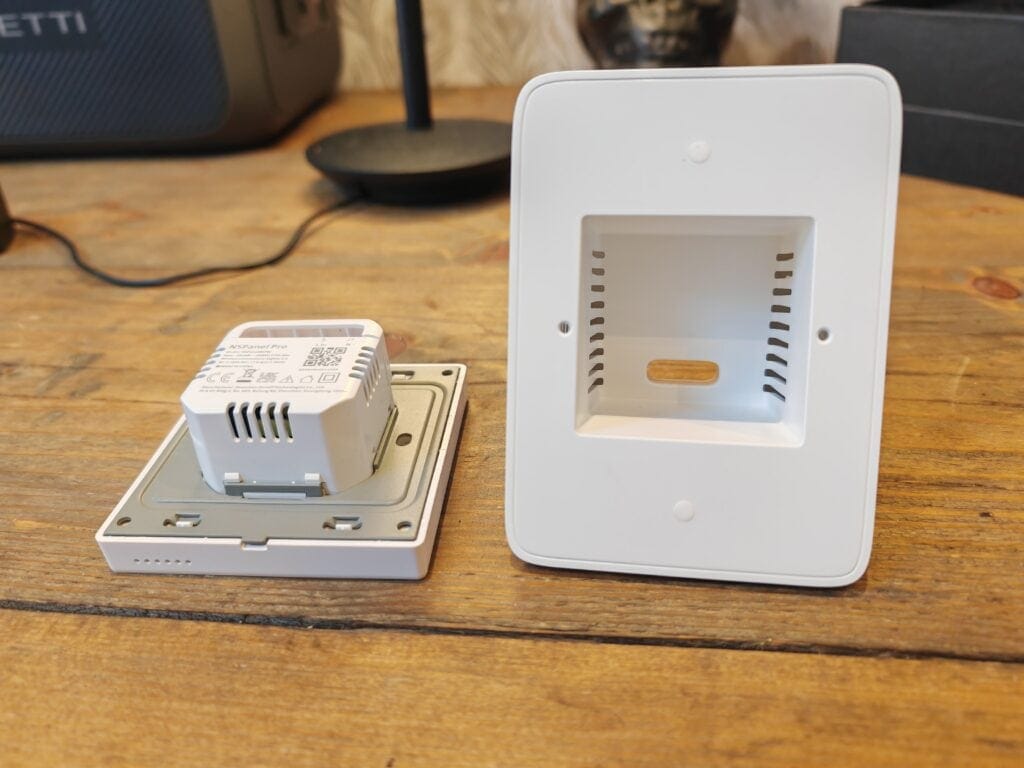
The Sonoff NSPanel Pro is designed to be installed into the backbox used for your home light switches and wired directly into your mains.
As I have an older home, I had relatively old electrics with shallow back boxes, which won’t accommodate the NSPanel.
Furthermore, with me being based in the UK, the wiring for the light sockets does not have a neutral wire, which the NSPanel panel requires.
Sonof sells a stand that allows you to mount the panel into then wire this into a normal plug socket, which is how I set the panel up.
Set-Up

Setting up the panel itself is very simple. With it having a display and being based on Android, connecting to the WiFi is done on the device itself.
Then when the panel is set up, you need to add it to the app by scanning the QR code.
App


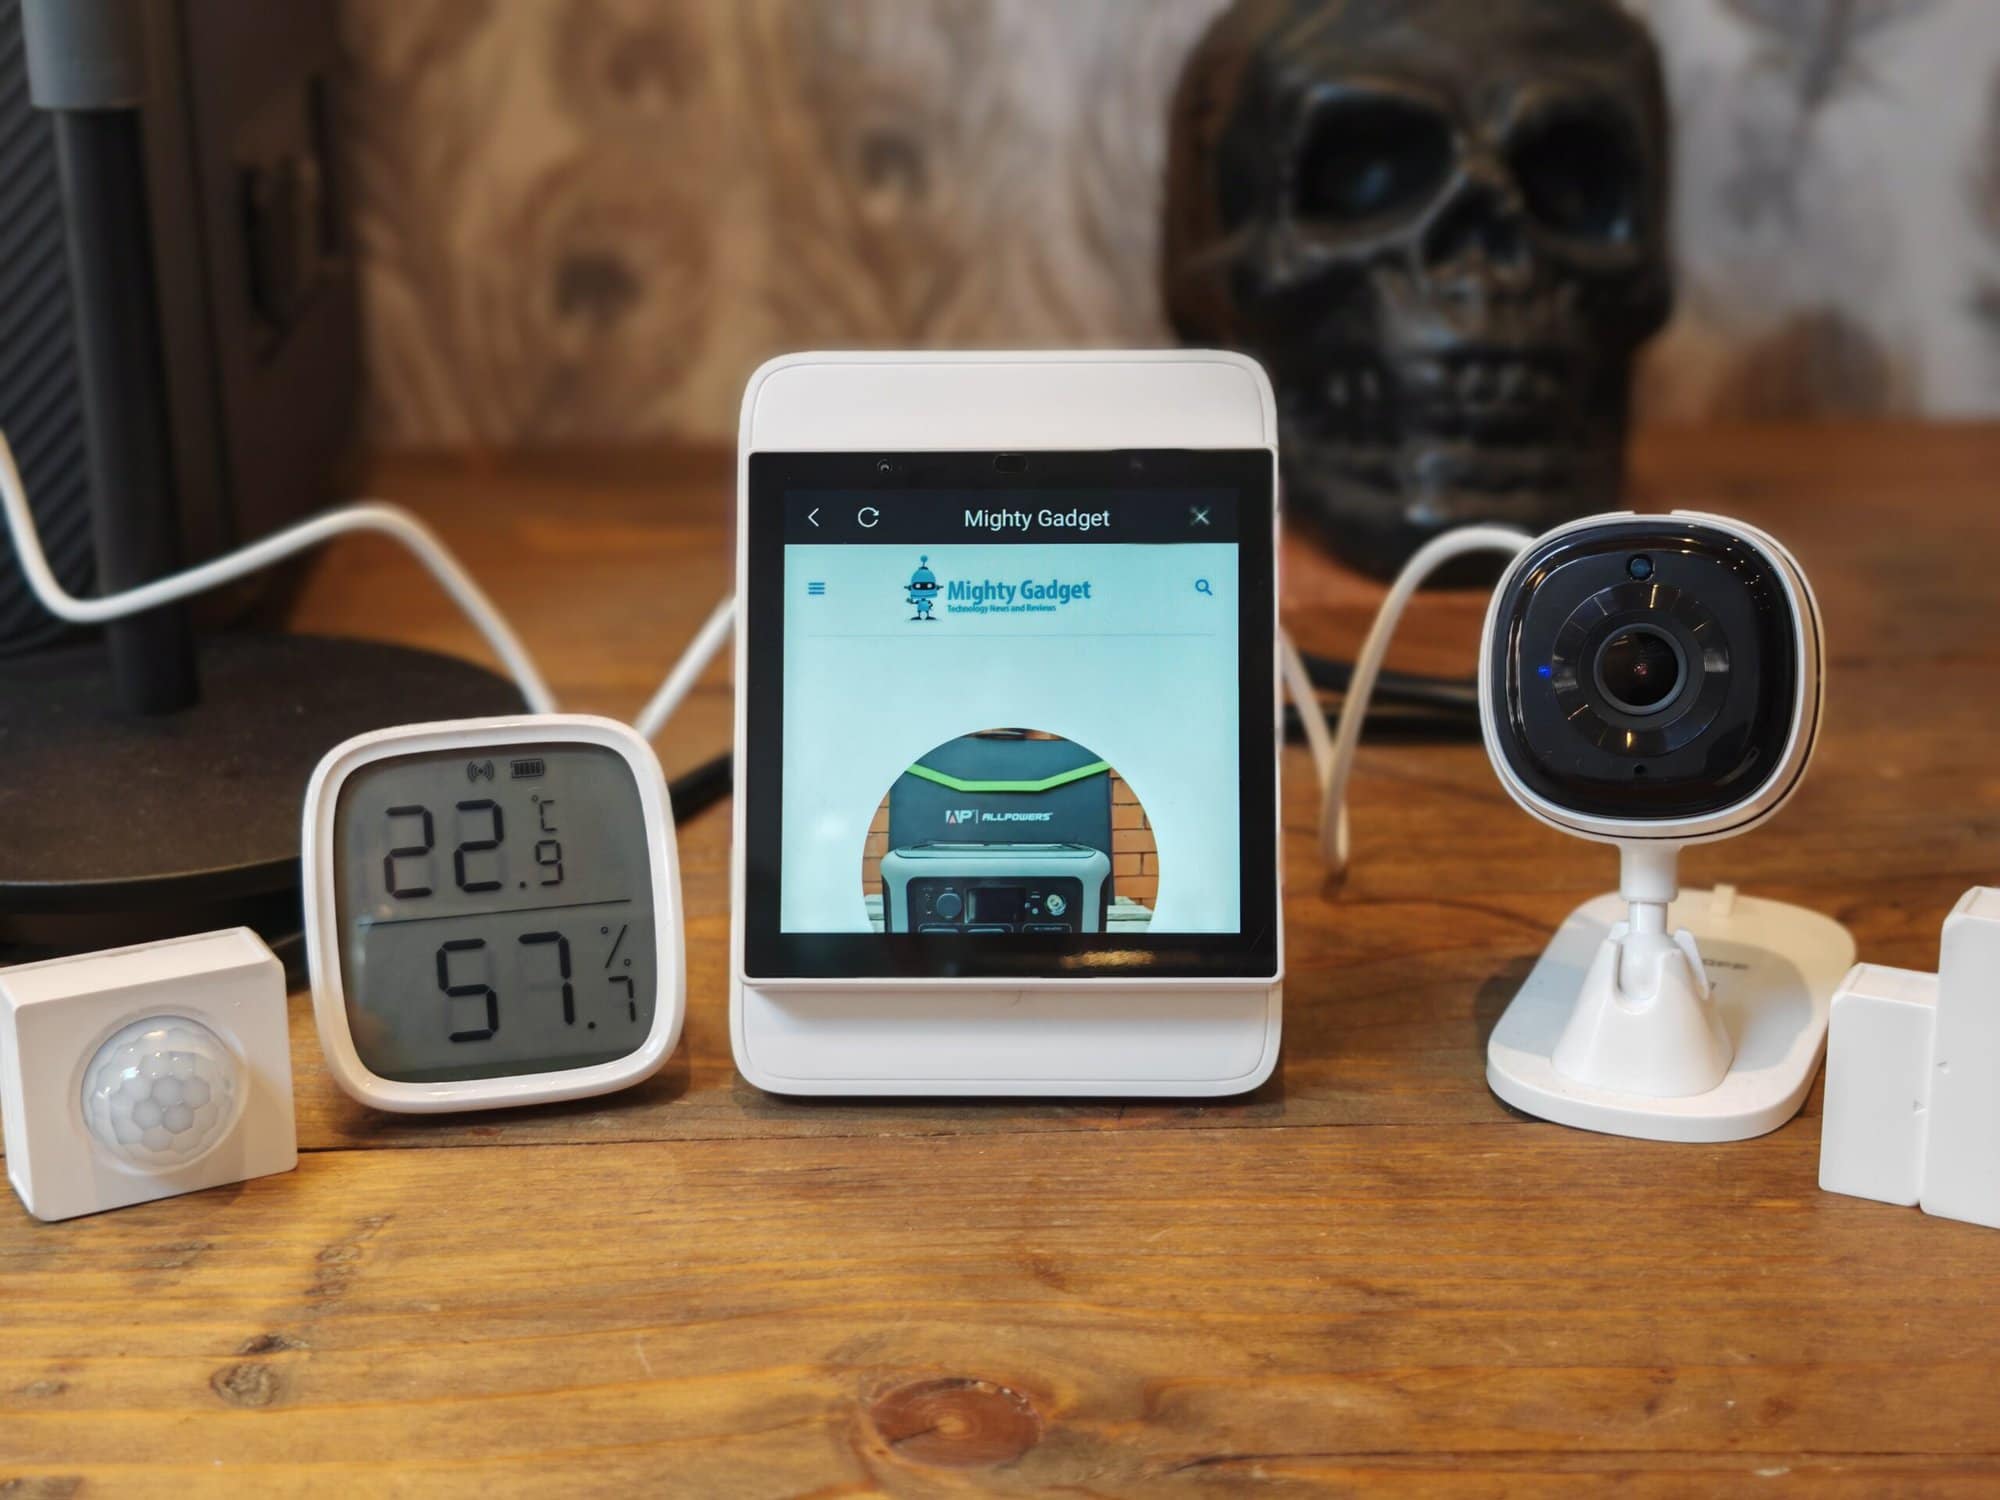
I know a lot of users don’t use the app and, instead, use Home Assistant, but I found it was OK. You can view the historical data from your sensors, which I always find useful for temperature sensors. You can also view the Sonof camera feed (but not the RTSP feeds). Then you can set up any if this then that automation scenes.
ZigBee Gateway and Pairing Zigbee Devices and Sensor


This panel is a Zigbee 3.0 gateway with support for up to 32 devices. As far as gateways go, it is a bit limited with support, you can use Sonoff, Philips Hue or IKEA devices, and that’s about it. In comparison, things like Homey and SmartThings support a huge range of Zigbee as well as many third-party ecosystems.
Pairing any Zigbee-enabled device is quite simple. You pair the device on the panel itself. You need to slide down and then select add device. Then place the device into pairing mode, which normally means powering it up for the first time or holding down the reset button.
It took quite a while to identify the device, but I managed to pair up all the devise I had without issues.
Pairing Camera
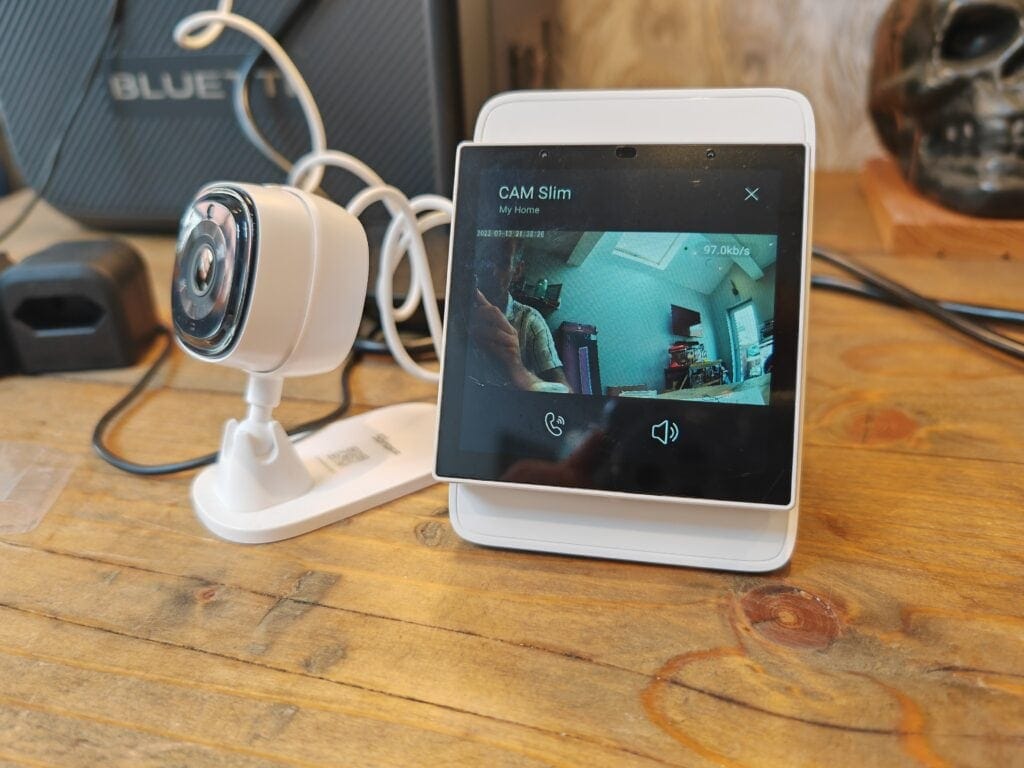
Sonoff included one of their Cam Slim cameras in my package, which is a budget indoor camera priced at just $26.90.
For this, you need to use the eWeLink app then add the device and select the sound pairing. You will need to provide your 2.4GHz SSID credential, and this will then play an irritating beeping noise passing the details over to the camera.
Initially, the camera failed to connect and then took a long time to connect, but I got there eventually.
Even though you pair the camera separately from the panel, the panel will show the camera on the device list, and you can view the feed directly on the panel.
Adding a third-party RTSP camera
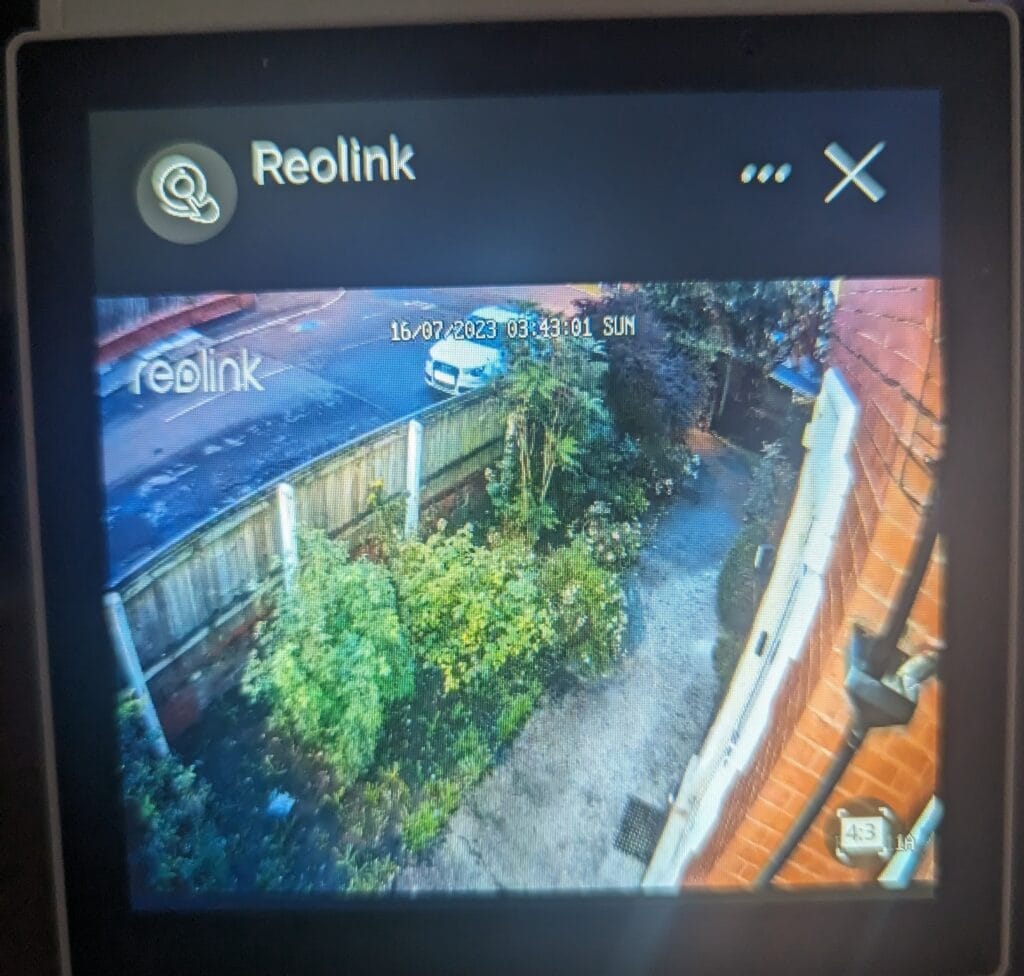
One feature that I was particularly keen on was the ability to stream the feed from any camera that supports RTSP. I have Reolink cameras around the outside of my home which all have RTSP.
You need to add the RTSP feed on the panel itself via the Add Camera button when you swipe down.
You will then need to provide the full RTSP feed, which is a bit laborious to type out on the tiny display. For my Reolink cameras, it looks something like this:
- rtsp://admin:password@192.168.0.0/h264Preview_01_sub
I had no problems adding the camera, but unfortunately, it doesn’t work quite as well as I would have liked.
The stream takes two or three seconds to load, and when it loads, it seems to be 50/50 if it streams properly. A lot of the time, it will just load the image but not continue to stream, leaving it locked on a static image.
It is possible this is due to my Reolink cameras, but I don’t have any other brands installed at the moment.
It is not ideal, but it is OK if I want to check who is at the door, as tapping on the camera icon is faster than pulling my phone out to view the footage from my Eufy doorbell.
How to add Home Assistant and Apps
The Sonoff NSPanel Pro now allows you to via web pages on the device itself, so this is likely the easiest way to add Home Assistant.
However, you can install various apps once you enable ADB, and this opens you up to a wide range of customisations.
You will need to update to the 1.5.6 firmware via the settings screen in the NSPanelPro.
In the eWeLink App, select your device -> go to settings -> tab ‘Device ID’ 8 times until it shows a popup warning. Accept the warning. ADB mode is now enabled. Click USB debugging, and turn it on.
With the NSPanel Pro, you can access ADB over TCP and therefore connect wirelessly. You will want to look in the settings or scan your network for the panel IP then.
Blakadder.com has a good guide on how to install the various bit. I will write my own guide at a later date, as it would have been too long to add to this review.
Panel Performance
I have used the NSPanel Pro for a few weeks, and this has all been done through the default UI and app rather than any modifications via ADB.
I don’t have a lot of sensors or devices linked to the system, but I have been pleased with the overall performance.
It can feel a little bit laggy at times, and I think I would prefer to pay more money for a more powerful chipset.
One handy feature that I haven’t used much is the ability to do calls on the panel. If you have multiple panels up, you should be able to use it as an intercom system. You can also call the panel from the app on your phone.
Price and Alternative Options
- [Comprehensive Control Panel] The All-in-One Panel allows you to control an unlimited number of devices, supporting all SONOFF products, including smart lights, cameras, security sensors, and switches. It will continue to support future SONOFF devices as they are released
- [Not Only Smart Panel, But Zigbee Hub] Easily add multiple Zigbee devices directly from the screen. The Zigbee 3.0 protocol enhances stability and expands coverage, while connected devices can be voice-controlled via Alexa, Google Home, and more
- [Smart Scenes with One Click] Activate various smart home scenes instantly with a single press, integrating seamlessly with other smart devices
- [Customizable Security Settings] Create up to 3 security modes with different arming devices. Once armed, any triggered sensor will set off an alarm and send an alert notification to your phone
- [Live Monitoring on Display] NSPanel Pro acts as a live monitoring screen, supporting up to 4 camera types. Monitor your living spaces like the living room, garage, or bedroom in real time
The Sonoff NSPanel Pro is available on Amazon for £99 with a 10% off voucher available.
Alternatively, you can buy it from Itead.cc for $89.90, and this includes free shipping.
The older NSPanel is available for £80.99 and has a 15% off voucher available.
There are actually quite a few smart home control panels available:
Brilliant Smart Home Control – $360
I think this may be the best known alternative. It is well-reviewed and looks impressive. It lacks Zigbee but integrates with a wide range of third-party systems such as Ring, Sonos, Hue, Google Nest, Wemo, SmartThings, Apple HomeKit. However, it is over three times the price.
Hihome Smart Home Control Panel – €199
This appears to be almost identical to the NSPanel Pro. The main differences are that it costs double, and only has 1GB of RAM. It is then a Zigbee and Bluetooth hub for Hihome and Tuya-compatible devices.
Rithum Switch smart home control panel – £249.99
Another switch that looks very similar to NSPanel Pro but costs significantly more. There is no hardware spec for this, and it is not a Zigbee hub, but it is integrated with third-party systems via plugins. Some of these plugins require you to pay for them, such as the Homey Pro and Tado
EVVR Pad S – Not Available
This doesn’t actually appear to be available. It looks like it was announced in January 2022 but still not on sale. However, it appears to be very similar to the NSPanel Pro but with superior hardware, including a much more power chipset, 5GHz WiFi, POE and a wider range of device support
Overall
I personally like the Sonoff NSPanel Pro, and I love the concept of having multiple smart displays/hubs located around my home as replacements for dumb light sockets.
I have seen this get some criticism for the pricing, but I don’t think £90 is unreasonable for a smart home hub with a display built-in and if you look at competing options, it looks like a bargain.
The big issue seems to be that Sonoff hasn’t delivered what they originally promised. That would certainly be annoying if you were an early buyer.
However, I think if you judge the NSPanel Pro by what it currently does, it is an excellent smart home control panel.
Sonoff NSPanel Pro Smart Home Control Panel Review Rating
-
Overall - 80%80%
Summary
The Sonoff NSPanel Pro may have gotten off to a rocky start, but it looks like Sonoff has addressed the biggest concerns, and it has grown to become an excellent smart home control panel.
Pros
- Innovative concept for smart home control
- Can be modded with ADB developer mode
Cons
- Some performance issues
- Still missing features that were originally advertised

I am James, a UK-based tech enthusiast and the Editor and Owner of Mighty Gadget, which I’ve proudly run since 2007. Passionate about all things technology, my expertise spans from computers and networking to mobile, wearables, and smart home devices.
As a fitness fanatic who loves running and cycling, I also have a keen interest in fitness-related technology, and I take every opportunity to cover this niche on my blog. My diverse interests allow me to bring a unique perspective to tech blogging, merging lifestyle, fitness, and the latest tech trends.
In my academic pursuits, I earned a BSc in Information Systems Design from UCLAN, before advancing my learning with a Master’s Degree in Computing.
I’m proud to share that Vuelio has consistently ranked Mighty Gadget as one of the top technology blogs in the UK. With my dedication to technology and drive to share my insights, I aim to continue providing my readers with engaging and informative content.
I work directly with the companies he reviews products for or their chosen PR agency.
For Social Media, you can find me on: