Any links to online stores should be assumed to be affiliates. The company or PR agency provides all or most review samples. They have no control over my content, and I provide my honest opinion.
The Amazon Fire TV Stick 4K Ultra HD is the cheapest device on the market that can do 4K Ultra HD with HDR in Dolby Vision, HDR, and HDR10+.
While the official Kodi forums often recommend devices such as the ODROID N2 with CoreELEC Kodi Leia, I’d argue the Fire Stick is a better choice purely from a price perspective. The N2 will set you back £78 plus you will need a power adaptor for it which cost a few more. In comparison, the Fire TV Stick 4K Ultra HD has an RRP of £49.99, but on Prime Day it was just £25, and it regularly drops to £40 and under.
The Fire TV Stick does have some issues though, there is no ethernet, and the ethernet adaptors are restricted to 100Mbps, so you will need to use Wi-Fi and have a good signal if you want to watch local 4K movies with large files sizes.
Then there is the issue with no Google Play Store on the device, and for some reason, Amazon won’t allow Kodi to be on their store.
[content-egg module=Amazon template=list]
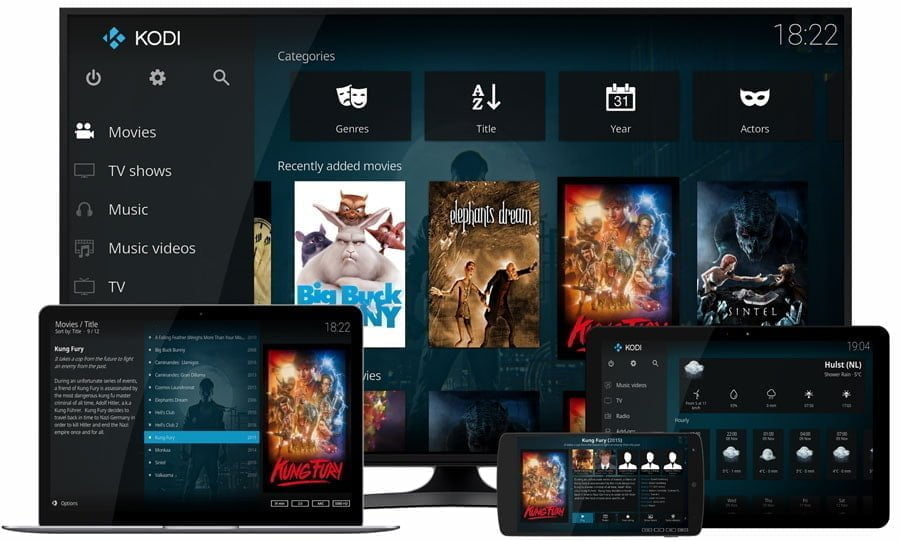
The easiest way to get Kodi on the system is to buy MrMC which costs £2.42. I don’t like the interface, and much prefer an official Kodi install.
There are several methods to install Kodi on a FireStick; one option includes using ES File Explorer to download the files and manually install it.
The other option I personally prefer is to us adbLink on my PC which can then remotely install Kodi. I like this method as it also makes it easy for me to transfer over my advancedsetting.xml file, which contains the MYSQL settings.
The following steps can be used to install Kodi via adbLink.
- Download adblink
- Download the latest version of Kodi for Android ARM devices
- Find the IP of the Fire TV via Settings -> Device -> About -> Network
- Enable ADB Debugging via Settings -> Device -> Developer Options and turn ADB Debugging to ON.
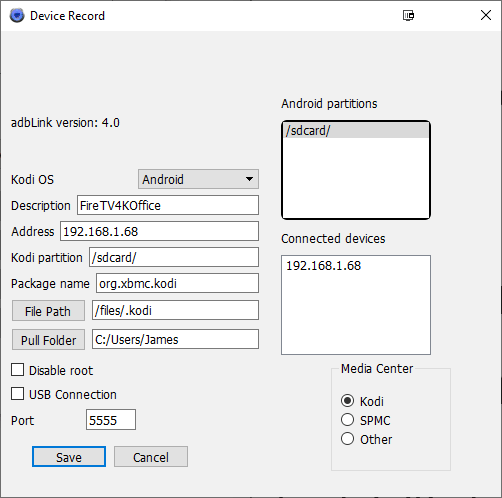
- Load adblink and create a new connection with the previous IP address. Most settings should be chosen for you but you tweak things to your liking, this includes options for SPMC.
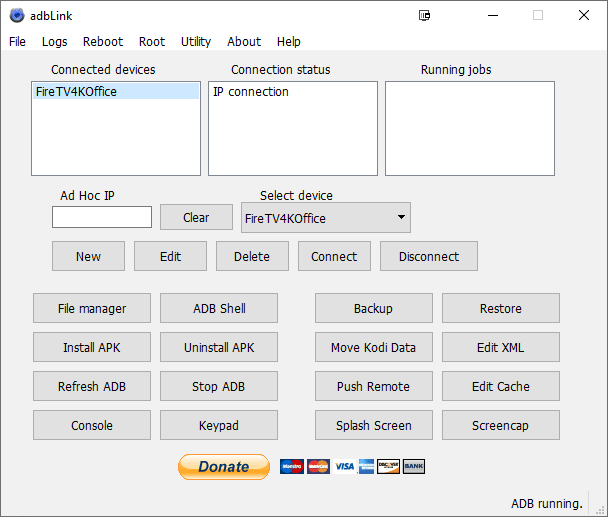
- Connect adbLink to Fire TV. It can sometimes be a little slow to respond, but when connected it should say the connected device and the connection status.
- Hit install APK and select the Kodi APK
- Wait for the green bar to complete the installation process. This process can take a couple of minutes
- Kodi should now appear on your AFTV homescreen under Apps.
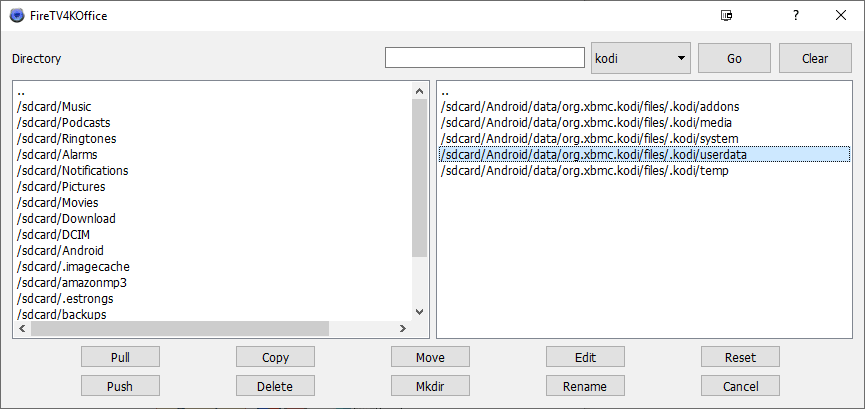
If you want to use advancedsetting.xml you will first need to load up Kodi so that all the user folders are created. Then use the file manager and browse to /sdcard/Android/data/org.xmbc.kodi/files/.kodi/userdata hit push then select your setting files.
You will need to close Kodi if it is still open, then when you restart all your TV shows and movies should be there.
I am James, a UK-based tech enthusiast and the Editor and Owner of Mighty Gadget, which I’ve proudly run since 2007. Passionate about all things technology, my expertise spans from computers and networking to mobile, wearables, and smart home devices.
As a fitness fanatic who loves running and cycling, I also have a keen interest in fitness-related technology, and I take every opportunity to cover this niche on my blog. My diverse interests allow me to bring a unique perspective to tech blogging, merging lifestyle, fitness, and the latest tech trends.
In my academic pursuits, I earned a BSc in Information Systems Design from UCLAN, before advancing my learning with a Master’s Degree in Computing. This advanced study also included Cisco CCNA accreditation, further demonstrating my commitment to understanding and staying ahead of the technology curve.
I’m proud to share that Vuelio has consistently ranked Mighty Gadget as one of the top technology blogs in the UK. With my dedication to technology and drive to share my insights, I aim to continue providing my readers with engaging and informative content.