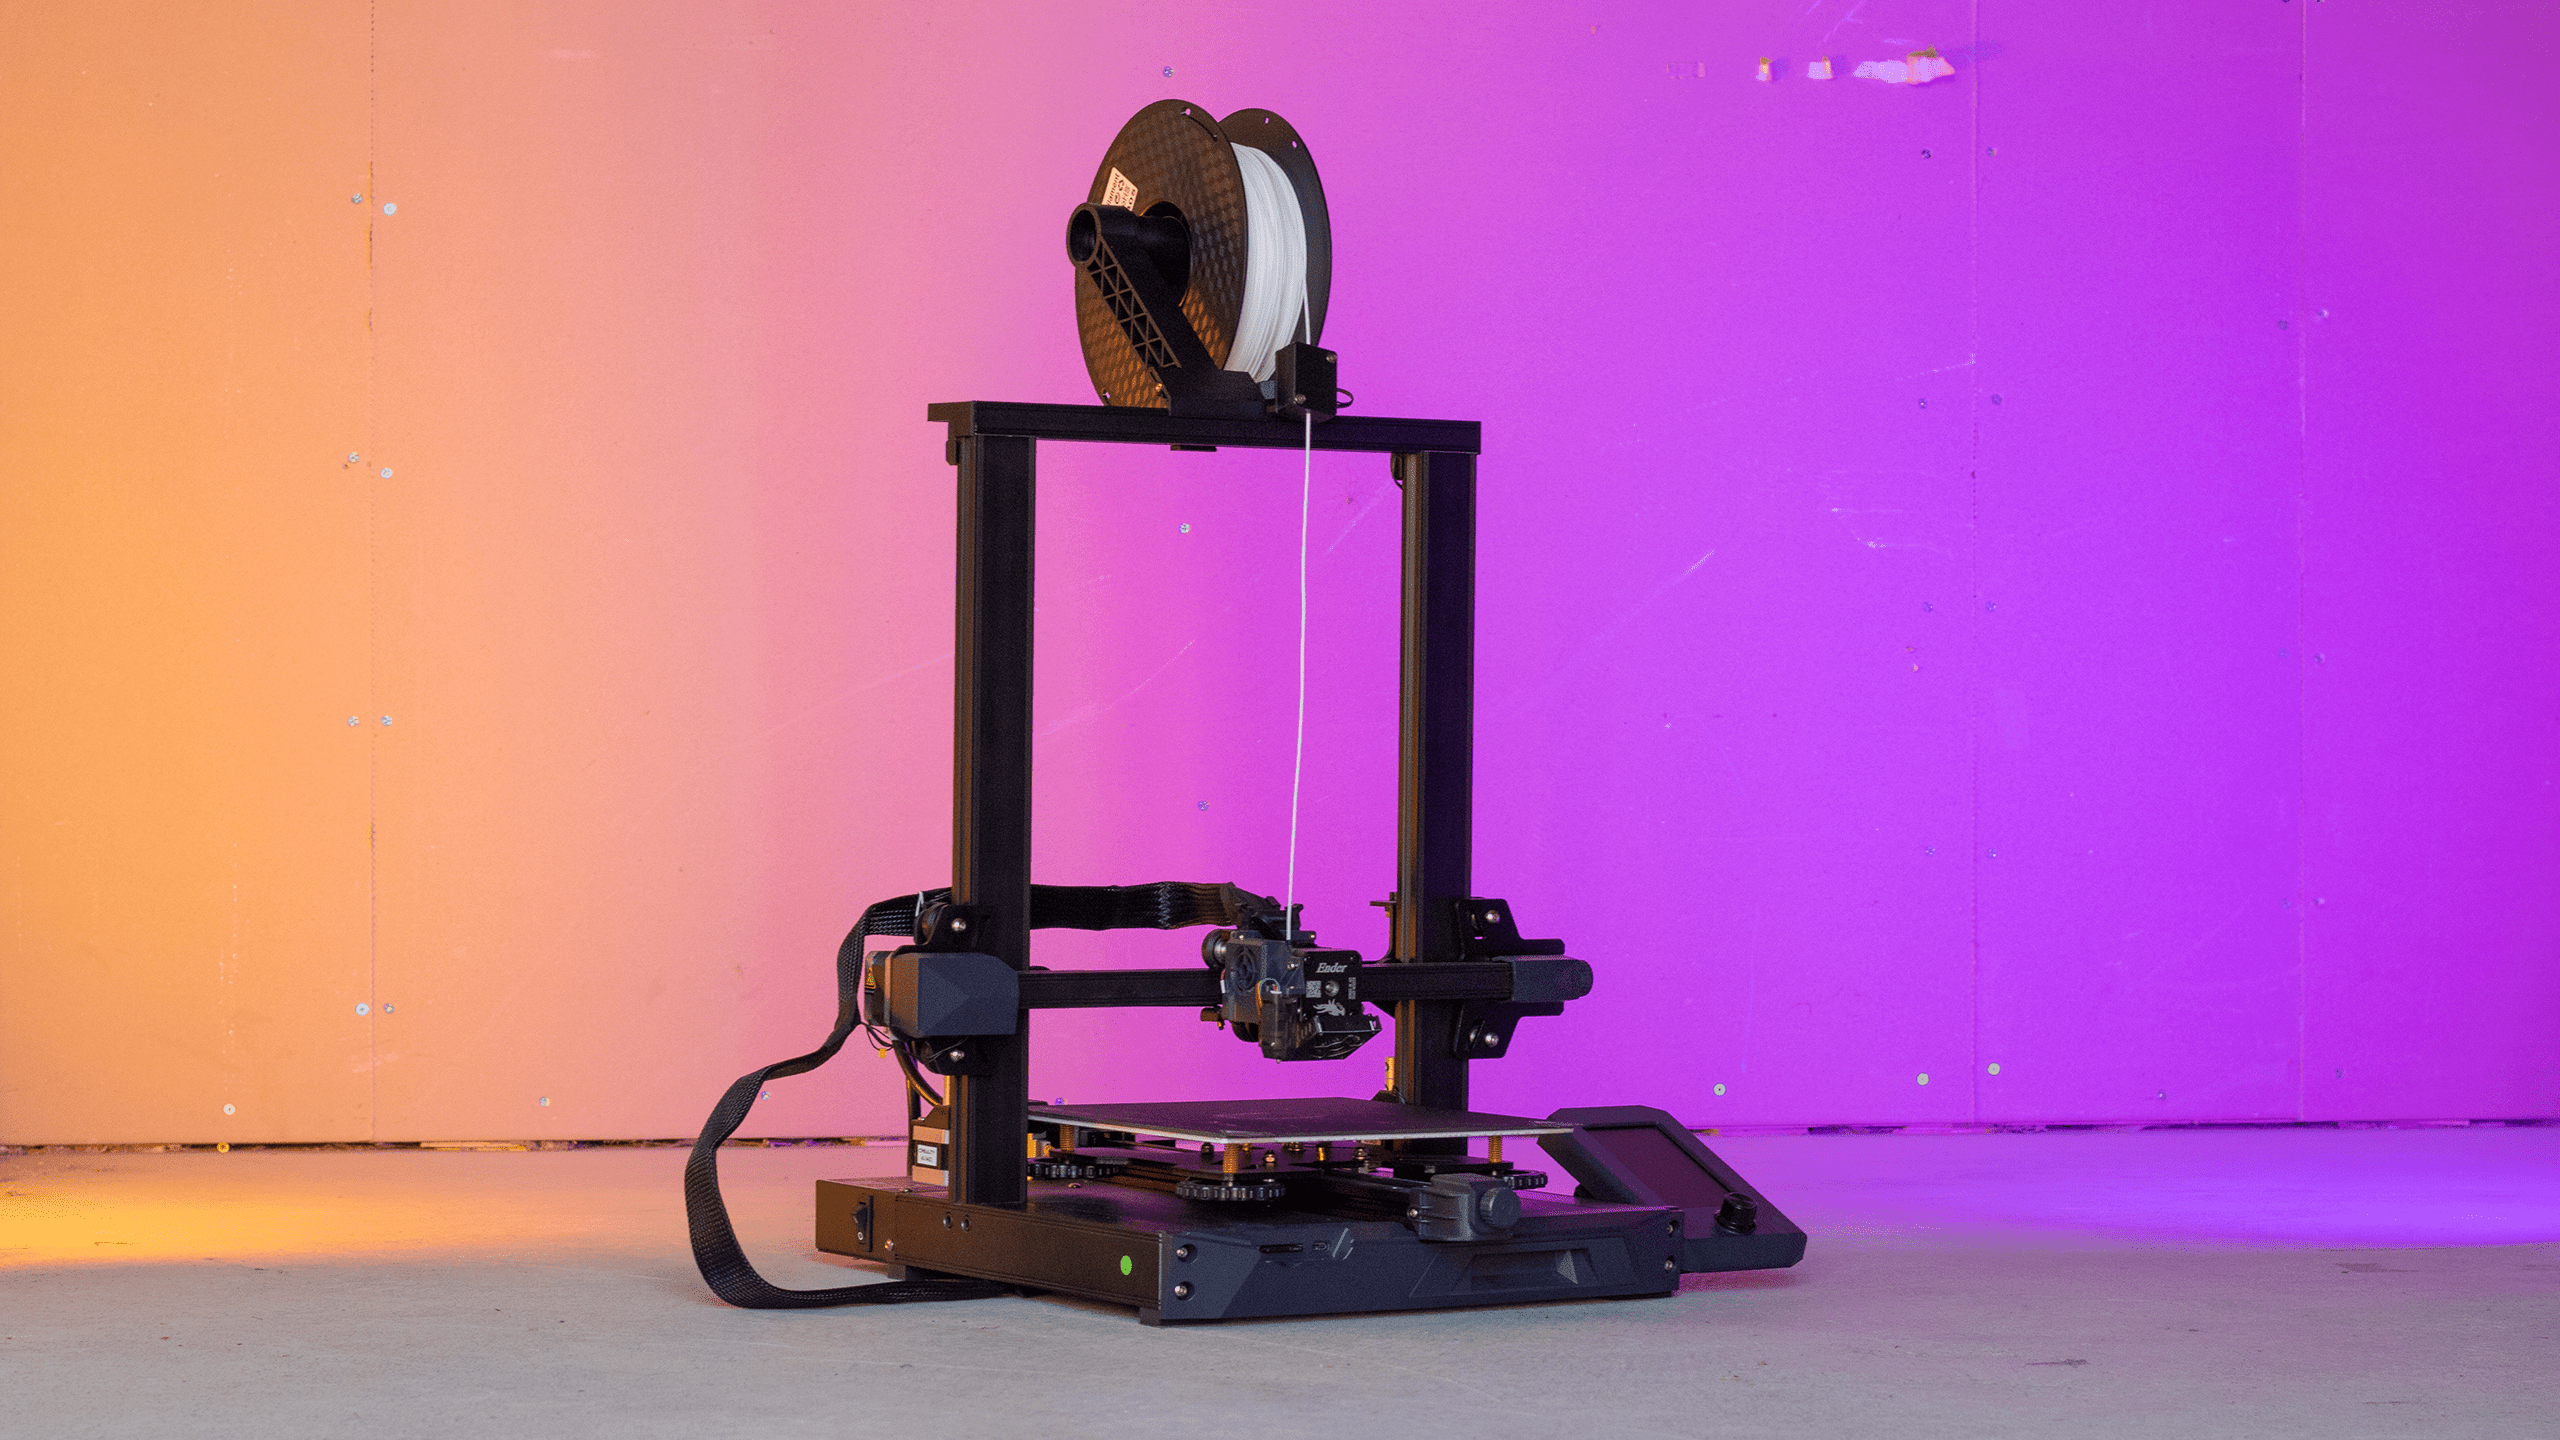
Creality Ender-3 S1 3D Printer Review – A great budget 3D printer for under £350
This is my third review of Creality 3D printers. I have previously reviewed the Creality Halot One Plus resin printer and the Sermoon V1 Pro.
The Ender Series from Creality has some of my favourite printers going; the Ender-3 S1 is no exception to this. Though it has room for multiple expansions and extras, it can still perform excellently without them.
Personally, I find the best way to learn is to get your hands on something and get stuck in. This is why I appreciate the semi-constructed design of the Ender-3 S1. This design makes for a perfect learning experience about the different parts of a printer for a beginner. It does this without the overwhelming aspect of having to tackle every piece. Additionally, constructing your own machine then shows you where all the expandable pieces of the printer are. The Ender-3 S1 had a plethora of modular extensions including, but not limited to: a laser engraver, LED lamps, and water cooling. Each module is easily connected and fitted, including a UI option to swap the operating system over to engraver mode.
Initially, I was hesitant about the Ender’s performance as Creality advertises a variety of additions, including some recommended accessories. The Ender-3 S1 needs none of them; this printer is excellent even without all the bells and whistles. The only addition I could maybe get behind recommending is the tempered glass build plate.

- 【500mm/s Max Printing Speed】Creality Ender-3 V3 KE supports a maximum printing speed of 500mm/s, 8000mm/s² acceleration, which can print faster while keeping the print quality, saving 86% of the time compared with other printers.
- 【Smart UI, Self-test with One Tap】Responsive touch UI with an intuitive tab bar, smart self-test for Z offset, auto leveling, and more with just one tap, Real-time model preview, and vivid motion graphics of printing parameters.
- 【X-axis Linear Rail, Ultra-smooth Motion】The precise linear rail on the X-axis has a carriage slide containing ball bearings, together with the dual Linear Shafts on Y-axis and dual X-axis Lead Screws, making each move accurate, steady and frictionless ( 0.04 friction coefficient), built out of stiff steel, it will stay as new even after long-time use.
- 【Hotend with 60W Ceramic Heater】60W ceramic heater, able to fully melt filaments for high-speed printing, Bi-metal heatbreak, effectively preventing thermal creep, Copper nozzle, enabling 300 ℃ printing with handle Hyper PLA, PETG, ABS,TPU(95A) and ASA filaments.
- 【4010 Model Cooling Fans on Two Sides】Ender-3 V3 KE features the 4010 model cooling fan on each side of the printhead, which cools the freshly printed section rapidly and evenly, keeping your printers always in good shape.
Specification:
- General
- Technology: Fused deposition modelling (FDM)
- Assembly: Semi-assembled
- Mechanical arrangement: Cartesian XZ-head
- 3D Printer Features
- Build volume: 220 x 220 x 270 mm
- Feeder system: Direct
- Print head: Single nozzle
- Nozzle size: 0.4 mm
- Max. hot end temperature: 260 ℃
- Max. heated bed temperature: 100 ℃
- Print bed material: PC-coated spring steel sheet
- Frame: Aluminum
- Bed levelling: Automatic
- Display: 4.3-inch LCD
- Connectivity: SD card, USB
- Print recovery: Yes
- Filament sensor: Yes
- Camera: No
- Materials Used
- Filament diameter: 1.75 mm
- Third-party filament: Yes
- Filament materials: Consumer materials (PLA, ABS, PETG, Flexibles)
- Software
- Recommended slicer: Creality Slicer, Cura, Simplify3D, Repetier-Host
- Operating system: Windows, Mac OSX, Linux
- File types: STL, OBJ, AMF
- Dimensions
- Frame dimensions: 487 x 453 x 622 mm
- Weight: 9.1 kg
Build Plate
Central to the Ender-3 S1 is the PC-coated spring steel build plate. Removing prints is incredibly easy when using a magnetic base and a flexible platform – compared to the Ender 2’s rigid PC platform, secured with bulldog clips. However, though the platform’s flexibility is nice, the PC coating still leaves much to be desired. For example, a poorly levelled nozzle can easily damage it, and PLA residue is frequently left over after printing. Because of this, if you are repeatedly printing, or printing on any large scale, or just because you want a better experience, I recommend getting the tempered glass build plate. Glass is durable, easy to clean, and supplies surprisingly excellent adhesion.
Automatic Bed Levelling
Echoing a point I made in the Sermoon V1 Pro review, I have not reviewed two printers which use the same auto-levelling method. Typically the printer will use some form of probe or sensor to measure the distance from where it thinks zero is to where zero actually is. “Levelling” is perhaps not the right word to use as the print bed, in every system I’ve seen so far, doesn’t actually adjust. Instead, when the printer completes this automatic mesh bed calibration, they actively adjust the print layer height to counteract any slight deviations in the print bed height.
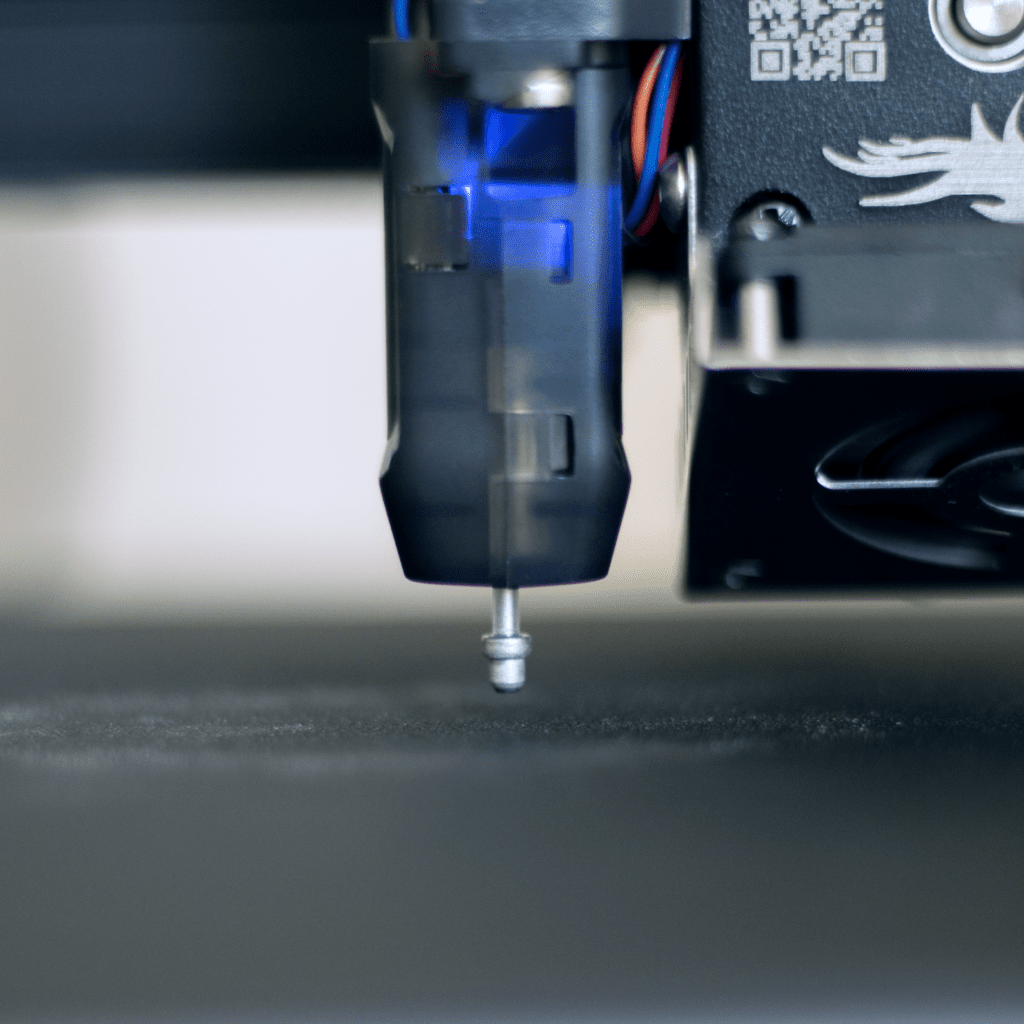
The Ender-3 S1 has two methods for levelling – Creality’s CR Touch Automatic Bed Levelling Device or standard manual levelling. Once auto-levelling is initiated, the printer deploys a tendril from the print head and probes the surface 16 times. Though not stated, I would imagine this device to be a variation of a strain-gauge sensor, similar to the one equipped to the Kobra Max. I like this levelling method as it provides a lot of visual feedback to the user about what it’s doing. However, the system isn’t perfect as you still need a Layer Height Gauge (AKA a piece of paper) to adjust the z-axis offset accordingly.
Users can adjust the z-axis via the UI in increments of 0.01mm. I was pleased to see this level of fidelity, as with the previous three FDM printers I have reviewed, they only allowed levelling in increments of 0.05mm.
Additionally, Ender-3 S1 also comes with a spare z-stop sensor that can be easily affixed to the frame and installed. The z-stop allows for an alternate manual levelling method with which you are probably familiar. I think this is a solid addition to enable the user to choose to use the traditional levelling system or as a backup system if the fancy new sensor fails.
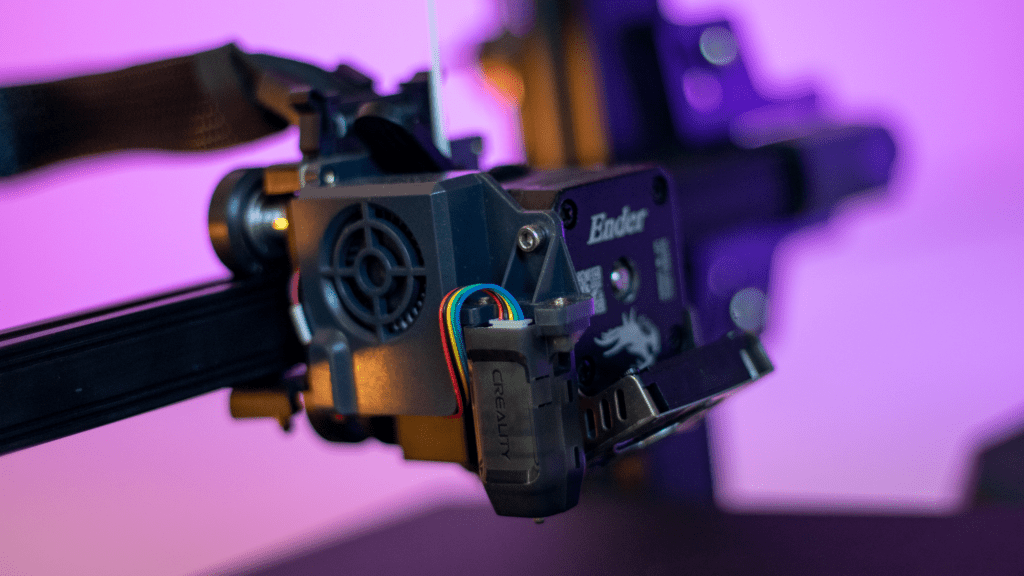
Sprite Dual Gear Extruder
I believe the Ender-3 S1 uses the same extruder as the Sermoon V1 Pro, anointed the “Sprite Direct Dual-Gear Extruder”. This little thing has a gear ratio of 1:3.5, delivering a pushing force of up to 80N. The numbers might not mean anything to you directly, but it basically means there’s more power to shift the filament, thus creating better extrusion and retraction.
As newer models emerge, direct extruders are constantly being updated and improved upon. They are also becoming more popular in beginner 3D printers, and I don’t really know how I feel about this. The extra weight on the carriage, the weight of the spool pulling directly onto the x-axis, and the spool’s subsequent mounting and location all start to add up.
Other Bits and Bobs
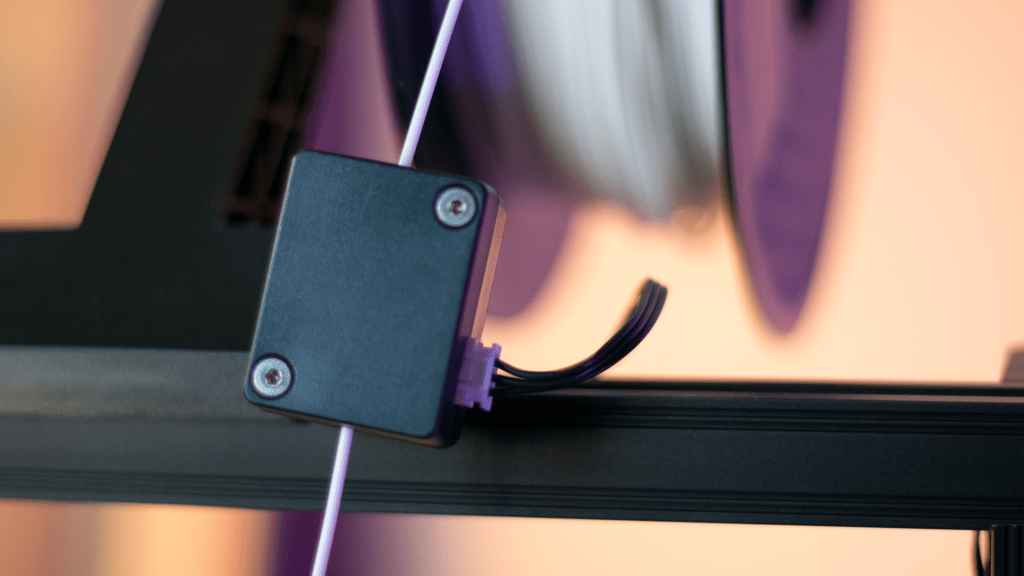
Interestingly helping the direct extrusion system is the filament sensor. Personally, I don’t particularly care for filament sensors, but the location of the one on the Ender-3 S1 serves two purposes. First, the sensor helps to feed the filament from the spool into the extruder. It also helps stabilise some of the forces applied onto the spool, stopping shaking/ vibration in the printer; this reduces ghosting and other artefacts in the prints.
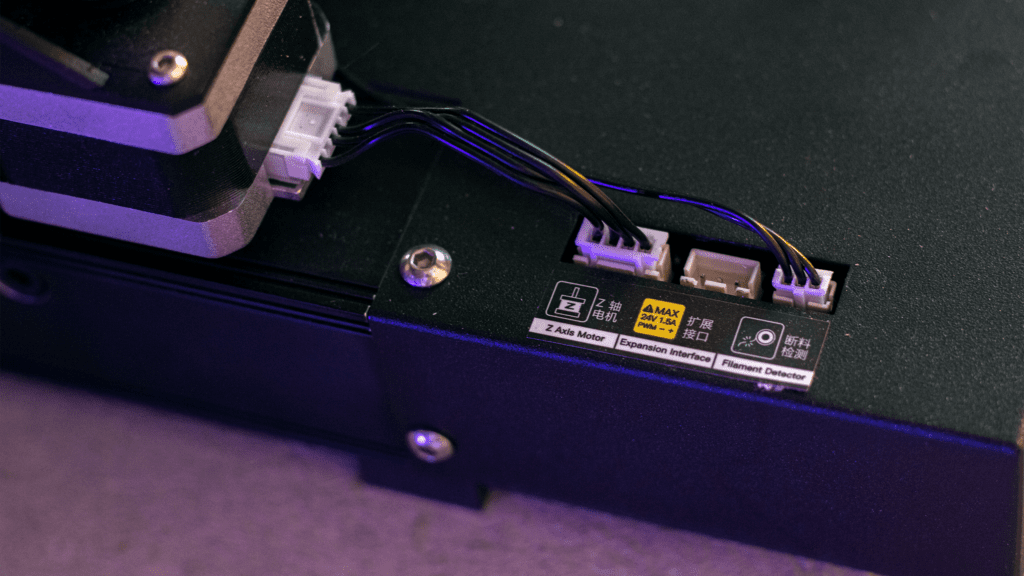
The printer also has dual z-axis screws to provide extra stability and accuracy in the z-axis. It’s nice to have as it balances the load between the two threads.
Knob-type belt tensioners are also nice to have. I’m glad they’re there, but at this point, I’d almost expect these basic ‘quality-of-life’ features on a printer. Especially as companies are rapidly innovating interesting new high-tech auto-levelling systems and other gizmos, I can’t really call these knobs a ‘feature’ anymore.
Print Samples


Final Thoughts
Overall, the Ender-3 S1 is a decent machine. It’s not particularly interesting, but what it does, it does really well. I was able to get some very consistent, decent prints from it, printing at considerable speeds. I’m pleased to have this in my collection.
- 【500mm/s Max Printing Speed】Creality Ender-3 V3 KE supports a maximum printing speed of 500mm/s, 8000mm/s² acceleration, which can print faster while keeping the print quality, saving 86% of the time compared with other printers.
- 【Smart UI, Self-test with One Tap】Responsive touch UI with an intuitive tab bar, smart self-test for Z offset, auto leveling, and more with just one tap, Real-time model preview, and vivid motion graphics of printing parameters.
- 【X-axis Linear Rail, Ultra-smooth Motion】The precise linear rail on the X-axis has a carriage slide containing ball bearings, together with the dual Linear Shafts on Y-axis and dual X-axis Lead Screws, making each move accurate, steady and frictionless ( 0.04 friction coefficient), built out of stiff steel, it will stay as new even after long-time use.
- 【Hotend with 60W Ceramic Heater】60W ceramic heater, able to fully melt filaments for high-speed printing, Bi-metal heatbreak, effectively preventing thermal creep, Copper nozzle, enabling 300 ℃ printing with handle Hyper PLA, PETG, ABS,TPU(95A) and ASA filaments.
- 【4010 Model Cooling Fans on Two Sides】Ender-3 V3 KE features the 4010 model cooling fan on each side of the printhead, which cools the freshly printed section rapidly and evenly, keeping your printers always in good shape.
Creality Ender-3 S1 Review Rating
-
Overall - 85%85%
Summary
Overall, the Ender-3 S1 is a decent machine. It’s not particularly interesting, but what it does, it does really well. I was able to get some very consistent, decent prints from it, printing at considerable speeds. I’m pleased to have this in my collection.
Pros
- Easy to use and consistent performance
Cons
- English manual needs work

I am James, a UK-based tech enthusiast and the Editor and Owner of Mighty Gadget, which I’ve proudly run since 2007. Passionate about all things technology, my expertise spans from computers and networking to mobile, wearables, and smart home devices.
As a fitness fanatic who loves running and cycling, I also have a keen interest in fitness-related technology, and I take every opportunity to cover this niche on my blog. My diverse interests allow me to bring a unique perspective to tech blogging, merging lifestyle, fitness, and the latest tech trends.
In my academic pursuits, I earned a BSc in Information Systems Design from UCLAN, before advancing my learning with a Master’s Degree in Computing.
I’m proud to share that Vuelio has consistently ranked Mighty Gadget as one of the top technology blogs in the UK. With my dedication to technology and drive to share my insights, I aim to continue providing my readers with engaging and informative content.
I work directly with the companies he reviews products for or their chosen PR agency.
For Social Media, you can find me on: