
Any links to online stores should be assumed to be affiliates. The company or PR agency provides all or most review samples. They have no control over my content, and I provide my honest opinion.
I have recently covered a few products that support Apple Homekit. The Aqara Smart Video Doorbell G4 would be the highlight of my recent reviews as it is the best doorbell you can buy that supports Homekit and it supports HomeKit Secure Video.
I don’t personally use any Apple devices, but my partner does. From my limited experience of Homekit, it is excellent smart home platform that I think has a lot of advantages over the Android orientated Google Home.
As I have covered a few products that have Homekit, I thought I should write a bit more content about what it is, and some frequently asked questions about Homekit.
What is Apple HomeKit?
Apple HomeKit is a smart home platform developed by Apple that allows users to control a wide variety of smart home devices using their iPhone, iPad, or Apple Watch. HomeKit is designed to be easy to use and offers a wide range of compatibility with smart home devices.
What works with Apple Homekit

- Smart Lights: One of the most popular HomeKit-compatible devices are smart lights. HomeKit can control a wide range of smart lights including Philips Hue, LIFX, and Nanoleaf. Users can easily control these lights using Siri or the Home app on their Apple devices.
- Smart Thermostats: HomeKit also works with a variety of smart thermostats, including ecobee, Honeywell, and Nest. Users can control their thermostats using Siri or the Home app, and can also create automation rules that adjust the temperature based on certain conditions.
- Smart Locks: HomeKit-compatible smart locks allow users to lock and unlock their doors using Siri or the Home app. Popular smart locks that work with HomeKit include August, Schlage, and Yale.
- Smart Cameras: HomeKit-compatible smart cameras can be used to monitor your home from anywhere. Brands such as Logitech, Netatmo, and Eve are compatible with HomeKit.
- Smart Doorbells: There are a limited number of smart video doorbells that support HomeKit. I have done a post covering all the current Homekit video doorbells, but the best options in my opinion is the Aqara Smart Video Doorbell G4.
- Smart Plugs: HomeKit-compatible smart plugs allow users to control the power supply to any device plugged into them. Brands such as Belkin and iDevices have HomeKit-compatible smart plugs.
- Smart Speakers: HomeKit works with smart speakers such as the Apple HomePod and the Sonos One. Users can control music playback using Siri or the Home app.
Setting up HomeKit devices
Setting up HomeKit devices is relatively simple. To add a device to HomeKit, users need to follow these steps:
- Make sure the device is compatible with HomeKit.
- Download the manufacturer’s app and set up the device.
- Open the Home app on your Apple device.
- Tap on the “Add Accessory” button.
- Scan the HomeKit code on the device or enter the code manually.
- Follow the prompts to complete the setup process.
Once the device is set up in HomeKit, users can control it using Siri or the Home app. HomeKit also allows users to create automation rules that control multiple devices based on certain conditions. For example, users can create an automation rule that turns on the lights and adjusts the thermostat when they arrive home.
In conclusion, Apple HomeKit offers a wide range of compatibility with smart home devices, and is easy to set up and use. With HomeKit, users can control their smart home devices using Siri or the Home app, and create automation rules that make their home more convenient and energy-efficient.
Apple Homekit FAQs
How does Homekit work?
HomeKit works by using a central hub called the HomePod, Apple TV, or iPad to communicate with HomeKit-enabled devices. The hub acts as a bridge between the devices and the user’s Apple devices.
When a user sets up a HomeKit-enabled device, the device communicates with the hub, which then communicates with the user’s Apple device using Wi-Fi, Bluetooth, or a wired connection. This allows the user to control the device using Siri or the Home app on their Apple device.
HomeKit uses a standard called HomeKit Accessory Protocol (HAP) to communicate with HomeKit-enabled devices. HAP is a secure and encrypted protocol that ensures that all communication between the devices and the hub is secure and private.
Where to find Homekit setup code?
The HomeKit setup code is a unique eight-digit code that is used to add a HomeKit-enabled device to your home network. The setup code is usually provided with the device, either on the packaging or in the user manual.
Here are some common places where you can find the HomeKit setup code:
- Packaging: The setup code is often printed on the packaging of the device. Look for a sticker or label that says “HomeKit-enabled” or “Works with Apple HomeKit” on the package.
- User Manual: The setup code may also be included in the user manual that comes with the device. Look for a section on how to set up the device with HomeKit, and the setup code should be listed there.
- Device: The setup code may be printed directly on the device itself. Check the back or bottom of the device for a sticker or label that includes the code.
If you cannot find the setup code, you may be able to retrieve it using the manufacturer’s app. Most HomeKit-enabled devices come with a companion app that can be used to set up and control the device. In the app, look for a section on setting up the device with HomeKit, and the setup code should be listed there.
Once you have the setup code, you can add the device to your HomeKit network using the Home app on your Apple device. Open the app, tap on the “+” button, and follow the on-screen instructions to add the device using the setup code.
Where is Homekit on Apple TV?
To use an Apple TV as a HomeKit hub, you need to ensure that the Apple TV is signed in to the same iCloud account as your iOS devices, and that it’s running the latest version of tvOS. Once you have set up your Apple TV as a HomeKit hub, you can use it to control your HomeKit-enabled devices remotely.
To find HomeKit on your Apple TV, follow these steps:
- Turn on your Apple TV and make sure it’s connected to the same Wi-Fi network as your iOS devices.
- Go to the Settings app on your Apple TV and select “Accounts”.
- Select “iCloud” and make sure you’re signed in to the same iCloud account that you use for HomeKit on your iOS devices.
- Go back to the Settings app and select “HomeKit”.
- Enable the “Use this Apple TV as a Home Hub” option.
Once you have set up your Apple TV as a HomeKit hub, you can use it to control your HomeKit-enabled devices remotely from your iOS devices, even when you’re away from home. Simply open the Home app on your iPhone, iPad, or Apple Watch, and you should see your HomeKit-enabled devices listed there. You can then use Siri or the Home app to control your devices as you normally would, even if you’re not at home.
What’s Homekit Secure Video?
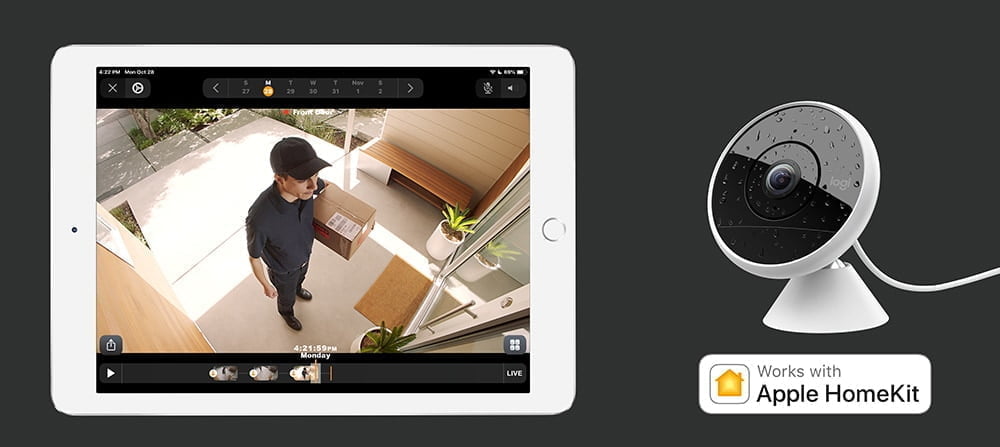
HomeKit Secure Video is a feature of Apple’s HomeKit platform that enables users to securely store and view recordings from their compatible home security cameras. With HomeKit Secure Video, the video footage from your home security cameras is encrypted and stored securely in iCloud, which provides an extra layer of protection for your personal data.
HomeKit Secure Video offers several benefits over traditional home security systems:
- Privacy: HomeKit Secure Video uses end-to-end encryption to ensure that your video footage is secure and private. Only you and anyone you’ve shared access with can view the footage.
- Intelligence: HomeKit Secure Video uses advanced machine learning algorithms to analyze the video footage and identify people, animals, and vehicles. This helps you to quickly filter through hours of footage to find the events that matter.
- Integration: HomeKit Secure Video is integrated with Apple’s Home app, which means you can view and control your home security cameras alongside your other smart home devices, all in one place.
To use HomeKit Secure Video, you’ll need a compatible home security camera that supports the feature. Once you’ve set up your camera, you can enable HomeKit Secure Video in the Home app on your iPhone, iPad, or Mac. From there, you can view live and recorded video footage from your camera, set up activity zones to trigger alerts when motion is detected, and configure other advanced features.
How to view Homekit secure video?
To view HomeKit Secure Video footage, follow these steps:
- Open the Home app on your iPhone, iPad, or Mac.
- Tap or click on the camera that you want to view footage from. You’ll see the live feed from the camera.
- To view recorded footage, tap or click on the “Activity” tab at the bottom of the screen. This will show you a timeline of recorded events from the camera.
- Scroll through the timeline to find the event that you want to view. You can also use the search bar at the top of the screen to search for specific events by date or time.
- Tap or click on the event to view the footage. You can scrub through the video to see what happened before and after the event.
- To save a clip of the footage, tap or click on the “Save” button. You can then choose to save the clip to your iCloud Drive or share it with someone else.
It’s important to note that HomeKit Secure Video footage is stored securely in iCloud, and is only accessible by you and anyone that you’ve shared access with. Additionally, HomeKit Secure Video only works with compatible home security cameras that support the feature.
How to reset Homekit accessory?
To reset a HomeKit accessory, you will need to follow the instructions specific to that accessory, as the steps can vary depending on the manufacturer and model. However, there are some general guidelines that may help you reset your accessory:
- Check the manufacturer’s instructions: Most HomeKit accessories will come with a user manual that includes instructions on how to reset the device. Check the manual or the manufacturer’s website for specific instructions.
- Use the Home app: If you have set up the accessory in the Home app, you may be able to reset it from there. In the Home app, tap and hold on the accessory that you want to reset, then tap on “Details”. Scroll down and look for an option to “Remove Accessory” or “Reset Accessory”. Follow the prompts to complete the reset.
- Use the reset button: Some HomeKit accessories have a physical reset button that you can press to reset the device. Check the user manual or the manufacturer’s website to find the location of the reset button and the steps to perform a reset.
- Power cycle the accessory: In some cases, simply unplugging the accessory and plugging it back in can reset it to its default settings. Try unplugging the accessory from power for a few minutes, then plugging it back in and setting it up again.
It’s important to note that resetting a HomeKit accessory will erase all of its settings and data, so you will need to set it up again from scratch.
Why is Homekit so bad?
I don’t personally think Homekit is bad. I think Homekit has done a good job at achieving a unified platform where other
, but plenty of other people complain about it.
Some common complaints include:
- Limited device compatibility: HomeKit only works with a limited number of smart home devices, and not all devices that claim to be HomeKit compatible may work seamlessly with the platform.
- Complexity of setup: Setting up HomeKit can be complex and time-consuming, especially for users who are not familiar with Apple’s ecosystem or who are new to smart home technology.
- Reliability issues: Some users have reported reliability issues with HomeKit, such as devices becoming unresponsive or disconnecting from the platform.
- Lack of advanced features: HomeKit may not offer the same level of advanced features or customization options as other smart home platforms, which may be a drawback for power users or those with more complex setups.
Does Home Assistant work with Homekit?
Yes, Home Assistant does work with HomeKit. Home Assistant is an open-source home automation platform that can integrate with a wide range of smart home devices and services, including Apple HomeKit.
To set up HomeKit integration with Home Assistant, you will need to follow these steps:
- Open the Home Assistant web interface and navigate to “Configuration” > “Integrations”.
- Click on the “Add Integration” button and search for “HomeKit” in the search bar.
- Follow the prompts to configure the HomeKit integration, including selecting the devices and entities that you want to include in HomeKit.
- Once the integration is set up, you should be able to control your Home Assistant devices and automations using the Apple Home app or Siri on your iOS device.
It’s important to note that not all Home Assistant devices and services may be compatible with HomeKit, and some may require additional configuration or customization to work properly. Additionally, the HomeKit integration in Home Assistant may not offer the same level of features or customization options as other Home Assistant integrations, so it’s important to review the documentation and user forums to ensure that the integration will meet your specific needs.
Is Homekit secure?
Yes, HomeKit is generally considered to be a secure smart home platform. Apple has implemented a number of security features and protocols to protect user data and prevent unauthorized access to HomeKit devices and systems.
Some of the security features of HomeKit include:
- End-to-end encryption: HomeKit uses end-to-end encryption to protect user data, which means that data is encrypted on the device itself and can only be decrypted by authorized users with the proper credentials.
- Authentication and access control: HomeKit uses strong authentication and access control mechanisms to ensure that only authorized users can access and control HomeKit devices.
- Device certification: HomeKit requires manufacturers to certify their devices before they can be used with the platform, which helps ensure that devices meet Apple’s security and compatibility standards.
- Firewall and router support: HomeKit is designed to work with firewalls and routers to prevent unauthorized access to HomeKit devices and systems.
Despite these security features, it’s important to note that no technology is completely foolproof and there is always a risk of security vulnerabilities or breaches. It’s important for HomeKit users to follow best practices for securing their devices and networks, such as using strong passwords, keeping devices up to date with the latest firmware and security patches, and regularly monitoring device activity for signs of unauthorized access or activity.
Can Homekit control Alexa devices?
While HomeKit and Alexa are both popular smart home platforms, they are not directly compatible with each other. This means that you cannot use HomeKit to directly control Alexa devices, or use Alexa to directly control HomeKit devices.
However, it is possible to integrate HomeKit and Alexa using third-party tools or services. For example, you can use a smart home hub or bridge, such as the Philips Hue Bridge or the Homebridge platform, to connect your HomeKit and Alexa devices together. These tools essentially act as a middleman between the two platforms, allowing you to control your HomeKit devices through Alexa and vice versa.
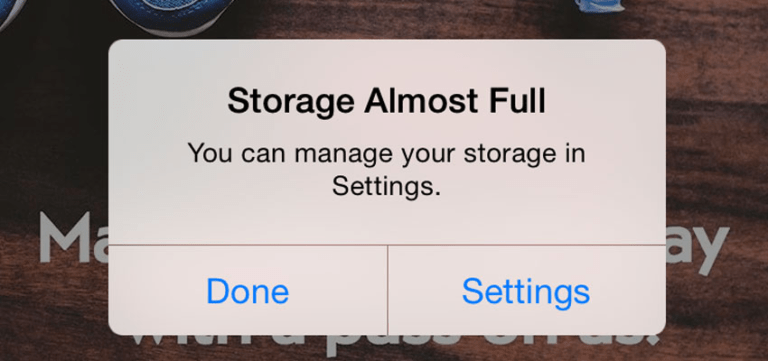
How to stop Homekit setup popup?
If you are seeing a HomeKit setup popup on your iPhone or iPad and you want to stop it from appearing, you can try the following steps:
- Go to the “Settings” app on your iOS device.
- Scroll down and tap on “Home.”
- Toggle off the option for “Home Control.”
This should stop the HomeKit setup popup from appearing on your device. Note that turning off this option will also disable the ability to control any HomeKit devices or accessories that you have set up on your device.
If you do want to use HomeKit to control your smart home devices, but you are still seeing the popup even after setting up your devices, you may need to check your HomeKit settings to ensure that everything is properly configured. You can do this by going to the “Home” app on your device and checking the status of your HomeKit devices and accessories.
Originally posted on mightygadget.com – Follow on Twitter – Instagram – Facebook – Mighty Gadget Latest Reviews
I am James, a UK-based tech enthusiast and the Editor and Owner of Mighty Gadget, which I’ve proudly run since 2007. Passionate about all things technology, my expertise spans from computers and networking to mobile, wearables, and smart home devices.
As a fitness fanatic who loves running and cycling, I also have a keen interest in fitness-related technology, and I take every opportunity to cover this niche on my blog. My diverse interests allow me to bring a unique perspective to tech blogging, merging lifestyle, fitness, and the latest tech trends.
In my academic pursuits, I earned a BSc in Information Systems Design from UCLAN, before advancing my learning with a Master’s Degree in Computing. This advanced study also included Cisco CCNA accreditation, further demonstrating my commitment to understanding and staying ahead of the technology curve.
I’m proud to share that Vuelio has consistently ranked Mighty Gadget as one of the top technology blogs in the UK. With my dedication to technology and drive to share my insights, I aim to continue providing my readers with engaging and informative content.