Any links to online stores should be assumed to be affiliates. The company or PR agency provides all or most review samples. They have no control over my content, and I provide my honest opinion.
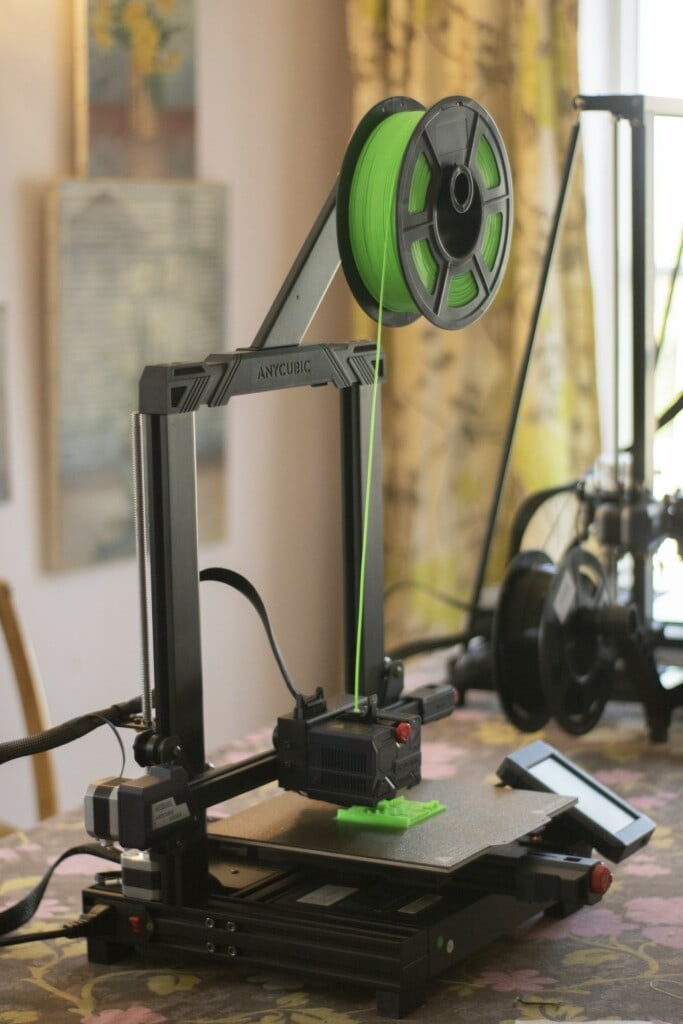
The Kobra is Anycubics’ newest beginner printer. This machine has a lot to offer.
I reviewed the Kobra and the Kobra Max at the same time, so I will be referencing both machines in each review, respectfully. You can check out the Kobra Max’s review here.
No products found.
Anycubic Kobra Specifications
| Machine dimensions | 19.1 x 19.1 x 16.9 in. /48.6 x 48.6 x 43 cm |
| Build Volume | 9.8 x 8.7 x 8.7 in. /25 x 22 x 22 cm (HWD) |
| Material | 1.75mm PLA, ABS / PETG& TPU |
| Nozzle | ø 0.4 mm |
| Build Platform | Heated Textured Flexible Removable PEI Spring steel |
| Connectivity | USB,microSD card |
| Interface | 4.3″ Color Touchscreen LCD |
| Bed Leveling | Anycubic Horizon Automatic bed leveling, Inductive Sensor |
Semi assembled
The Anycubic Kobra comes semi-assembled, which may seem like an odd thing to highlight as a feature but as a beginner having the most minimal set-up is great. This is accompanied by a fantastic user manual that talks you through every step of the assembly and set up, including the installation and preparation of Anycubics slicer of choice – Ultimaker Cura. Anycubic has really made this a very accessible machine for people new to 3D printing, having even included a settings profile for Cura, decreasing faffing by tenfold. The semi-assembled shipping and settings profile are potentially my favourite part of the Kobra, as it really nails what a beginner’s machine should be.
Direct Extrusion
The Anycubic Korba is equipped with a direct extrusion system; this varies from Bowden extrusion, which can be seen on the Kobra Max, in a multitude of ways.
In this layout, the extruder is attached directly to the printhead, rather than to the frame of the printer. There are a couple of different pros and cons to this design, it must be said.
The extruder pushes the filament directly into the nozzle allowing for significantly fewer extrusion related issues that could potentially ruin a print. Another consequence of this is the easier retraction of filament, reducing strings improving clarity in a print.
Because of the proximity of the extruder, it also means less torque is required, resulting in a smaller motor and a quieter machine.
A direct drive extruder is also more compatible with a wider range of filaments, including flexible and abrasive materials, as the filament no longer needs to travel through the lengthy Teflon tube.
Obviously, with having an extra motor in the print head this adds a little bit of weight to it. Unfortunately, this reduces the print speed of the Kobra, which is reflected in the recommended print speed being 50mm/s. This is compared to the Kobra Max’ recommended 80mm/s as it features a Bowden Extrusion system. However, a reduced print speed isn’t always a bad thing, as there is less chance of missing a step and potentially improved accuracy when travelling at lower speeds.
I must admit my biggest concern and consequence of Direct Extrusion is the feeding of the filament and location of the spool. As the printhead moves, it also has to pull filament from the spool when travelling along the x-axis. I fear there may be negative impacts on the accuracy of the print with this additional strain on the movement. However, I have not tested for this directly as testing and analysis would take too much time.
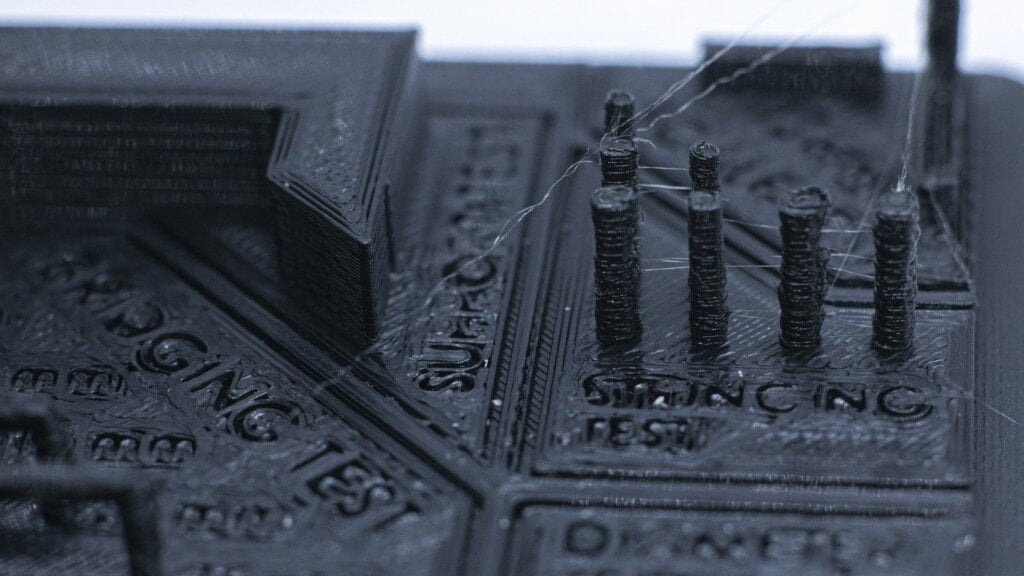
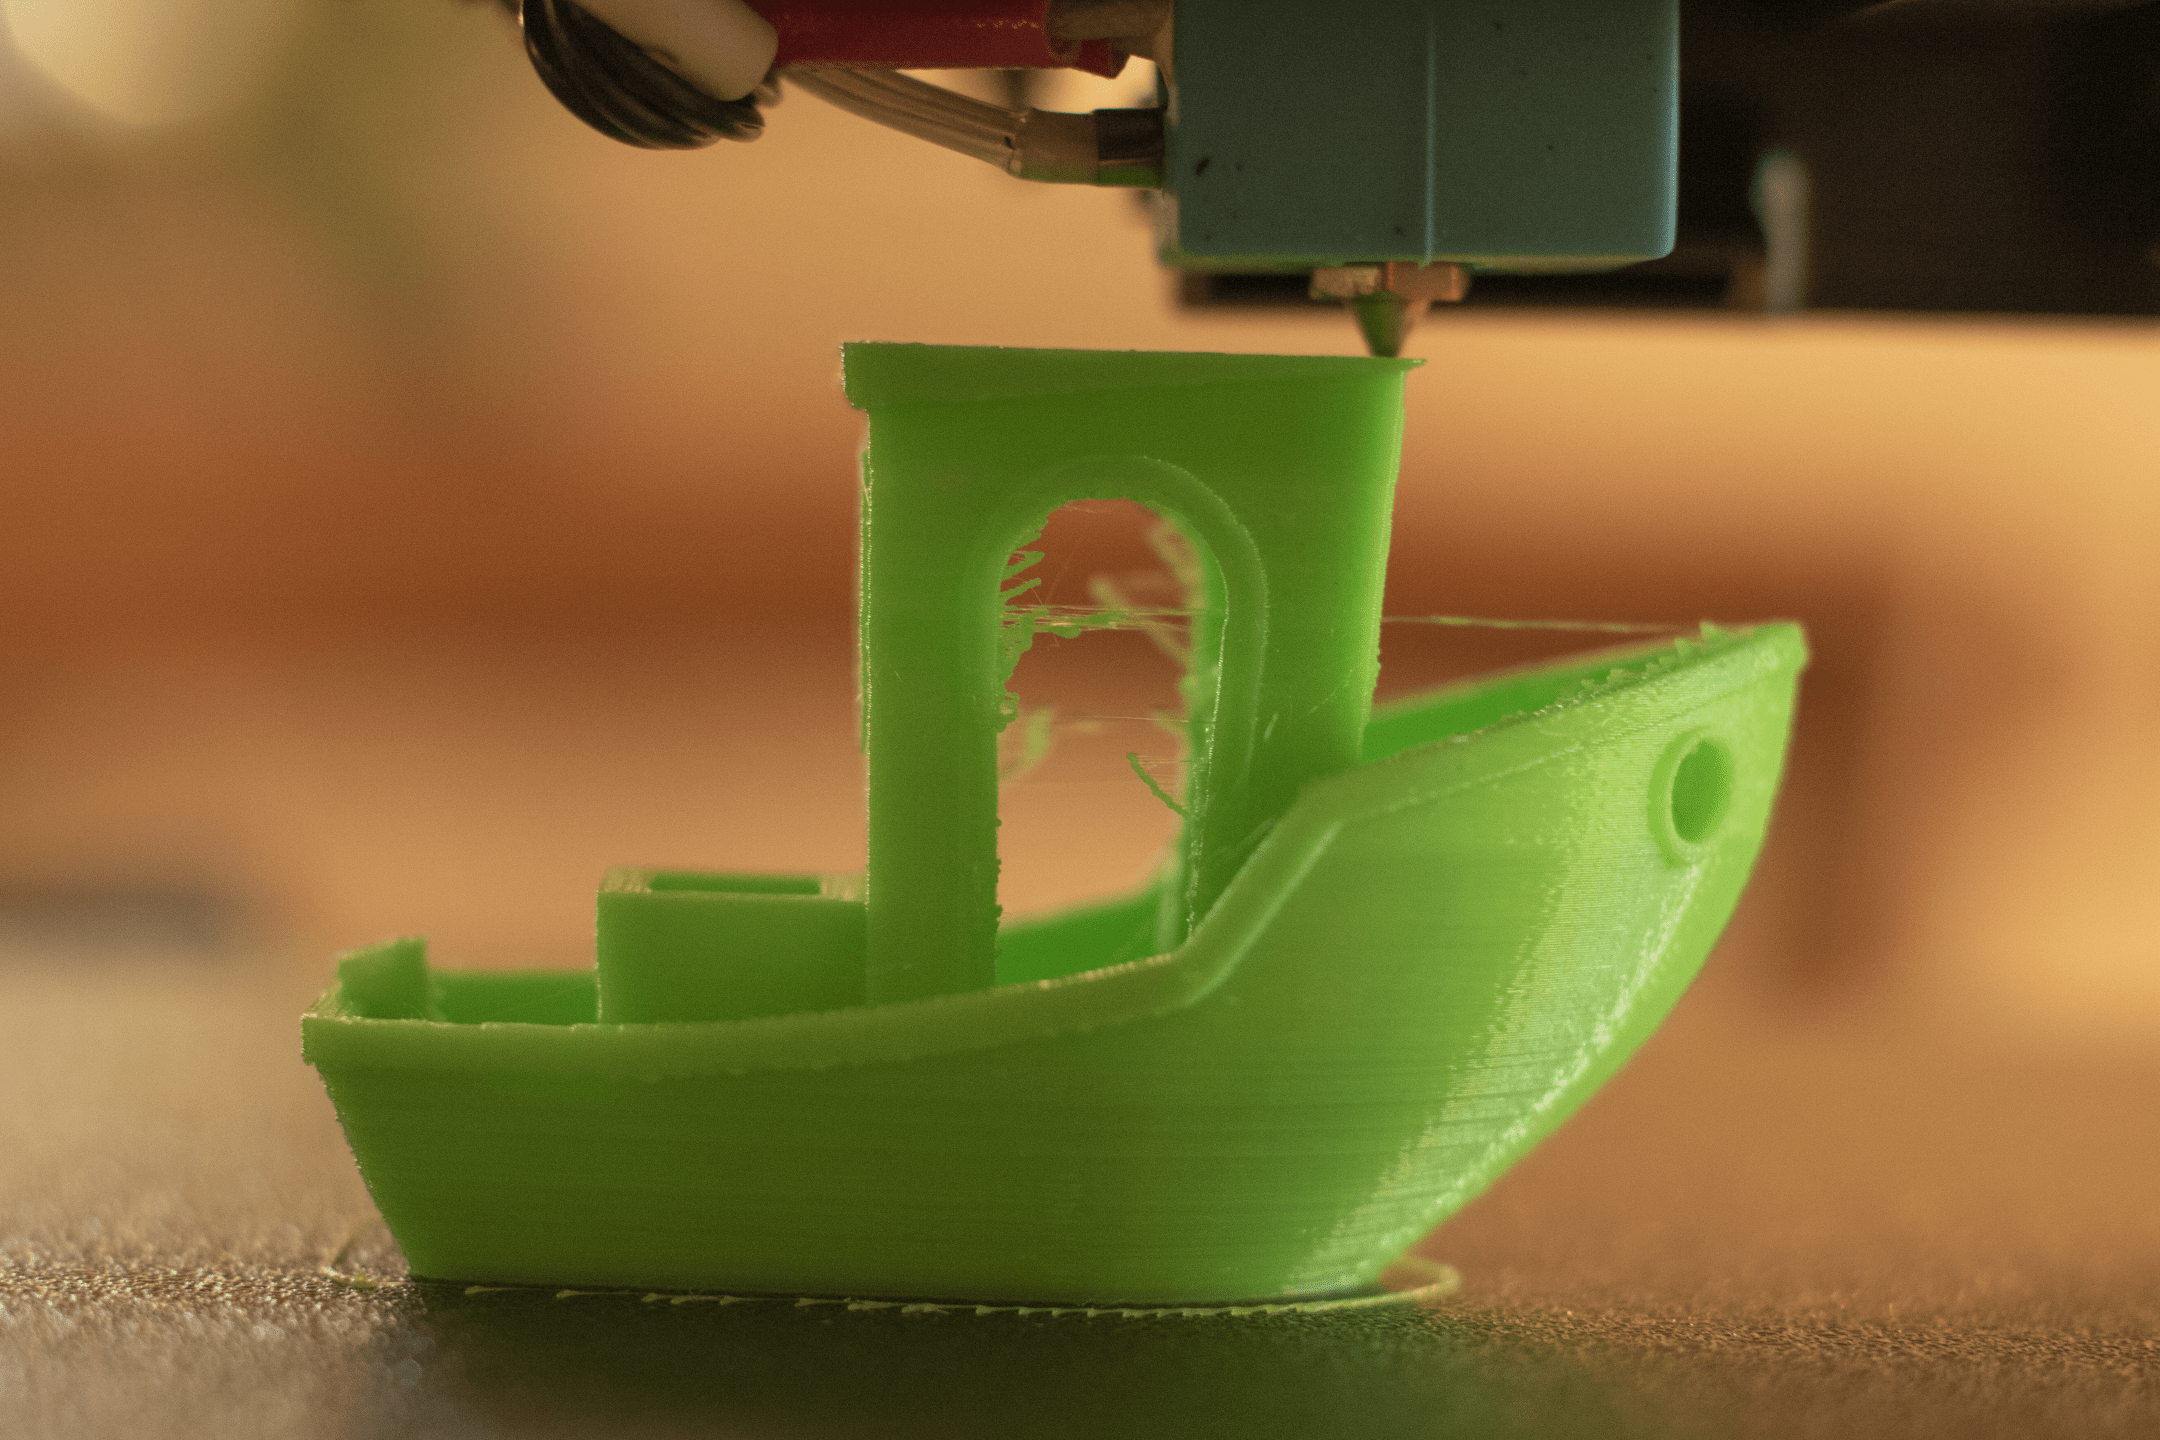
I also printed some 3D printer tests for both the Kobra and the Kobra Max to see how they and their recommended settings coped with different situations. The stringing test showed some interesting results. Though there was almost no stringing, a testament to the effective retraction, I did see some deformation in the layers of these pieces. These artefacts could be smoothed out with changes to settings in Cura. However, I wasn’t trying to get good prints; I wanted to see what the printers could do straight from the box.
The filament is fed directly into the top of the printhead, meaning the filament spool has to be directly above that. The Kobra has a surprisingly flexible spool holder attached to the top of the frame. When performing the little jumps or travels between these spindles in the stringing test, I witnessed the spool wobbling and bouncing on this precarious spool holder. The spool wasn’t going to fall, but I was worried about the vibrations this would create through the machine.
The profile has the jerk settings set relatively low, this is to try to help remove mechanical vibrations through the machine. Jerk is a maximum speed value the machine has to slow to before it can change direction, like a car slowing to turn a corner. As a consequence of this, it does mean that the printer overall has to move slower, increasing print time. But it does reduce vibrations which causes ghosting in a print.
LCD
The Kobra has a wonderful 4.3inch colour touch screen display, this makes setting up and preparing the machine nice and easy. Some controls on other 3D printers can be a bit fiddly and irritating. I found the interface to be intuitive and once again the user manual included a full menu breakdown of the UI, and a clear explanation of how to use the autolevelling system on the Kobra. I did, however, manage to lock-up the UI twice, probably via user error, though.
Anyclub LeviQ autolevelling
Similar to the Kobra Max the Kobra is equipped with an autolevelling feature. They both use different methods and sensors for levelling, and like everything, they come with different strengths and weaknesses.
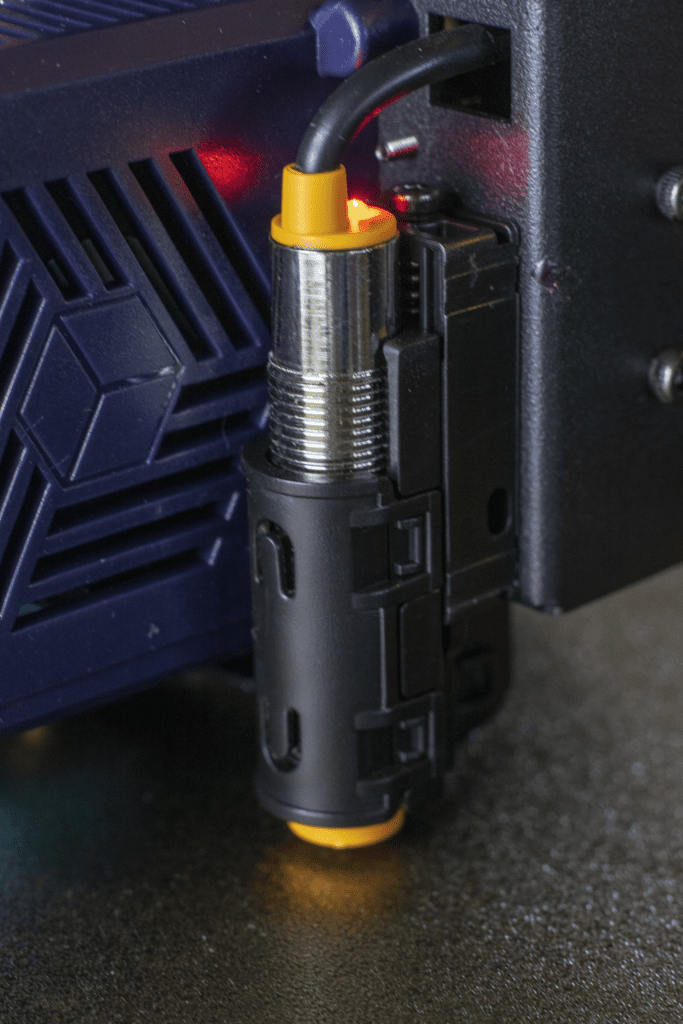
The Kobra uses an Inductive sensor which is a fancy bit of kit that creates a magnetic field and senses a change in the field from the presence of a conductive surface, like metal.
Inductive sensors are more precise and consistent than their mechanical and optical counterparts, as well as having a lower standard deviation. This is exactly what you want with an autolevelling sensor, especially on a beginner machine, because it’s something you can rely on, and it’s one less thing to worry about when wrapping your head around a printer.
The process of autolevelling is relatively simple, once initiated, the machine preheats and probes the print bed 16 times uniformly across the surface. The printer uses this information to create a profile of the surface and adjusts accordingly.
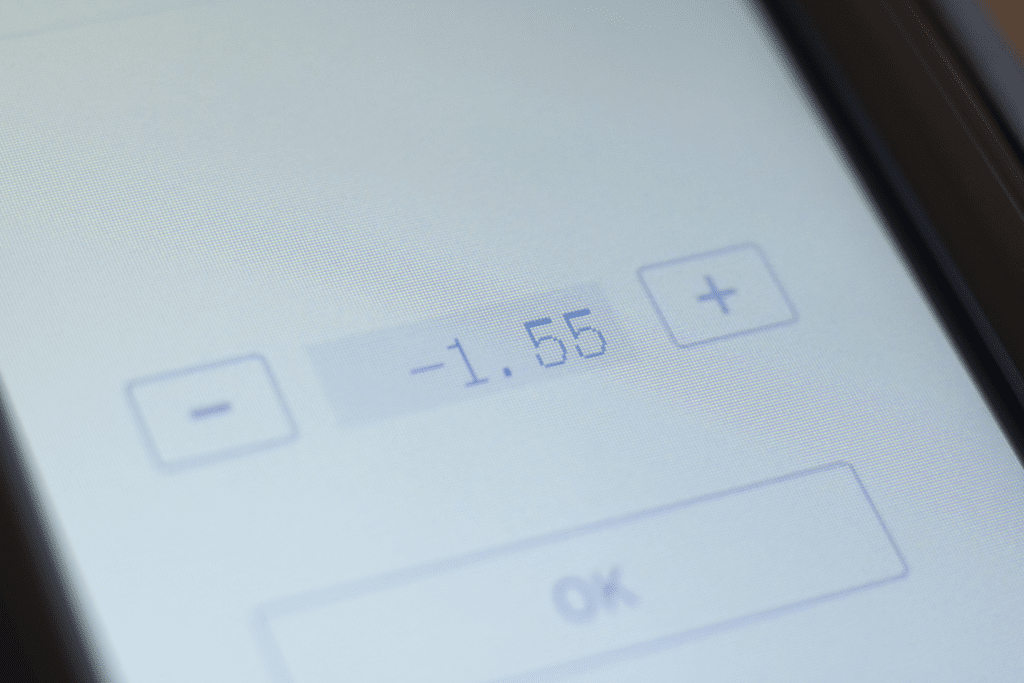
However, unlike the Kobra Max, the user must then adjust z-offset for the nozzle. This is because the sensor creates the profile about 1.5mm too high from the print surface, so it needs to be told where the bed actually is. In the autolevelling submenu, there is a setting to adjust the z-offset, which counts in increments of 0.05mm. As per the manual, the user places a piece of paper under the nozzle and decreases the height of the print head until there is slight friction from the nozzle on the paper. This is a similar method used on other machines to manually levelling a print surface, where the user adjusts the 4 corners via a wheel. However, on the Kobra, as it is on a digital system with set increments of 0.05mm, I found myself questioning was -1.45 too little or was -1.50 too much, I personally felt like I needed more precision. However, I came to the conclusion that because of the textured print surface choosing the lower offset wasn’t a bad idea.


Just remember to actually adjust the z-offset, I forgot to do it twice and have some lovely balls of spaghetti to remember it by.

Spring Steel
The Kobra dons a lovely textured spring steel surface, this is my first experience using a metal printing surface, and I was actually very impressed. The sprint steel sheet is firmly fixed in place by a large magnetic base below, but measuring at an average thickness of 0.51mm, the flexible wafer-thin base is easily peeled away for removal.
The Spring Steel surface is textured, and this is perhaps the best part of the printing platform. When the bed is preheated, it expands so then the tactile surface can grip the first layer of the print, as the soft filament molds to the surface. Once the print is complete and the print bed cools, it contracts, and the print becomes free of its own accord, leaving only the fingerprint of the steel surface in the bottom of the printed item. I had mixed feelings about this, as I was very happy for such a versatile surface, however, I was concerned that it would be too good at removing prints. This led me to check whether the print bed was allowed to cool during a pause, which it wasn’t, thankfully. The machine is also able to resume prints from a power outage, but I fear that feature may be redundant if the power issue is not resolved with haste as the partial print may have already evicted itself.
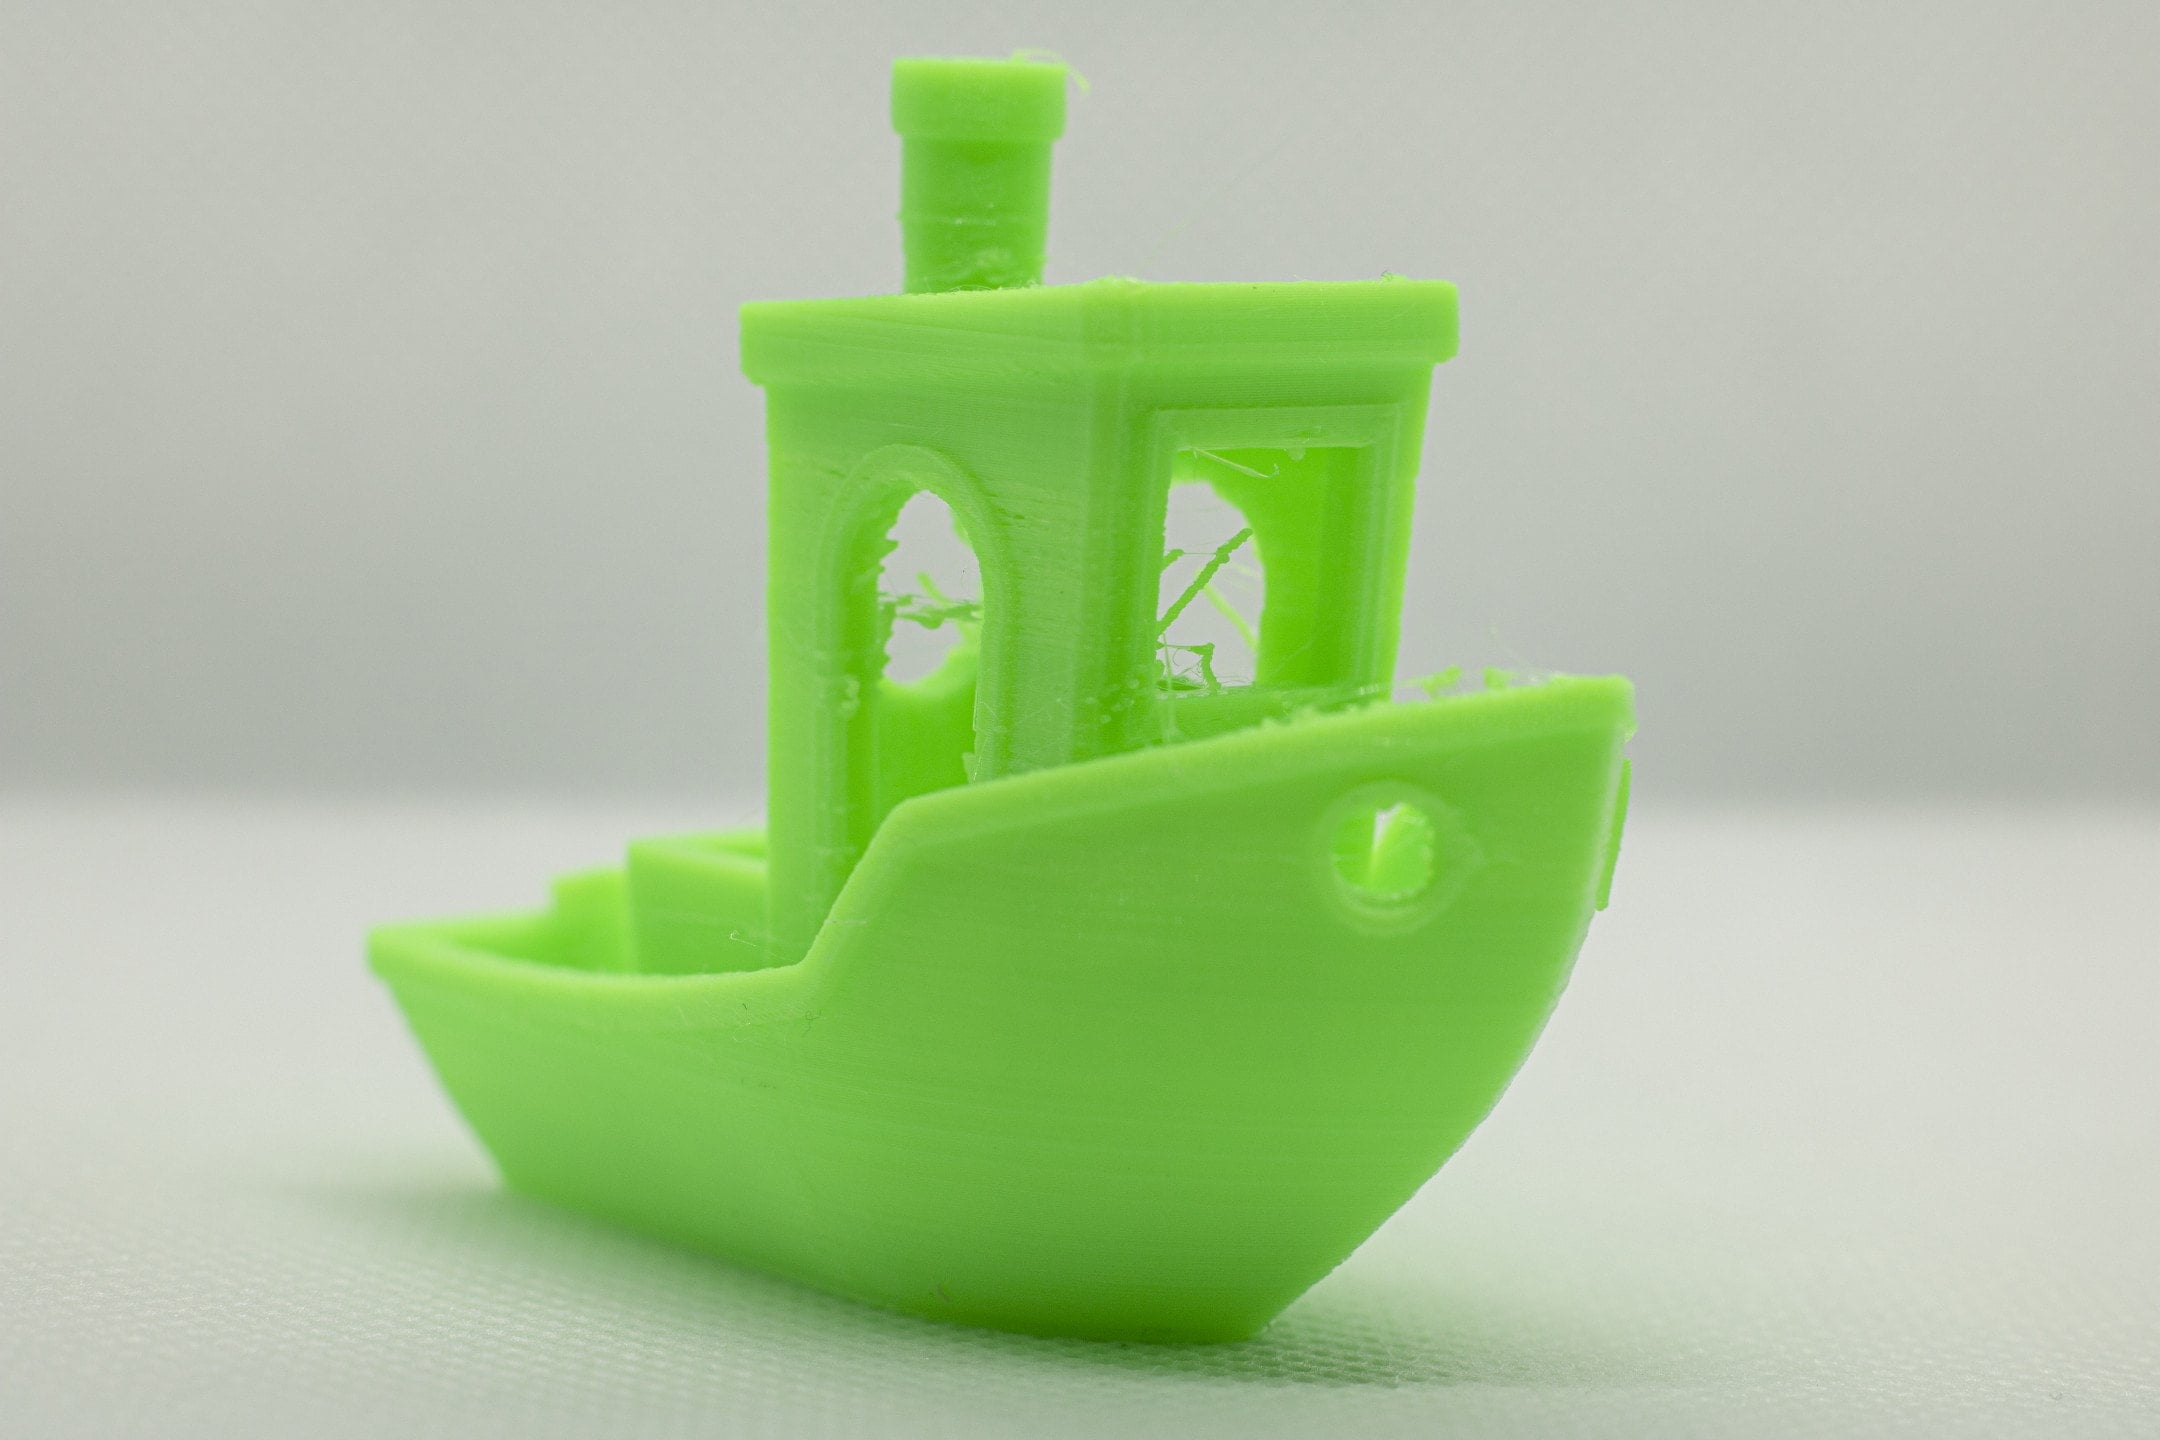
Test Print
Extras
Some nice little extras come with the Kobra, like the attention to detail in the user manual. A smaller pamphlet version is included in the box, but the full version is available on the microSD card. The manual includes diagrams of effective extrusion and an explanation to incorrect adhesion. They even go as far to tell you that the microSD card is actually inserted upside down in the printer. Furthermore, towards the back of the manual is a large troubleshooting section, giving helpful advice on an abundance of potential issues.
Price and Availability
No products found.
At the time of writing the estimated price for the Kobra is 279USD and the Kobra max is 699USD. Final pricing will be confirmed on the 28th of March when the printers launch.
Availability will be immediately after the launch.
The existing Anycubic Vyper, which is a well reviewed and affordable FDM 3D printer, currently retails for $349.00
Final Thoughts
The Kobra is a great machine with the potential to consistently create fantastic prints again and again. This machine is not perfect, but it’s not supposed to be, that’s why I think this is an excellent printer for beginners as it gives you something to sink your teeth into.
Anycubic Kobra FDM 3D Printer Review Rating
Summary
The Kobra is a great machine with the potential to consistently create fantastic prints again and again. This machine is not perfect, but it’s not supposed to be, that’s why I think this is an excellent printer for beginners as it gives you something to sink your teeth into.
Overall
85%-
Overall - 85%85%
Pros
- Affordable
- Spring steel bed
- Quiet
- Autolevelling
Cons
- Slow
- Small

I’m Ted Culshaw, a dedicated professional adept in the realm of film, photography, and 3D design. As the brother of the chief editor at Mighty Gadgets, James, I’ve had the privilege of overseeing the reviews for a wide range of 3D printers and creative products, covering everything from photography to lighting. My academic background in film and photography, coupled with a brief stint in the TV industry, has provided me with a rich foundation in these fields, which I leverage to consistently deliver high-quality reviews.
In my current role at my father’s bespoke kitchen business, Culshaw Kitchen Makers, I am responsible for creating many of the 3D designs and CNC cutting, thereby directly contributing to the beauty and functionality of our handmade kitchens. I take immense pride in my work, and I am constantly seeking ways to improve and innovate.
Aside from this, my passion for photography and filmography extends beyond my professional life. I regularly offer freelance services to local businesses, using my skills to help them elevate their visual presence and narrate their unique stories.
At heart, I am a passionate professional who believes in the transformative power of creative design and visual storytelling. Whether it’s through reviewing the latest 3D printer or crafting a bespoke kitchen design, I am committed to delivering excellence in all my endeavours.
You can find me on Instagram
Last update on 2024-04-24 / Affiliate links / Images from Amazon Product Advertising API