Laservii M1s Enclosed Laser Engraver Review
I have previously reviewed quite a few 3D printers, and last year I reviewed my first laser engraver, the LaserPecker LP5. While I had no previous experience with laser engravers, I enjoyed reviewing it and thought it was an excellent product that is relatively easy to use for someone getting into laser engraving.
While it was not expensive by laser engraver standards, at nearly £1900, it was certainly not cheap.
I have now been sent the Laservii M1s, which is a smaller enclosed laser engraver that is a bit more wallet-friendly, with models available for as low as £229 for the 12W model.
The two machines are not direct competitors. The LP5 is a galvo-based dual-laser unit with a fibre laser for metal work, while the M1s is a conventional gantry diode laser inside a plastic enclosure. What they have in common is that both are aimed at people who want to start engraving at home without building a machine from a kit. The M1s does this for a fraction of the price, and I was interested to see how many compromises that involves.
Laservii sent me the 12W model along with two optional accessories, the M1s Cellular Kit and the air assist pump.
Laservii M1s Enclosed Laser Engraver: 12W vs 24W vs IR-2W Specification
| Specification | M1s 12W | M1s 24W | M1s IR 2W |
|---|---|---|---|
| Processing Capability | |||
| Best for | Detailed engraving and the largest work area | Higher output for non-metal projects | Fine marking on metals and acrylic |
| Laser module | 12W blue diode | 24W blue diode | 2W infrared |
| Working area | 305 x 205 mm | 285 x 205 mm | 285 x 205 mm |
| Supported workpiece height | 0-50 mm | 0-50 mm | 0-50 mm |
| Maximum engraving speed | 36,000 mm/min | 36,000 mm/min | 36,000 mm/min |
| Compatible materials | Plywood, MDF, solid wood, paper, kraft paper, coated metal, leather, selected laser-safe plastics and bamboo | Plywood, MDF, solid wood, paper, kraft paper, coated metal, leather, selected laser-safe plastics and bamboo | Stainless steel, titanium, aluminium, copper, brass, opaque acrylic |
| Accuracy and Laser | |||
| Wavelength | 450 ±5 nm | 450 ±5 nm | 1064 ±1 nm |
| Laser output | 12W +10% (continuous) | 24W +10% (continuous) | 2W +10% |
| X/Y positioning accuracy | ±0.1 mm | ±0.1 mm | ±0.1 mm |
| Spot shape | Near-square | Rectangular array of spots | Circular |
| Spot size | 0.05 x 0.08 mm | 0.08 x 0.1 mm | 45 μm or less |
| Focus distance | 21 ±0.5 mm | 21 ±0.5 mm | 21 ±0.5 mm |
| Connectivity and Software | |||
| Firmware | V1.0.23 (20260130) | V1.0.24 (20260130) | V1.0.24 (20260130) |
| Compatible software | Wecarver, LaserMaker Space, LightBurn, LaserGRBL | Wecarver, LaserMaker Space, LightBurn, LaserGRBL | Wecarver, LaserMaker Space, LightBurn, LaserGRBL |
| File formats | .NC, .Gcode, .GC | .NC, .Gcode, .GC | .NC, .Gcode, .GC |
| Connectivity | Wi-Fi, USB data | Wi-Fi, USB data | Wi-Fi, USB data |
| Storage | microSD (TF card) | microSD (TF card) | microSD (TF card) |
| Bluetooth / USB flash drive | No / No | No / No | No / No |
| Machine and Power | |||
| Dimensions | 485 x 375 x 200 mm | 485 x 375 x 200 mm | 485 x 375 x 200 mm |
| Body material | ABS + PC | ABS + PC | ABS + PC |
| Colour | White / amber | White / amber | White / amber |
| Control board input | 24V | 24V | 24V |
| Rated power | 72W | 120W | 96W |
| Power adapter | 100-240V AC, 24V 3A output | 100-240V AC, 24V 5A output | 100-240V AC, 24V 4A output |
| Net weight | 7.0 kg | 7.2 kg | 7.2 kg |
| Package and Accessories | |||
| Package dimensions | 532 x 425 x 255 mm | 532 x 425 x 255 mm | 532 x 425 x 255 mm |
| Gross weight | 12.0 kg | 12.2 kg | 12.2 kg |
| Optional accessories | Risers, air assist, camera, TR3 rotary | Risers, air assist, camera, TR3 rotary | Risers, air assist, camera, TR3 rotary |
| Safety and Compliance | |||
| Certifications | CE-MD, CE-RED NB, FCC SDoC, FCC ID, EN 60825-1, FDA, UL 62368-1, CAN/CSA 62368-1 | As 12W | As 12W |
Which Model Should You Choose?
All three versions share the same enclosure, motion system and controller. The only real difference is the laser module, and the right choice depends on the materials you want to work with.
The 12W blue diode is the entry-level option and the one I have been testing. It has the finest spot of the two diode modules at 0.05 x 0.08 mm, which favours detailed engraving, and it has the largest working area. The 24W module combines multiple diodes to double the output, which mainly benefits cutting speed and the thickness of wood you can get through. The trade-off is a slightly larger spot and 20 mm less travel on the X axis.
The IR 2W model is a different tool altogether. A 450 nm blue diode cannot usefully mark bare metal, and it passes straight through clear acrylic. The 1064 nm infrared module is designed for fine marking on stainless steel, aluminium, brass and similar metals, but with only 2W of output it is not suited to cutting wood. At more than double the price of the 12W model, it only makes sense if metal marking is your main use.
One thing I would have liked is the option to buy the modules separately as upgrades. The design looks modular, with a single screw and one cable holding the module in place, so a 12W owner should be able to move to a different module later. At the time of writing, Laservii sells the M1s as three separate machines.
Unboxing
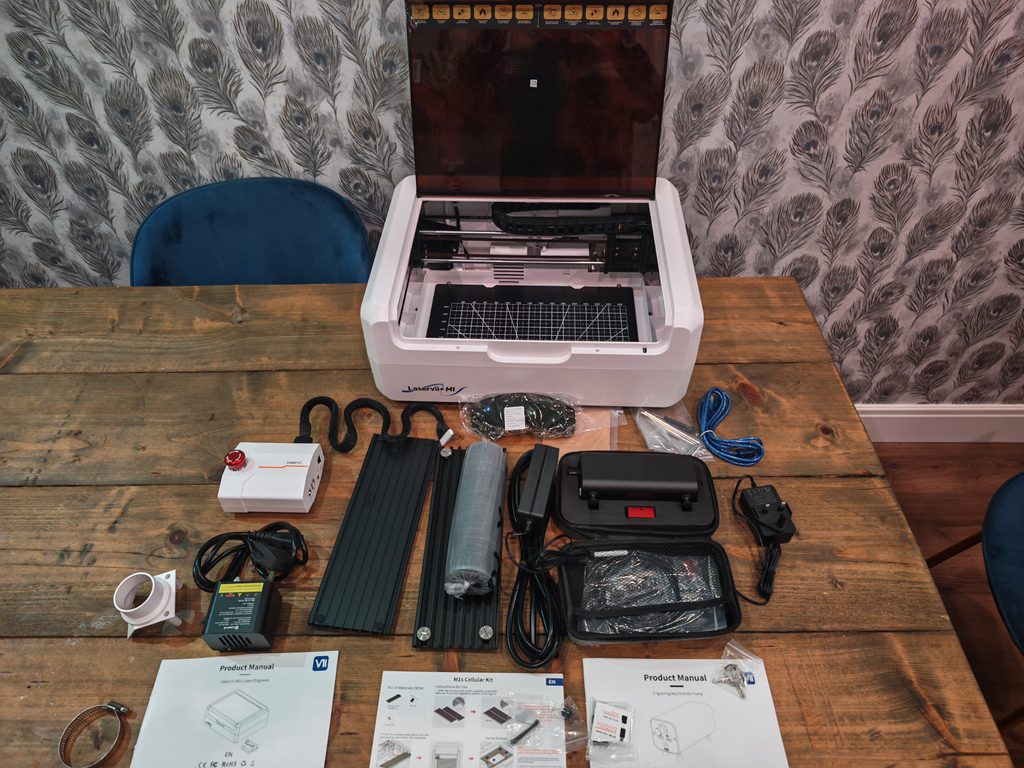
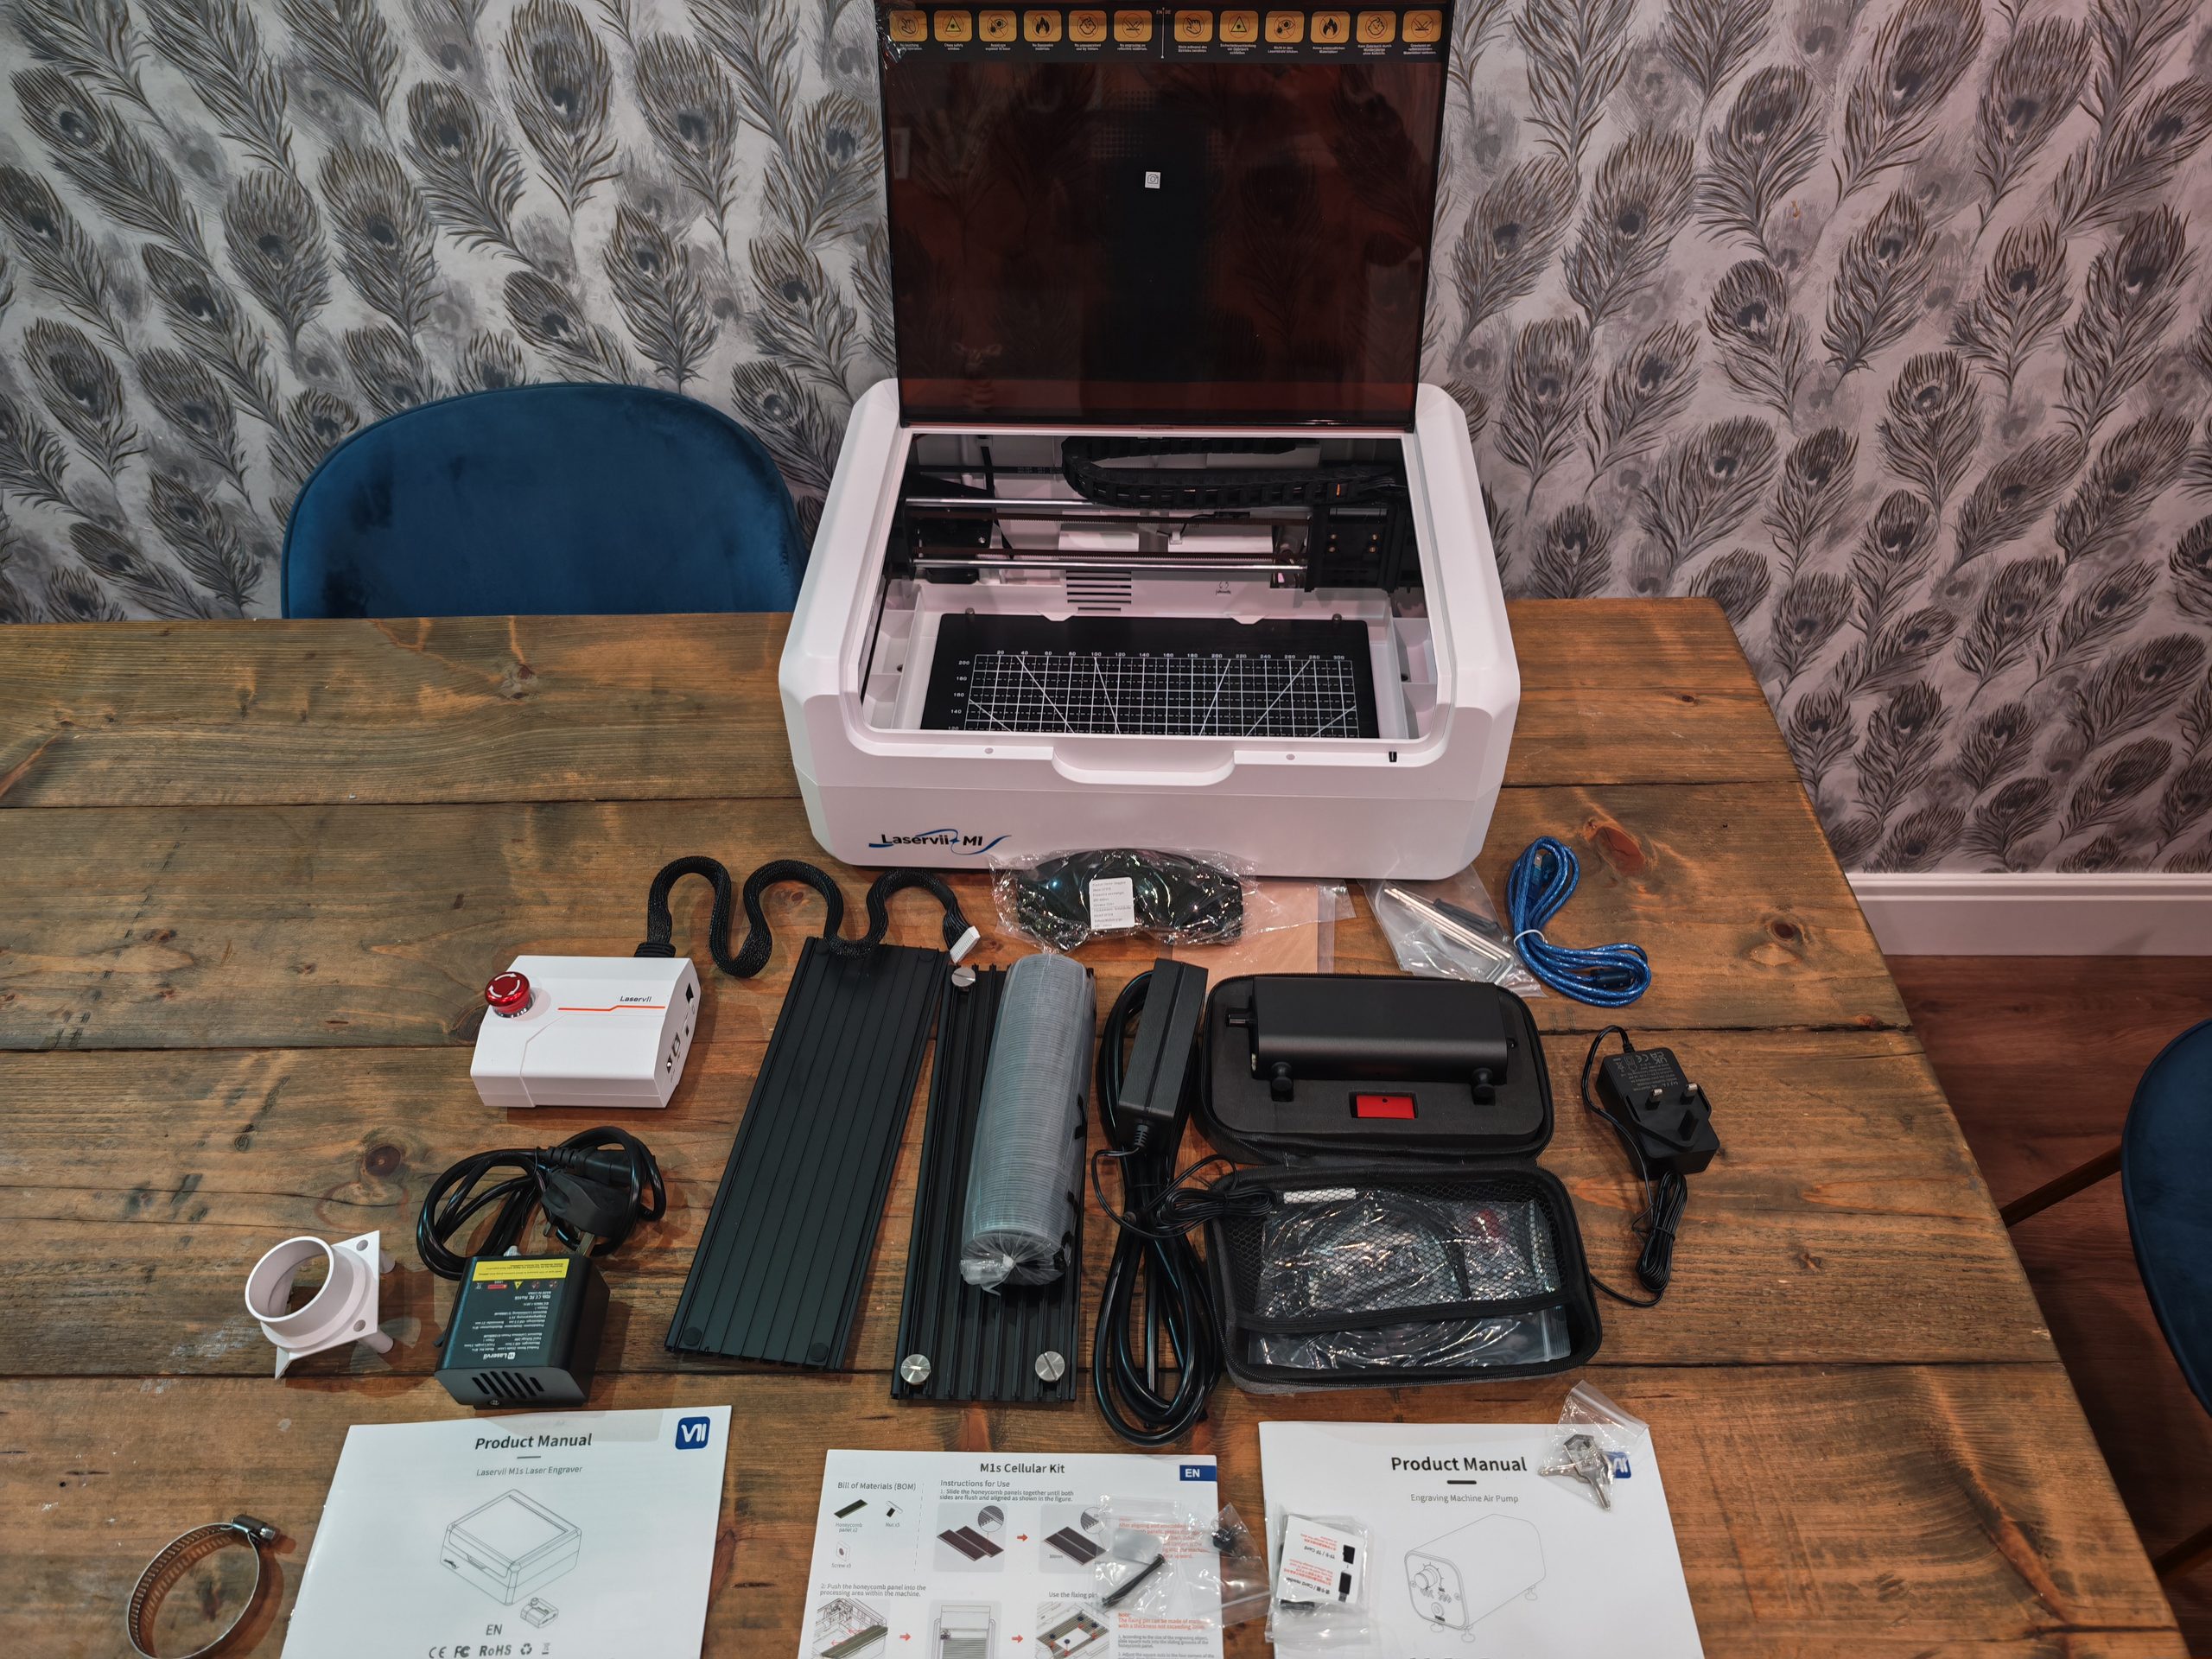
The M1s arrives in a box measuring 532 x 425 x 255 mm with a gross weight of around 12 kg, so it is manageable for one person to carry. The machine itself weighs 7 kg and measures 485 x 375 x 200 mm, which is roughly the footprint of a large desktop inkjet printer. It fits comfortably on a standard desk, which is one of the main selling points of this machine compared to open-frame gantry lasers.
Most of the accessories are packed inside the enclosure, under the hinged amber lid. The standard package includes:
- The M1s enclosure with the gantry, belts, limit switches and cable chain pre-fitted
- The 12W blue diode laser module
- An external controller box with an emergency stop button
- A 24V power adapter and UK mains cable
- A USB-A to USB-B cable
- An exhaust hose, exhaust flange and Jubilee clip
- Laser safety goggles
- Kraft paper test panels and aluminium shims
- A microSD card, safety keys, Allen keys and manuals
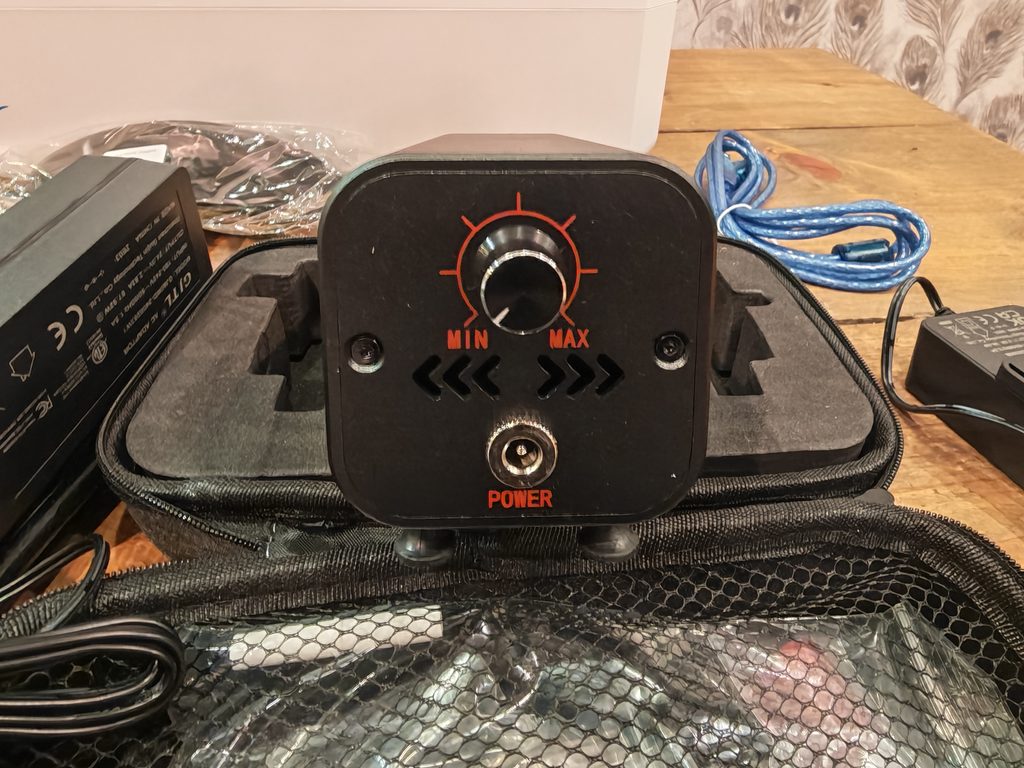
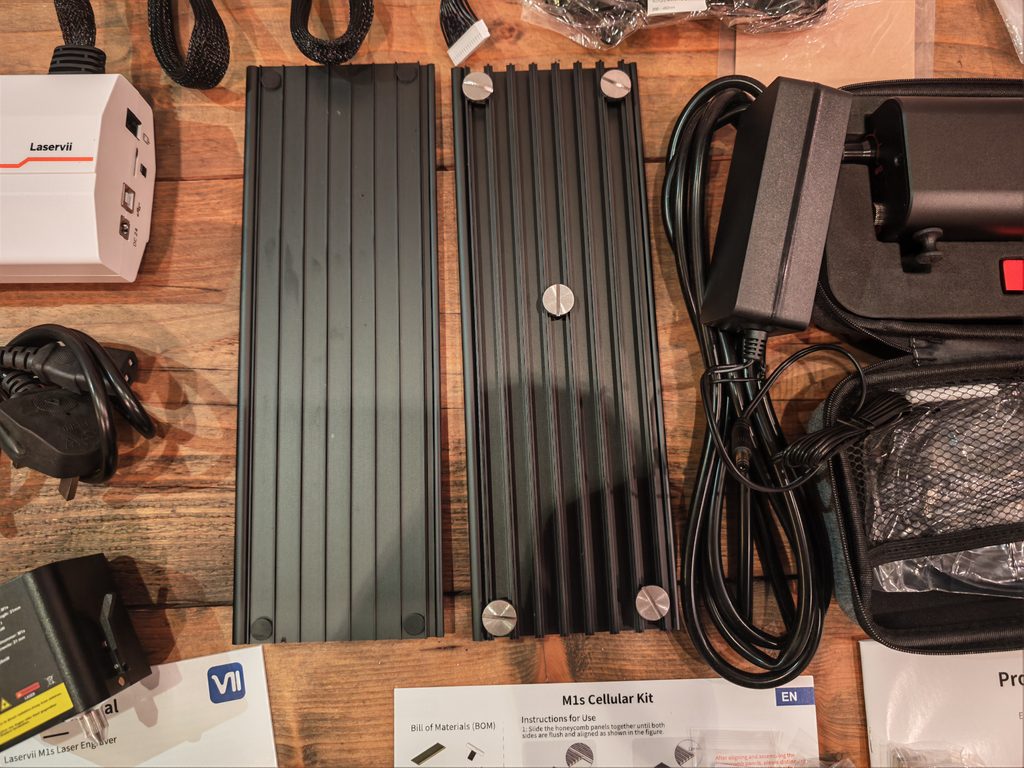
My review unit also came with two optional extras: the M1s Cellular Kit and the Laservii air assist pump. The Cellular Kit is two slatted aluminium panels that slide together and sit on the bed with locating pins. The air pump comes in its own zip carry case with a separate UK power adapter and a dial on the front to adjust the airflow. Neither of these is included as standard, which I will come back to below.
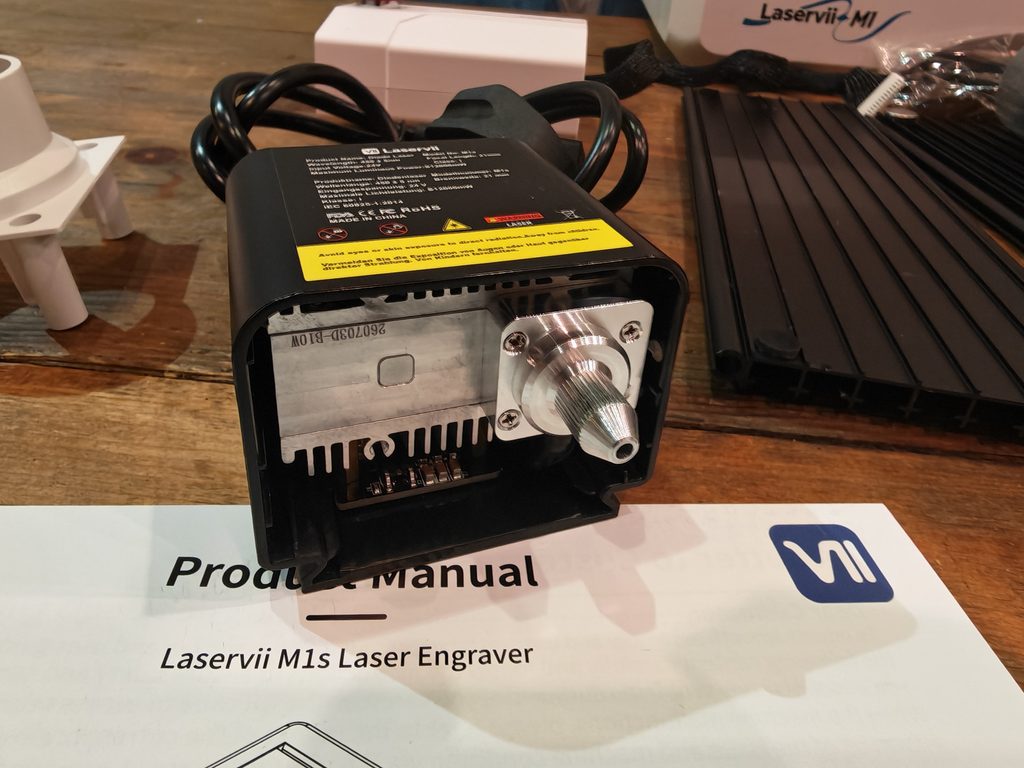
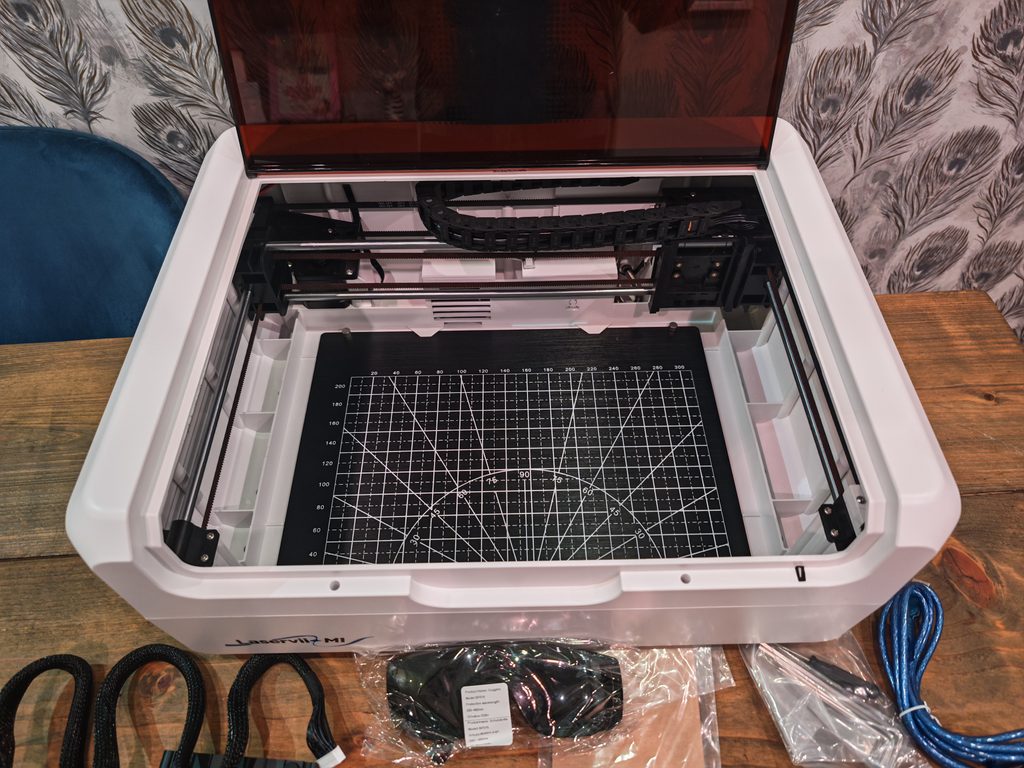
The enclosure is made from ABS and polycarbonate. It feels light and a little hollow, which is what I would expect at this price, but the panels line up well and the internal cabling is tidy, with everything routed through a cable chain at the rear. There is an LED strip down each side of the interior, which lights the bed well enough to see what the laser is doing through the amber lid.
Set Up
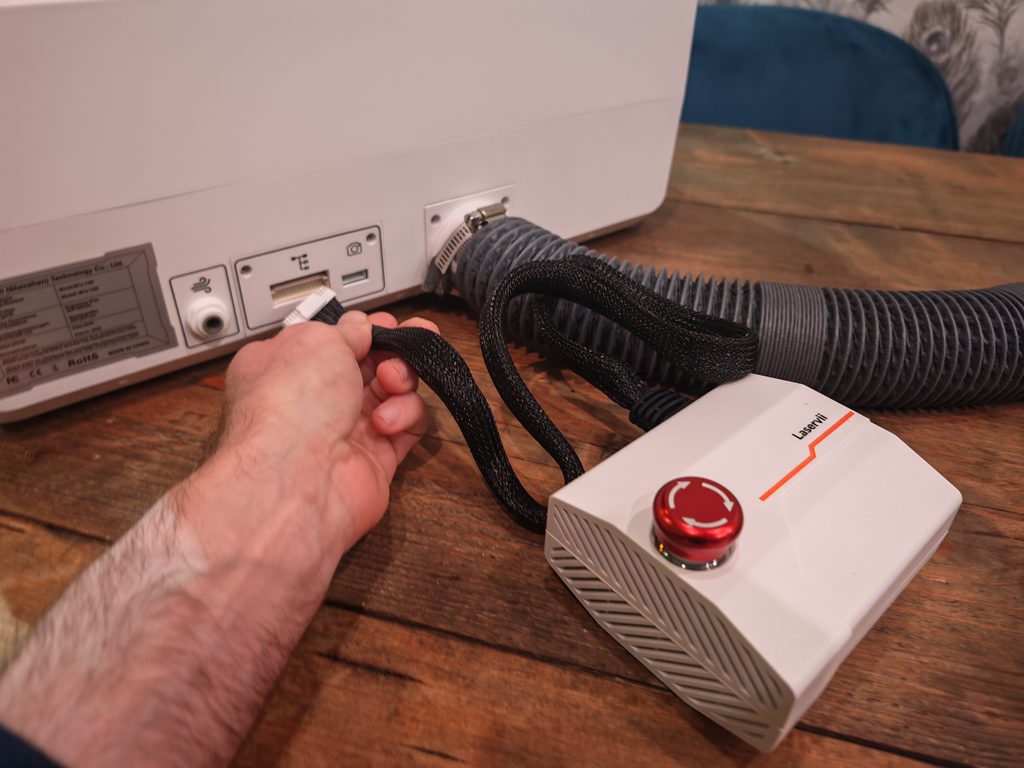
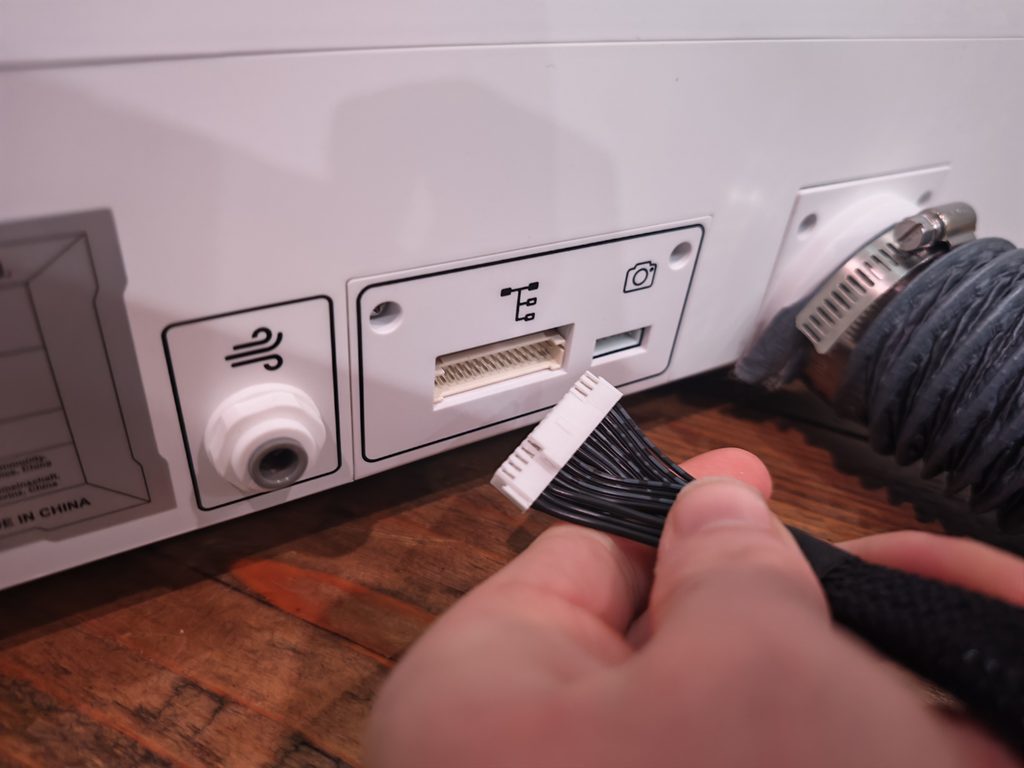
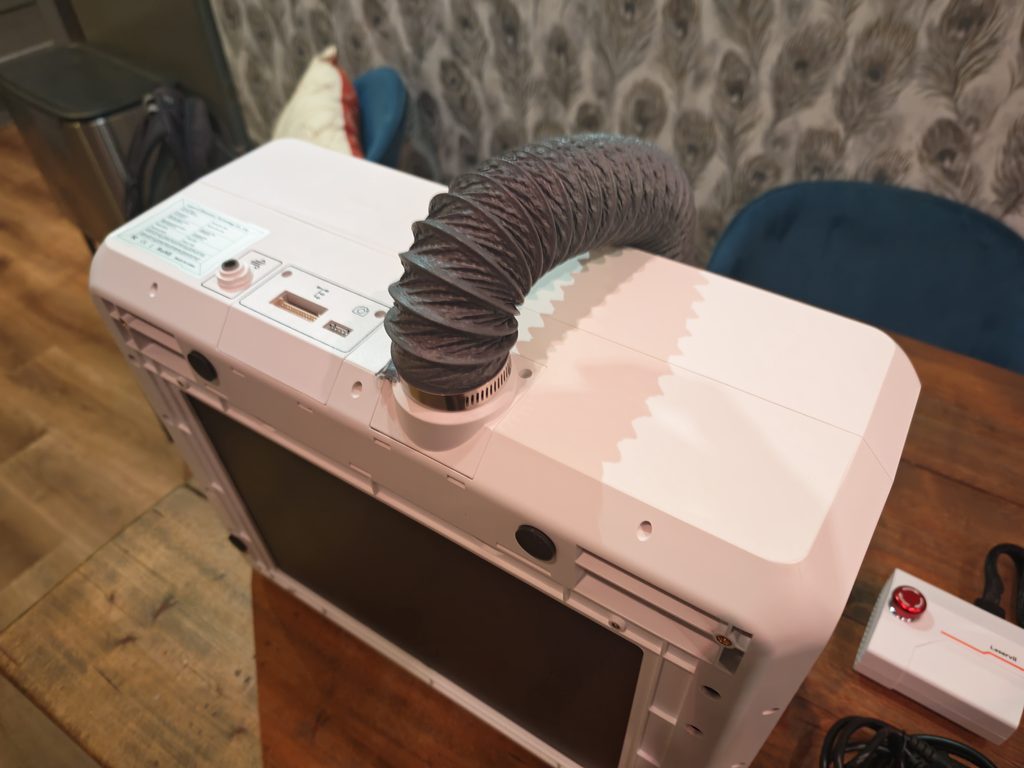
Laservii ships the M1s largely pre-assembled, and setting it up is far simpler than building an open-frame diode laser from scratch. The process involves a handful of steps:
- Slide the laser module down onto the carriage, tighten the retaining screw on the side and plug the cable from the cable chain into the connector on top of the module.
- Fix the exhaust flange to the rear of the machine with the two supplied screws, then attach the exhaust hose and secure it with the Jubilee clip.
- Connect the controller box to the multi-pin port on the rear of the machine using the attached braided cable.
- If you are using the air assist pump, push the air line into the push-fit connector on the rear.
- Plug the power adapter and USB cable into the controller box, insert the key and twist the emergency stop to release it.
It took me around 15 minutes to go from a sealed box to a machine that was powered on and homed.
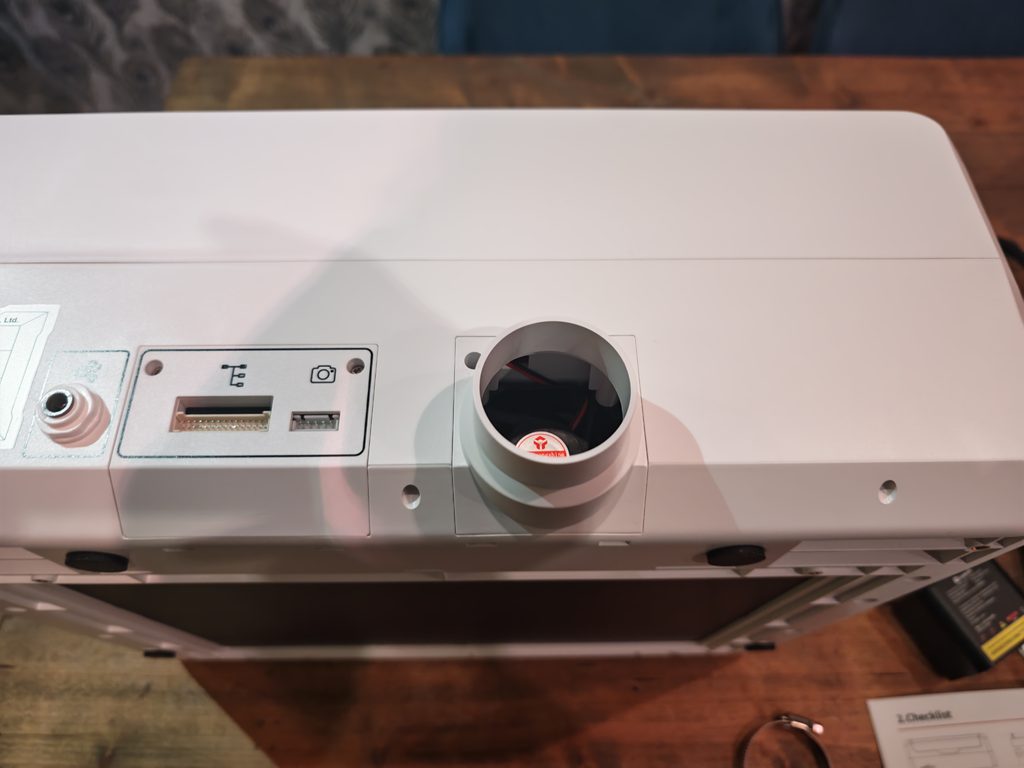
The external controller box is the most unusual part of the design. The rear of the enclosure only has the air assist inlet, the main multi-pin connector, a port for the optional camera module and the exhaust outlet. Power, USB and the microSD card slot are all on the controller box instead, along with the emergency stop. It seemed like an odd decision at first, but it does keep the cabling tidy and means the emergency stop can sit wherever is most convenient on your desk. The downside is that it is another box to find space for, and its placement is limited by the length of the braided cable.
Once powered on, the M1s homes itself using the limit switches on the X and Y axes. There is a small microswitch on the lid that pauses the job and cuts the laser if the lid is opened. This is a sensible safety feature, but it is easy to miss, and if the lid is not fully closed the job will stop shortly after starting. This caught me out on my first attempt.
Focusing is manual, using a magnetic flip-down leg on the side of the module. You drop the leg down, loosen the thumb nut, lower the module until the leg touches the surface of the material, tighten the nut and flip the leg back up. This sets the 21 mm focal distance. It only takes a few seconds, but it is more hands-on than the LaserPecker LP5 I reviewed last year, and you will need to repeat it whenever you change material thickness or add the slatted bed.
The work bed is a black aluminium plate with a printed grid and angle guides, which is useful for lining up workpieces. The 12W model has a working area of 305 x 205 mm, and the bed supports workpieces up to 50 mm tall. Optional risers are available if you need to engrave taller objects or want to use the rotary attachment.
My main criticism of the setup is that the standard kit does not include a slatted or honeycomb bed or air assist. Neither is essential for engraving, but if you plan to do any cutting, both make a noticeable difference to edge quality and smoke build-up. The bed is also an unusual size, so you are unlikely to find a third-party honeycomb panel that drops straight in. If you intend to cut, I would budget for the Cellular Kit and air pump at the time of purchase rather than adding them later.
Software
Software is where the M1s shows its budget positioning the most. The machine runs open GRBL firmware, which is good news for compatibility, but there is no polished first-party desktop application that walks you through the first job in the way that xTool or LaserPecker manage. Laservii lists four compatible programs: LightBurn, LaserGRBL, LaserMaker Space and the Wecarver mobile app.
The supplied microSD card contains the CH340 USB driver, LaserGRBL, firmware files and a LightBurn configuration file. I would copy these to your computer before doing anything else, because the card also needs to live in the controller box if you want to use Wi-Fi.
LaserGRBL
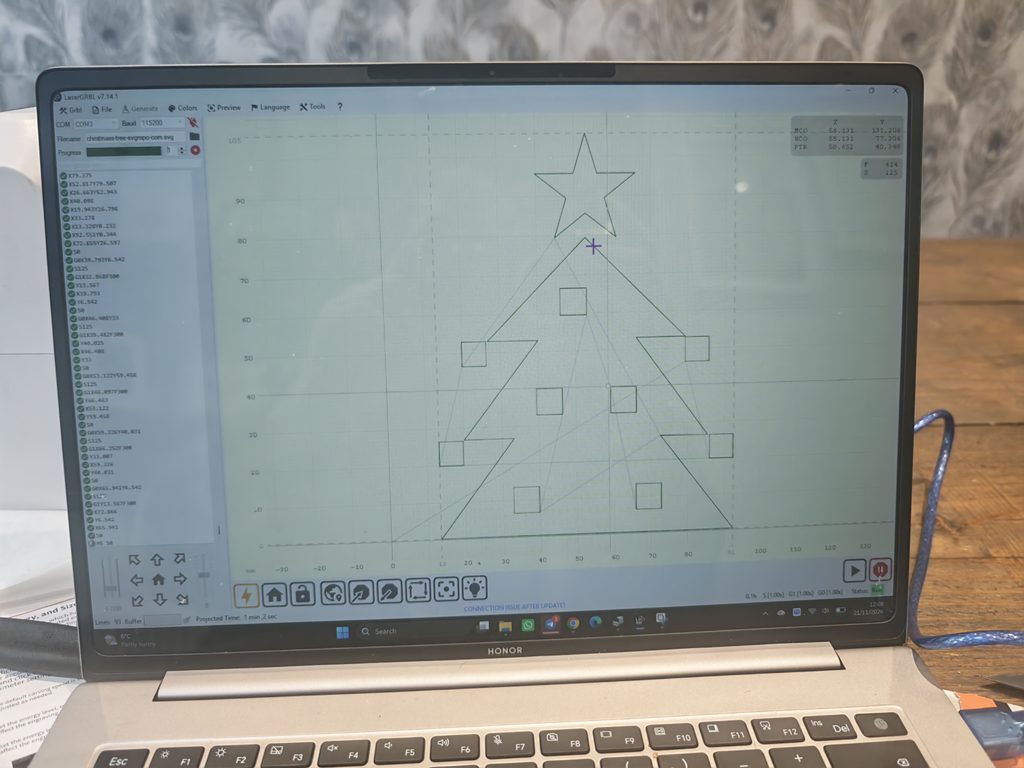
I used LaserGRBL for my testing, as it is free and included on the card. It is Windows only and connects over USB once you have installed the CH340 driver. On my laptop the M1s appeared on COM3, and with the baud rate set to 115200 it connected without any problems. Homing, jogging and framing all worked as expected from the buttons along the bottom of the window.
The workflow is basic but quick. You open a file, and for an SVG it asks for the engraving speed and the laser power as an S value, where S1000 is full power. It then converts the file to G-code, shows the toolpath on a grid with the dimensions in millimetres and gives a projected time for the job. The Christmas designs I used for testing were simple SVG icons, and each one went from download to a finished engraving in a few minutes.
There are limitations. LaserGRBL has almost no design tools, so you cannot add text or combine shapes, and artwork needs to be prepared elsewhere. SVG files are traced as outlines only. If you want filled areas or photos, you need to import the artwork as an image and use the raster engraving mode instead. There are also no material presets for the M1s, so finding the right speed and power is down to trial and error or the built-in test pattern generator. For a beginner, this is less approachable than it could be.
LightBurn
LightBurn is the other main option and the one most laser owners end up using. It does not detect the M1s automatically, so you need to import the device profile from the microSD card or add the machine manually as a GRBL device with a 305 x 205 mm working area. It runs on Windows, macOS and Linux, and adds proper layout tools, text, layers with separate settings and better image handling.
The catch is that LightBurn is paid software. There is a 30-day trial, after which you need a licence, and that is an extra cost on top of a £229 machine. LaserGRBL was enough for the simple line art I have been engraving, but I would expect anyone doing more involved projects to want LightBurn fairly quickly.
Wi-Fi and Standalone Use
The M1s can create its own Wi-Fi hotspot, which allows control from a phone or tablet. This is a direct connection to the machine rather than through your home network, so your device loses internet access while it is connected. I found it fine for starting a job that was already saved to the microSD card, but I would not want to do any design work this way. There is no Bluetooth, and no support for USB flash drives.
You can also load G-code files (.NC, .Gcode or .GC) onto the microSD card and run them without a computer attached. This is handy for repeat jobs, although there is no screen on the machine, so you still need the app to select the file.
Overall, the software experience is functional rather than friendly. Anyone who has used a GRBL laser or a 3D printer will be comfortable. A complete beginner should expect to spend some time on drivers and test pieces before producing anything worth keeping.
In Use
Engraving
Engraving is the M1s 12W’s strongest area. The fine spot produces thin, sharp lines, and I was pleased with how dark the results were on wood without having to burn deep into the surface.
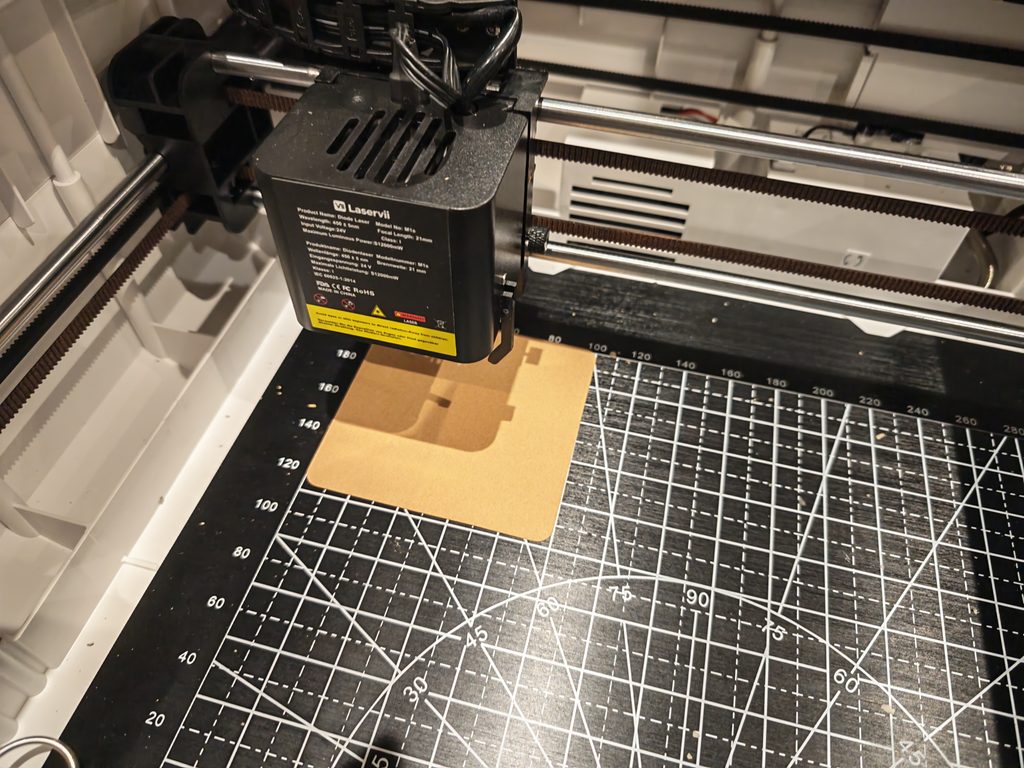
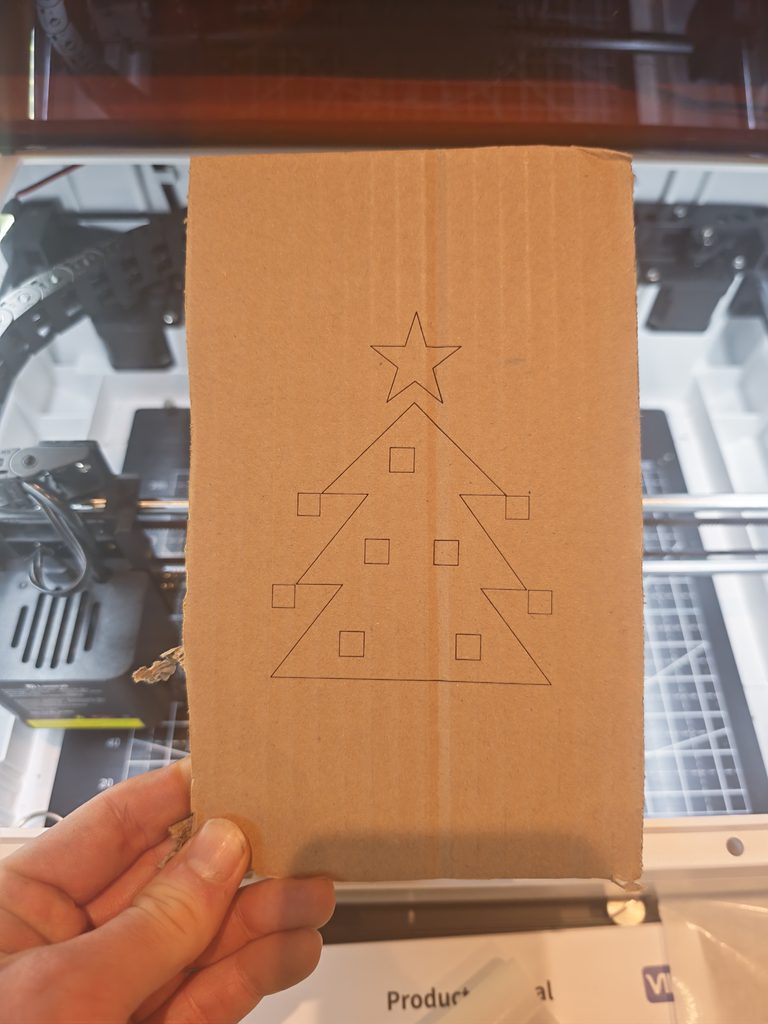
My first test was a Christmas tree outline on a piece of corrugated cardboard, which is a good way to check the machine without wasting material. I ran it at 300 mm/min with the power set to S125, which is 12.5%. The design measured roughly 80 x 105 mm and LaserGRBL projected a time of just over one minute. The result was a clean, thin dark line with sharp corners on the star and squares, and consistent line weight across the corrugations. Even at this low power there was no sign of the laser burning through the top layer of the card, although I would not go much higher on a material this thin.

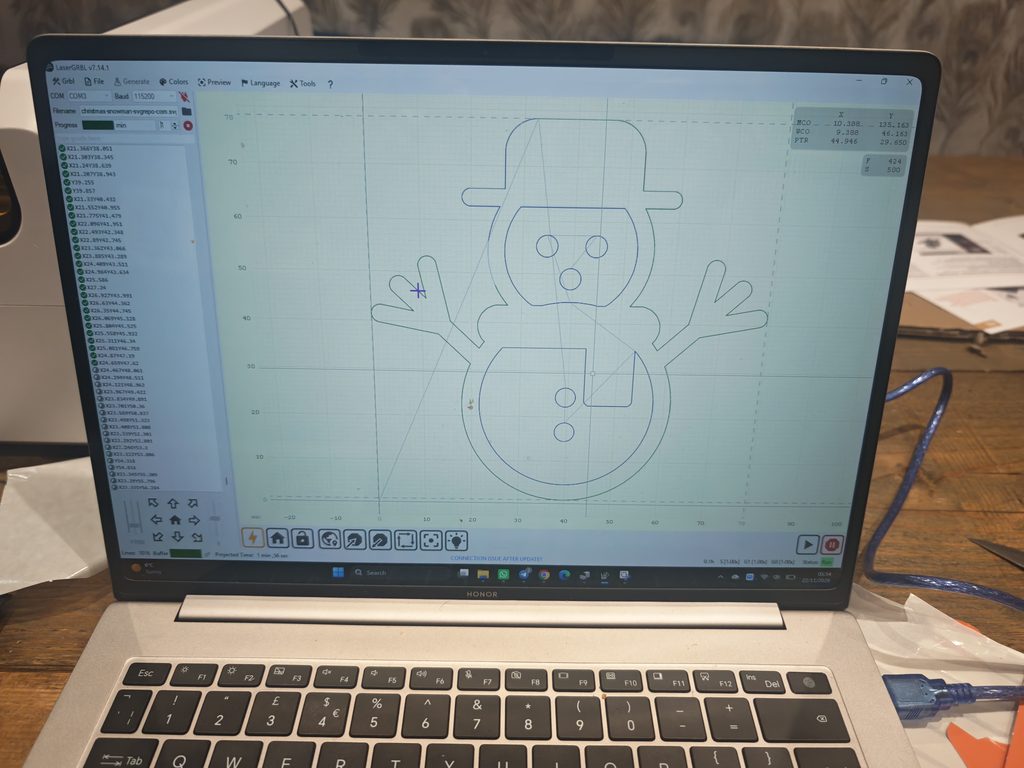
I then engraved a snowman design on a piece of hardwood. I kept the speed at 300 mm/min and increased the power to S500, or 50%. This design was around 80 x 78 mm and took just under two minutes. The lines came out dark and crisp, with very little scorching either side of them, and the line weight stayed even as it crossed the grain. The small circles for the eyes and buttons are properly round and close up neatly where the start and end points meet, which suggests there is no meaningful backlash in the belts. For a £229 machine, I think the quality of the line work is very good.
Both of these were vector outlines at a slow speed, which plays to the strengths of a diode laser. The M1s is rated for a maximum speed of 36,000 mm/min, but that figure applies to fast raster engraving at light power. For dark lines on wood you will be running far below it, and I would treat the maximum as a ceiling rather than a working speed. One quirk I noticed is that LaserGRBL’s live feed rate readout showed 424 rather than the 300 mm/min I had set. The job times matched the lower figure, so this appears to be down to how the firmware reports speed rather than the machine running faster than instructed.
Beyond wood and card, the blue diode module is suited to a few other materials:
- Cork and leather engrave at low power and are cheap materials to practise on.
- Slate takes a light grey mark that works well for coasters and signs. It needs more power than wood.
- Kraft paper and thin card mark easily at low power. Too much power will burn straight through.
- Anodised aluminium and painted metal can be marked, because the laser removes the coating. Bare metal is not possible with the blue diode.
The lack of a camera means positioning is done by framing. The laser traces the outline of the job at low power so you can check it sits where you want it on the workpiece. With the printed grid on the bed, this works well enough for flat items. It is slower than the camera-based placement on more expensive machines, and it becomes fiddly with small or irregular objects. Laservii does sell a camera kit that connects to the rear port, but I have not tested it.
One point on accuracy. Laservii’s marketing copy mentions 0.01 mm precision, while the specification table lists X/Y positioning accuracy of ±0.1 mm. The latter is the figure I would go by. Judging by how cleanly the outlines closed in my tests, it is more than adequate for craft work.
Cutting
Cutting is possible with the 12W module, but expectations need to be realistic. Thin, soft material is easy. A thin sheet of balsa cut through in a single pass at 600 mm/min and 100% power, and there was clearly room to increase the speed or lower the power.
3 mm birch plywood is a more demanding test because of the glue layers. The M1s got through it, but it needed a much slower pass, and this is where the air assist pump and the Cellular Kit made the biggest difference. Without air assist, the edges were heavily charred and there was visible smoke staining on the top surface. With the pump running and the material raised on the slats, the edges were cleaner, the kerf was narrower and the underside had far less scorching. Thicker plywood needed multiple passes, and I would not buy the 12W model if cutting material above 5 mm is a regular requirement. That is what the 24W version is for.
Clear acrylic cannot be cut with a blue diode laser, as the beam passes through it. Dark opaque acrylic will cut, but slowly. I would also avoid PVC, vinyl, polycarbonate and ABS in any laser, because of the fumes they produce.
Smoke Extraction and Safety
For ventilation, the M1s uses a small built-in 24V brushless fan mounted behind the exhaust outlet. There is no filter, so the hose needs to be routed out of a window or into an existing extraction system. With the hose vented outside, it did a reasonable job of keeping smoke out of the room during engraving and short cuts.
The enclosure is not airtight, though, and the fan is small. On longer plywood cuts I could smell smoke in the room, and the inside of the lid picked up a film of residue fairly quickly. If you plan to use the M1s in a spare room or home office, I would treat an open window as the minimum and consider an inline booster fan or a separate fume extractor. I would also not leave it running unattended. This applies to any diode laser cutting wood, enclosed or not.
Combined with the lid switch, key lock and emergency stop, the safety provisions are good for a machine at this price. The amber lid filters the laser light so you can watch a job without wearing the supplied goggles, and the key means you can lock the machine out if there are children in the house. These are the main reasons I would suggest an enclosed laser like this over a cheaper open-frame model for anyone working in a home or shared space.
User Experience
After the initial setup, the M1s is a straightforward machine to live with. Place the material, set the focus, frame the job, close the lid and press start. The workflow is quick once you have a small library of settings saved for the materials you use most.
Noise is noticeable. The stepper motors are audible at higher speeds, and the hollow plastic enclosure amplifies the sound a little. The exhaust fan is the bigger issue. I could not find a way to switch it off while the machine is powered on, so it runs constantly, even when you are only lining up a job or importing a file in LaserGRBL. It is not loud, but it is irritating during longer sessions, and a fan that only runs during a job would be a welcome firmware change. The air assist pump adds its own hum on top.
The manual focus leg is simple and reliable, but it is easy to forget. Adding the Cellular Kit raises the material by the height of the slats, and I ruined one test piece by not refocusing after fitting it.
The working area is the main physical limitation. 305 x 205 mm is slightly larger than an A4 sheet, which covers coasters, small signs, tags, ornaments and most gift-type projects. It rules out larger signage and furniture panels, and because the enclosure has no pass-through slot, there is no way to work around it with longer material. If you think you will outgrow this quickly, an open-frame machine with a 400 x 400 mm bed is the more sensible starting point, with the caveat that you lose the enclosure.
Maintenance has been minimal. The lens on the underside of the module needs an occasional wipe, particularly if you cut without air assist, and the bed and lid benefit from cleaning after a long session.
Compared to the LaserPecker LP5, the M1s is slower, more manual and less refined in its software. It also costs roughly an eighth of the price, has a larger working area and is fully enclosed as standard. For flat wooden items, I have been just as happy with the results from the M1s.
Price and Alternative Options

The Laservii M1s Enclosed Laser Engraver comes in three power variants:
- 12W: £229
- 24W: £435
- IR-2W: £588
The Laservii UK store lists a much higher regular price that is permanently discounted, so I would ignore the claimed saving and judge it on the price you pay. Bundles with the camera, honeycomb or risers are available, and the air assist pump and TR3 rotary are sold separately.
The 12W is the best value of the three. The jump to £435 for the 24W is steep, and at that price it runs into better-equipped competition. The IR-2W at £588 is a specialist purchase.
It is worth factoring in the extras. If you want to cut, the air assist and Cellular Kit are close to essential, and a LightBurn licence is worth considering once you outgrow LaserGRBL. The real cost of a well-equipped 12W setup is higher than the headline price suggests.
There are a few alternatives worth considering:
- The Creality Falcon A1C is the closest competitor. It is priced at around £199 for the 5W version and £289 for the 10W, with camera-equipped versions costing more. It has automatic focusing and Creality’s own software, which makes it easier for beginners, but the base model has less power than the M1s 12W.
- The Creality Falcon A1 10W costs around £449. It has a larger 381 x 305 mm working area, a built-in camera and air assist as standard. It is a more complete package, but it is roughly double the price of the M1s 12W and more than twice the weight.
- The xTool M1 Ultra starts at around £959 for a 10W bundle. It adds blade cutting, pen drawing and inkjet modules and has much more polished software. It is a craft machine with a different audience and budget.
- Open-frame diode lasers such as the Sculpfun S9 or Longer Ray5 can be found for under £200 and offer a larger working area. You lose the enclosure, lid interlock and built-in extraction, and I would not recommend one for use inside the home without adding an enclosure.
At £229, there are very few fully enclosed machines with 12W of output, and that is the main argument for the M1s.
Overall
The Laservii M1s 12W is a good entry point into laser engraving for anyone who wants an enclosed machine that fits on a desk and does not cost much. It is quick to set up, the engraving quality on wood and card is better than I expected for the money, and the lid interlock, key lock and emergency stop make it far more suitable for home use than an open-frame laser at a similar price.
The low price does come with compromises. The software experience relies on third-party programs and takes some effort to set up, there is no camera or autofocus, the exhaust fan runs constantly, and the extraction is only adequate if you vent it properly. The lack of air assist and a slatted bed in the box is my biggest complaint, because both are needed for decent cutting results and they push up the real cost.
If your main interest is engraving small items and cutting thin wood and card, the 12W model at £229 is easy to recommend, ideally with the air assist pump and Cellular Kit added to the order. If you want to cut thicker material regularly, the 24W is the better fit, although at £435 I would look closely at the Creality Falcon A1 before buying. The IR-2W is harder to justify unless metal marking is the priority.
It does not have the polish or the speed of the LaserPecker LP5, but it was never meant to. As a low-cost, safe way to find out whether laser engraving is something you will stick with, the M1s does the job well.
Laservii M1s Enclosed Laser Engraver Review
-
Overall - 85%85%
Summary
The Laservii M1s 12W is an excellent budget-friendly laser engraver that offers impressive engraving quality for just £229. I found it easy to set up, and the enclosed design with its various safety features makes it much more appealing for home use than similarly priced open-frame alternatives. It produces excellent results on wood, cork and slate, although cutting thicker materials is more challenging.
The main compromises are the basic software experience, manual focusing and limited working area. It is also frustrating that air assist and a slatted bed cost extra, as both make a significant difference when cutting. However, for anyone looking to get started with laser engraving without spending a fortune, I think the M1s 12W offers excellent value for money.
Pros
- Excellent engraving quality for the price.
- Affordable at just £229.
- Fully enclosed design with safety features.
- Quick and straightforward initial setup.
- Compact design fits standard desks.
- Compatible with LightBurn and LaserGRBL.
Cons
- Air assist and slatted bed cost extra.
- Basic software experience for beginners.
- No automatic focusing or camera.
- Limited 305 × 205 mm working area.
- Exhaust fan runs constantly.
- Smoke extraction could be better.

I am James, a UK-based tech enthusiast and the Editor and Owner of Mighty Gadget, which I’ve proudly run since 2007. Passionate about all things technology, my expertise spans from computers and networking to mobile, wearables, and smart home devices.
As a fitness fanatic who loves running and cycling, I also have a keen interest in fitness-related technology, and I take every opportunity to cover this niche on my blog. My diverse interests allow me to bring a unique perspective to tech blogging, merging lifestyle, fitness, and the latest tech trends.
In my academic pursuits, I earned a BSc in Information Systems Design from UCLAN, before advancing my learning with a Master’s Degree in Computing.
I’m proud to share that Vuelio has consistently ranked Mighty Gadget as one of the top technology blogs in the UK. With my dedication to technology and drive to share my insights, I aim to continue providing my readers with engaging and informative content.
I work directly with the companies I review products for or their chosen PR agency.
For Social Media, you can find me on: