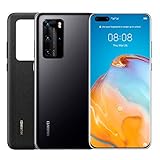
How to fix push notifications on Huawei P40 Pro if you have installed Google Play Services
Since writing my guide on getting Google Play Services on the Huawei P40 Pro, it has been reported by many users that some push notifications don’t work.
This is also the case for me, but it is only certain apps. I get notifications for things like Telegram, WhatsApp, Facebook, and a few others, but then no notifications from Ring and some other services.
People over at Xda-developers have concluded that the issue is related to apps using GMS for push notifications. Some do, some don’t and the ones that do don’t get push notifications.
There have been a few solutions that partially work, or act as workarounds. I have tried to list this from easiest to more difficult/annoying.
Related Content
- Huawei P40 Pro Review
- Huawei P40 Pro Google Mobile Services & Apps Guide – What works and what doesn’t.
- Google Alternatives Guide: Replacement Google apps & services for Huawei phones or anyone interested in privacy
Battery Management
First of all, if you have an app that struggles with notifications, trying disabling the automatic power management within the settings (Settings > Batter > App Launch > Switch to manage manually). This will prevent the software automatically shutting down an app and preventing notifications (I had to do this for lots of apps on the P30 Pro).
That will fix a few issues, but not many.
Blue Mail – For email notifications
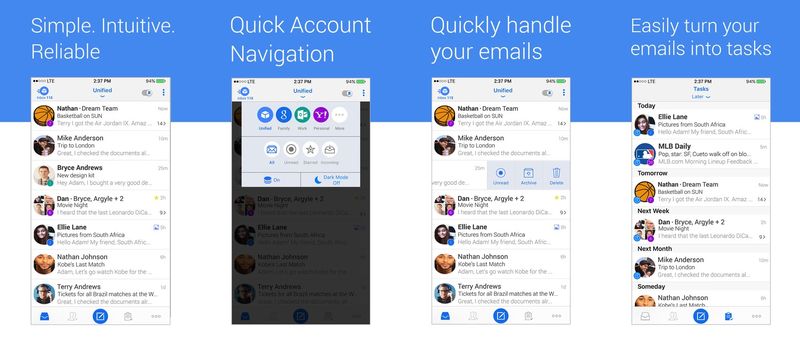
Many users are reporting that no email client is working for push notification on any email service with the exception of Blue Mail.
Luckily, this is also one of the best-reviewed email clients, so ditching Gmail in favour for this as your client is advisable regardless.
Autosync Account activator
The next possible solution is with an app called Autosync Account activator. This is on Google Play Store, but I was unable to install it from there on the P40 Pro. So I had to use APKPure.
Within this app, you can basically tell it to do a manual sync, but on schedule. So with my Gmail account, I can set it to every 5 mins
The user that reported this method says the app itself didn’t work, but then uninstalling it, Gmail started to work again suggesting that this 3rd party triggered app the autosync function of Android and solved some issues.
For me, I do get Gmail notifications, though I am not 100% if I had them in the first place, as I am using multiple phones at the moment. There does seem to be a significant delay compared to the P30 Pro, which I am still using.
Notifications pushed through IFTTT to Telegram
Ok, so this is a convoluted process for something that should work by default on your phone. With Telegram working for notifications you can have this as a hub for push notifications.
So, for example, I set up Twitter to push @ mentions to me. You will be restricted to the features IFTTT has, and it is annoying having to set up your notifications manually, but it works well.
I had hoped to use Pushover for this, seeing as that’s what the app is all about, but the notifications don’t work (due to Google). Gotify should work though, but this is dependant on a self-hosted gotify/server.
Push Notification or the PlayStore.
Finally, the last option which appears to be both the most successful and also the least appealing solution.
One user has managed to get all the notifications working, but to do this, you can’t have PlayStore working. They instead manage all their apps through the AuroraStore which you can get on F-Droid.
Fixing the problem is a bit of a chore too.
u003cstrongu003eHow to fix push notifications on Huawei P40 Prou003c/strongu003e
Total Time: 30 minutes
1
Download Ice Box (developed by Ruoxin He) from the PlayStore. (Or use the one u003ca href=u0022https://drive.google.com/file/d/12dcTEoSDwsZJk1Dero4rKnoPbZokGUpB/view?usp=sharingu0022 class=u0022rank-math-linku0022u003einside the Zipu003c/au003e)
2
Delete the Applications u0022Gu0022, Google Accounts, Device Info.
3
Install Minimal ADB on PC
4
HiSuite must be installed on the PC. You can download it from the official site.
5
Launch IceBox
6
Click 2 times on the arrow in the lower right corner
7
In the proposed list, select line 3 u0022Simple ADBu0022
8
We connect the Phone to the PC where Minimal ADB and HiSuit are already installed.
9
Choose u0022data transferu0022 on the Popup on your Phone.
10
Go Settings – About the phone – click on the build number 5 times – see the message You have become a developer.
11
Next we go settings – System and updates – For developers, search for u0022USB Debuggingu0022 and turn it on. ATTENTION! Hisuit started on the computer and a code appears on the phone, just minimize the window that opens.
12
On your Phone allow the debugging connection in the popup window.
13
Launch IceBox again.
14
Launch Minimal ADB on the PC.
15
At the command prompt, enter: adb shell sh /sdcard/Android/data/com.catchingnow.icebox/files/start.sh
16
Press Enter. u0022Successu0022 should appear, if not, then you did something wrong.
17
In IceBox, double-click on the arrow, then select line 3 u0022Simple ADBu0022
18
Click u0022GOT ITu0022, then go to the SYSTEM tab on top. On the Pop up a warning click u0022GOT ITu0022. Then tap in the right upper corner on the Search Icon. Search for u0022FRAMEu0022. Select the Google Services Framework, click Frost in the menu below. Close the application, reboot the device.
19
After the restart, install the AuroraStore.apk or download it from the official site. It is also on F-Droid
20
Launch AuroraStore and at startup, be sure to select an anonymous account!
21
Search for u0022Push Notification Testeru0022 and install it.
22
Launch u0022Push Notification Testeru0022 and press on Start.
23
If u0022Register for Push Notificationu0022 has a red X, then go into Settings -u003e Apps -u003e Search for u0022googleu0022 -u003e Show System Apps -u003e Select u0022Google Service Frameworku0022 and hit u0022Activateu0022.
24
Launch u0022Push Notification Testeru0022 again and press on Start. If it looks like the picture above, then repeat Step 13. – 18.
25
After restart Launch u0022Push Notification Testeru0022 and press on Start it should still look like the picture above.
Re-enable Google Play Store
If you decide you want to revert this change it is quite easy and you just need to delete Icebox and go to Settings -> Apps -> Search for “google” -> Show System Apps -> Select “Google Service Framework” and hit “Activate”.

I am James, a UK-based tech enthusiast and the Editor and Owner of Mighty Gadget, which I’ve proudly run since 2007. Passionate about all things technology, my expertise spans from computers and networking to mobile, wearables, and smart home devices.
As a fitness fanatic who loves running and cycling, I also have a keen interest in fitness-related technology, and I take every opportunity to cover this niche on my blog. My diverse interests allow me to bring a unique perspective to tech blogging, merging lifestyle, fitness, and the latest tech trends.
In my academic pursuits, I earned a BSc in Information Systems Design from UCLAN, before advancing my learning with a Master’s Degree in Computing.
I’m proud to share that Vuelio has consistently ranked Mighty Gadget as one of the top technology blogs in the UK. With my dedication to technology and drive to share my insights, I aim to continue providing my readers with engaging and informative content.
I work directly with the companies he reviews products for or their chosen PR agency.
For Social Media, you can find me on: